Friday, January 31, 2020

Creating a Battle Cry Scenario: Seminary Ridge July 1st, 1863

It's no secret I really like the Commands and Colors series of games.  While I own a number of them (Ancients, Napoleonics, Tricorne, and BattleCry) I've only ever played Napoleonics, Tricorne, and BattleCry.  All of the Commands and Colors games are well supported online and come with a host of scenarios both online and when you purchase them.


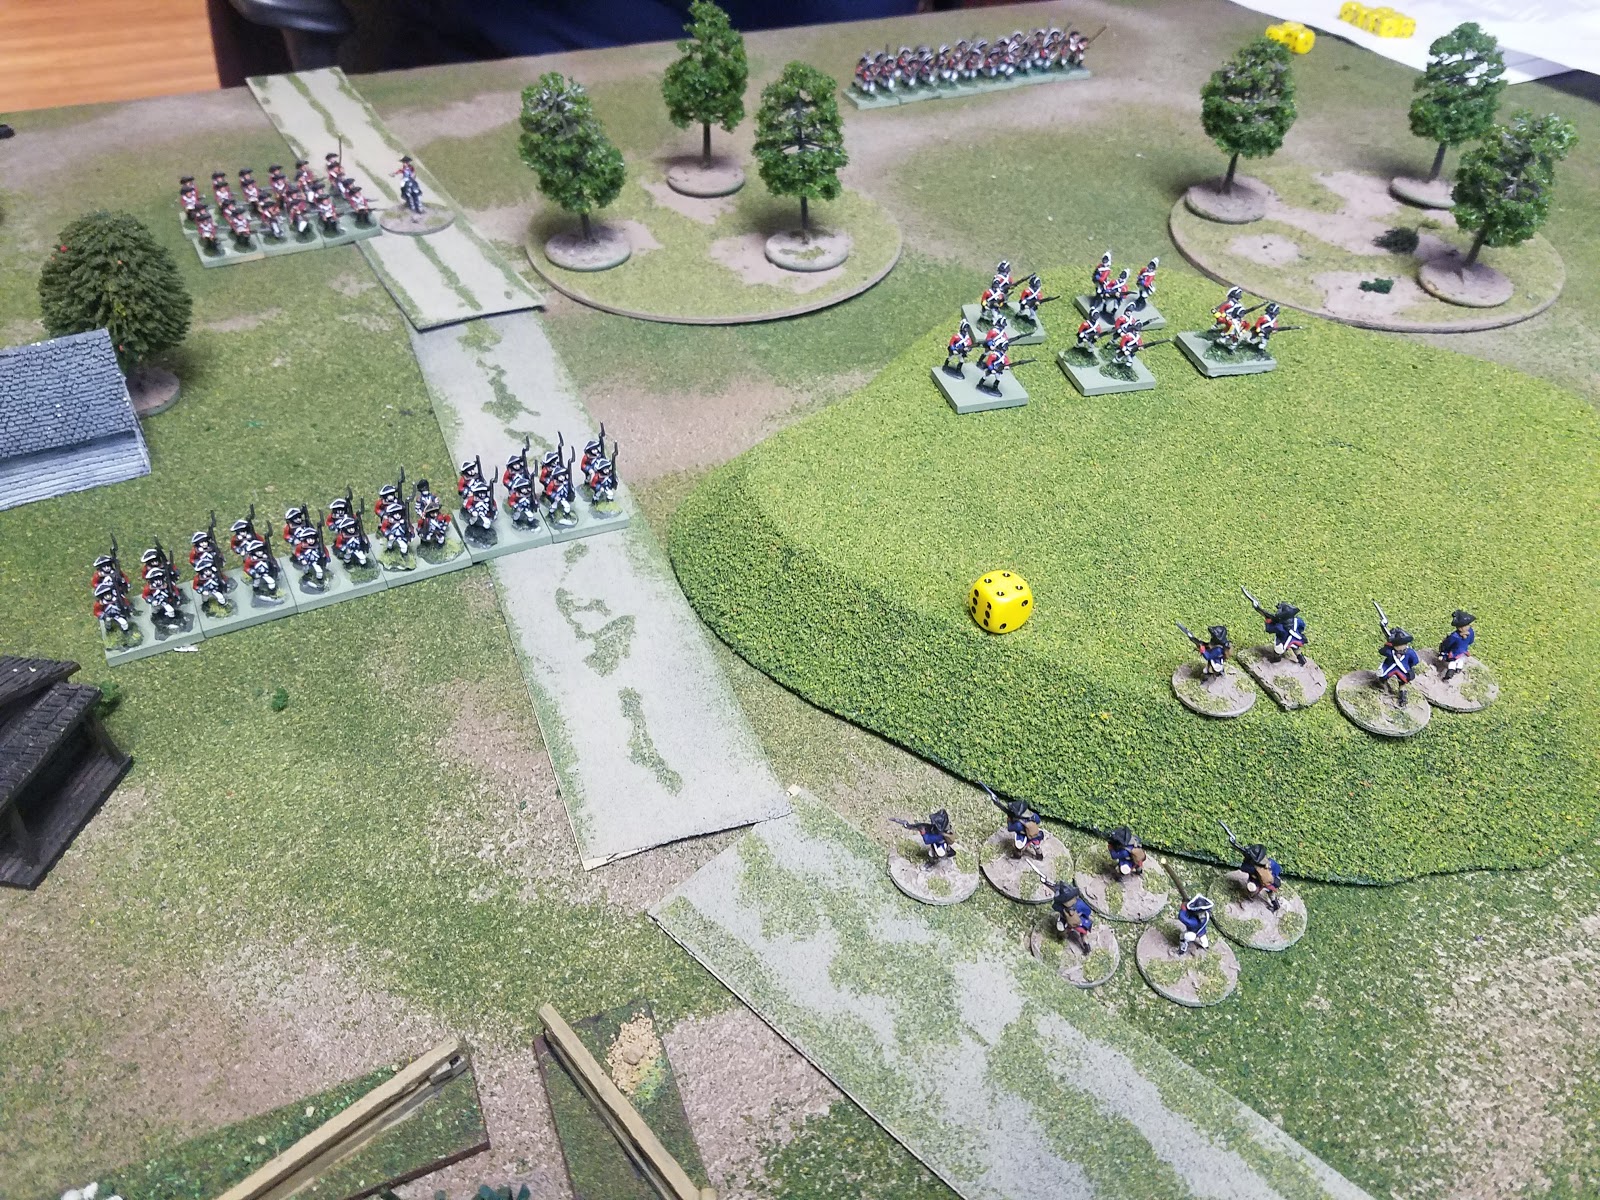
While I really enjoyed BattleCry when I played it, it seemed a little too "high octane" for me when assigned only 9-10 units to play an entire battle.  We were blowing through the entire battle of Antietam in an hour.  I wondered how a game would go with more units?  Or perhaps historical units scaled down at the Regimental level?

Enter Scott Mingus' "Enduring Valor" Gettysburg scenario books, written for combat at Regimental level, where the player is maneuvering Regiments around using the Johnny Reb III rules.  You might recall I did a series of blog posts where I created a scenario for Norm's outstanding "Two Flags-One Nation" hex-based rules which are also at Regimental scale.  I then fought that exciting battle using Norm's rules with historical results.

A must-have in any ACW wargamer's collection!

I have to admit I've been wanting to tinker with some BattleCry scenarios ever since we played Antietam with BattleCry last year.  So this time, instead of playing Oak Ridge again, I thought I'd pick a different scenario this time around:  Seminary Ridge!

The first volume of Enduring Valor has some excellent scenarios for the first day of Gettysburg, including some of the battles for Herr Ridge, McPherson Ridge, and Seminary Ridge.  The Seminary Ridge battle looks to be a great standup fight, perfect for a game like BattleCry.  So with that in mind, let's take a look at some stats:

Johnny Reb III operates on a scale where the basic unit of maneuver is the Regiment.  BattleCry seems to be pretty flexible with unit representation, and I feel like that is in line with the design ethos of the Commands and Colors System.  If I make a unit a Regiment, it's not going to break anything.  CHECK!

Enduring Valor scenarios use 1" as 50 yards.  If I use 1 hex to represent 200 yards, this fights literally perfectly in with the TFON hexes, and I'll use 1 hex to represent 4" of space from the maps.  CHECK!


BattleCry does not utilize a time scale and so the 20 minute game turns will not factor into this at all as I see time as variable each turn.  CHECK!  


While BattleCry does not distinguish much in the way of unit characteristics, I think I can do that by giving units that were either historically very stubborn, or very large more hits.  I'll have to use the troop strengths to figure out an average.  Naturally this average will have the standard number of hits for a BattleCry unit.  CHECK!

Looking at the stylized maps for BattleCry, I'm going to need to get a little bit creative as to where the units start but I think you accept a little bit of fudging when you buy into a Commands and Colors game in order to make the field a bit more linear.

Scenario Parameters

How do you win?  Well luckily I have good parameters in the Enduring Valor book.  The Seminary Ridge fight, the Union must inflict 40% casualties on the Rebels, and hold at least 1 major objective (there are 2).  To me, this equates to the Union knocking out 5 Rebel units, and holding onto 1 objective for a total of 6 victory banners.  So the victory conditions are 5 units knocked out, and a victory banner seized.

Orders of Battle and Command Cards

Confederate Troops
According to the write-up, these units assaulting Seminary Ridge were some of the best infantry units in Pender's Division, McGowan and Scales' Brigades.  The OOB is as follows:

10 total Units, 3 total Commanders

McGowan's Brigade:
Commanded by Abner Perrin
1st South Carolina Rifles*
1st South Carolina** (armed with smoothbore muskets)
12th South Carolina
13th South Carolina
14th South Carolina

Scales' Brigade:
Commanded by Alfred Scales
13th North Carolina
16th North Carolina
22nd North Carolina
34th North Carolina
38th North Carolina

Confederate Command
The Confederates have passed the battle onto Pender's fresh division to continue the attack onto Seminary Ridge.  They are fresh and have good troops committed to the attack.  The Confederates receive 5 command cards.

Union Troops
The Yankees have an amalgamated force of units who have fallen back from Seminary Ridge including the beat up but still elite Iron Brigade, the Pennsylvania Bucktails, and elements of Rowley's 3rd Division with New York and Pennsylvania troops.  They also have a very significant amount of artillery support, which is credited with enabling the battle-worn Union troops to hold out as long as they did.

11 total infantry units, 2 batteries of artillery, 4 total commanders

General Wadsworth is present as is General Doubleday.  Doubleday will not be represented however Wadsworth will be on the table.

Iron Brigade
Solomon Meredith, Commanding
2nd & 7th Consolidated Wisconsin Regiments
6th Wisconsin Regiment
19th Indiana Regiment
24th Michigan Regiment

1st Brigade / 3rd Division
Chapman Biddle, Commanding
80th New York
121st Pennsylvania
142nd Pennsylvania
151st Pennsylvania

2nd Brigade / 3rd Division Pennsylvania "Bucktails"
Roy Stone, Commanding
143rd Pennsylvania
149th Pennsylvania
150th Pennsylvania

Corps Artillery
Stewart's Battery, 4th US Artillery
Stevens' Battery, 5th Maine Artillery
Cooper's Battery, 1st Pennsylvania Artillery
Reynold's Battery, 1st New York Artillery

I will likely not include each battery as I believe that might REALLY unbalance things.  Instead I'll consolidate 2 batteries into 1 single battery, giving me 2 batteries of artillery.  Historically, the artillery served as a bulwark for men retreating from Seminary Ridge as a place for them to rally behind.  You really need to have the Union artillery present for the scenario.

Union Command
Doubleday is now commanding 1st Corps after Reynolds is killed in action.  He has done a decent job of commanding Corps through the mid afternoon and fighting the Rebel advance.  He also has a brace of tough, experienced brigade commanders serving under him who will add to his command.  The Union troops get 5 command cards.

Special Rules

Prepared Positions
Like in the Johnny Reb scenario, the Union troops historically fell back from McPherson ridge towards prepared positions.  in Johnny Reb you're allowed as the Union player to roll for the amount of inches worth of prepared positions you start with.  The Union player will roll 1D6 and this will equal the number of hexes he can start with "prepared" or with fighting positions.

Smoothbore Muskets
Even though BattleCry is supposed to be a "big battles" kind of game, at Regimental level you can really geek out over things like unit armament.  The 1st SC Infantry had smoothbore muskets and I'm inclined to give them 1 less fire die, but allow them a standard amount of melee dice.  that would be a cool addition to the game.

The Map
The trickiest part, but I was able to do this pretty seamlessly for the Oak Ridge scenario using squares, I'll use hexes for this one and see how it turns out.
From the Enduring Valor Gettysburg Scenario Book, Volume 1, Page 37.  Used Without Permission

From the picture, the map is divided into 1 square foot increments.  These will conveniently fit 9 hexes inside of each, giving us a 12 by 9 hex battlefield.  I'm content making the Commands and Colors battlefield sections each 4 hexes wide, instead of 4 / 5 / 4.

This means that the Union left section will extend up to the southern edge of the Lutheran Theological Seminary.  The Center will extend from the Seminary right up to the southern side of the Cashtown Road, with the Union right starting at the Cashtown Road and extending past the infamous "Railroad Cut" straight to the top of the map.

Here is the map with the sections on it.  The Confederate left is completely clear of units.

The Commands and Colors Sections!  from bottom to top, Union left, center, right.
So that's it right now.  I'd like to set the table up tomorrow and see how it looks!  If it's too difficult with hexes, I might try for squares but my preference is to play it with hexes.  I also need to brush up on the rules for fences, obstacles, etc.  Like any ACW game, there is a huge need to put in lots of fences.  I can tell you right now I dont have enough!

This seemed pretty easy to do, since Mr Mingus did all the hard work for me!  If I had a decent hex map creator, this would be even smoother.  Next step is to try my hand at the hex map and see how it goes.  I am also on the hunt for more sources of Regimental  ACW scenarios.  From my understanding there are some good ones on Wargames Vault so I'd like to look there.

Saturday, January 25, 2020

Rebels and Patriots: AWI First Clash at Lament Ridge!

As noted in my 2019, 2018, and probably 2017 reflections, I haven't played much American War for Independence games.  That's sad considering AWI was really my first foray into historical miniatures gaming after microarmor.  I really tried to get the lads on the table and played a few One Hour Wargame matches, but it never stuck.  Well that changed today when Dave came over and we broke out Osprey's "Rebels and Patriots" rules, and some of my 15mm AWI miniatures!


We played with smaller, 22 point armies and played the first scenario in the book, the battle at Lament Ridge.  The British were the attackers, with a 22 point company consisting of 4 line units and a single "light" unit.  I played a strictly militia unit with 5 green "line" units, and a single "minuteman" skirmisher unit.  We rolled for our officer traits (you do that in this game which is neat and adds some character to the table).  Suffice to say that none of the traits we rolled for really mattered in the game as there were no artillery pieces and no defenses.

Lament Ridge is visible with the yellow die on top.  (today's objective for both sides)

Dave, AKA Old Brown Trousers, the British commander - note the nice, neat battlelines!
 The game has a neat system for activating units where you have to beat a 6 or better on 2d6 to allow the unit to carry out an action.  It's seems easy enough and your commander gives you a +1 to activate, which is super helpful if you are milita and automatically get a -1 to your activation rolls.

My sharpshooting Virginia farmboys were incredibly lazy and failed their activation roll probably half the time.  What's up with that?!?!

The "blunder table" for rolling snake eyes on your activation rolls has some very unforgiving things that can happen to you I will say.  Although we didnt track this, Dave and I both would have lost a few "honour points" in the end of the game (more on this later) for BOLO'd rolls on this table.

militia units strung out along the advance.  
 While this game is more of a "detachment" or platoon scaled game, I played with my normal 15mm units, where a stand represented 2 figures.  It got a bit finicky once or twice, but played fine, and I enjoyed the spectacle of the larger looking units anyways.

American state line move through woods and through fields to get at Lament ridge where they know the British are coming to hold!
 The move and shooting values are quite generous in this game and it means you come to grips rather quickly.  Even though we played in 15mm, we kept ranges as-is for this game.  I wouldn't mind halving the values to make the ranges look a little more realistic.

Both of us pushing troops towards Lament Ridge - the Americans are having a little bit better luck for now.
 My minutemen reach the ridge first and using a skirmish order, open fire on the British light bobs who are climbing up the steep slope on the other side!  The ball has opened!

Minutemen open fire on the British!  

The 24th Foot is happy to return fire!  They are currently in "open" order and havent closed ranks just yet.
 Dave scrambles his line units to get into position around the hill.  His plan is to surround teh hill with close ordered units and basically evaporate any unit I leave in the open.  It's a good plan and the shooting forces my skirmishers back.  Meanwhile I'm struggling to move my line troops further up.


Firefight
Dave's having crap luck with the dice and while he's getting to reform his units into close order, the ones who are already in close order are just not passing their rolls to activate and fire!  My troops are consolidating their positions in the meantime!  I have a state line unit brought up to reinforce the lights on the hill while Dave's regulars can only watch!

Speaking of regulars, here are the British advancing!  The unit to the rear is in close order and the other units will be there soon.

We arranged the close order troops in 2 lines of 3.
 So far no one has been disordered but that is about the change very soon as I roll my first "snake eyes" in an activation roll.

Pennsylvania militia stuck in this cabbage field.

Meanwhile my Virginia farm boys pass their first activation roll of the game and advance towards the British.  They might be lazy, but they are DEAD ACCURATE shots!!!  The poor British unit to their front will be sent packing twice!

More state line taking up positions to fire at the British.
 The game "seems" like it's going my way but it's only turn 4.  While I have been on the objective for awhile now, the British are moving into position and close ordering their troops to fire on me from multiple directions.

Old Brown Trousers himself with a unit in close order.

More militia at the top of the hill - they move into close order!  Note the british unit to their right.


More militia running to reinforce the hill.  The terrain is tough and I'm having a hard time getting everyone through all of the forests.

I learn the value of close order troops whose fire is deadly.  While close order is a very unwieldy formation, it shoots and fights with great effectiveness.  Dave shreds 2 of my lead line units and I've already pulled the minutemen back.  I need to start getting my boys to shoot!!!

Note the skirmishers below the hill and my line troops on the road already taking casualties!

Note the disorder marker.  It's permanent because they're down to 50%
 Dave starts getting his rolling skills back and a horrifying volley takes out 2 and a half stands instantly!  They fail the morale check and go disordered.


Meanwhile the militia on the hill go disordered, too.  Yikes - trading shots with British regulars!  There has to be a better way!


Speaking of better way, my Virginia Farm Boys finally earn their pay - they unleash a deadly aimed volley at the British to their front who break contact, fail their morale check and retreat back into the woods!  The left flank has been successful, but I have not been able to concentrate my fire.  Dave hasn't lost a single unit even though he's been taking casualties.  I've lost 3 units already!  9 out of 22 points!  When you get to 50% you take a company morale test!

VA troops firing and forcing back the British troops 

2 disorder markers!
 On turn 9 we rolled to end the game and rolled a "5" which was enough to end the game.  We both looked up how the game ends and it turns out this game was a draw!  I was on the objective the longest and therefore my officer earned 3 honour points.  Dave took the least amount of casualties, 1 honour point, and infllicted greater than 33% casualties on my force, another 2 honour points.  Pretty neat way to figure out who won!  I was really on the ropes, though, and if I had lost another unit, I'd be over my 50%.  Plus Dave "severely wounded" my officer figure.  (his made it out without a scratch - hardly surprising for "old browntrousers"!)

Close Order units massing fires on the hill!

Skirmishers taking refuge behind the hill

Dave's units in close order formation

Dave's troops on the road


Light bobs in the woods after retreating a double move

American militia officer

More of Dave's troopers

The British after the Americans vacated the line.
Thoughts
Well we both really liked the rules.  First of all they are light-hearted and don't take themselves too seriously!  Units can come to grips quickly and the game gets down to the business of fighting which is great.  I feel like the game had a decidedly "AWI" feel to it, and I will definitely play them again.  It was a little finicky with the multiple figure bases but we were able to get through it pretty easily and pretty quickly.

What I liked about Rebels and Patriots:
I love the shooting system whereby 2 hits remove a figure in the open, but it takes 3 hits to remove in cover or at long range.
I like the unit builder system which allows you to make neat combinations of 24 point units.
I like the generous movement and firing distances (probably meant for 28mm figures)
I like the officer traits and I really like activation system for individual units.
I like the scenarios in the back of the book as well as the generic force lists in the back.

What I disliked about Rebels and Patriots:
The things in the rules are quite scattered and in various sections.
Not everything is explained well (company morale checks)
Lots of things to remember each turn (this is why everyone has been making rosters for their companies - very smart!)

So after playing this, Dave and I really want to play more AWI, which I suspect you will definitely see more of this year.  Also, after this past week's "Little Wars TV" video, we are both hankering to play Fire and Fury!  Something I haven't played in quite awhile, but used to be my absolute favorite ACW rules.


Tuesday, January 21, 2020

Honours of War SYW Solo Game

The final game in my trio of Seven Years War rules trials completed yesterday with a new game (new for me, anyways) on the table: Honours of War by Keith Flint, published by Osprey. 


As most of you who have been following this fun endeavor know, I have been playing the same battle with different sets of rules, and only utilizing 6 units from the Neil Thomas force builder in "One Hour Wargames."  This entire thing was started by Norm with his excellent "pocket armies" idea and I have been capitalizing on his good ideas.

The scenario is #4 "Take the High Ground" from the One Hour Wargames scenarios.  Austrians are the red player, Prussians are the blue in this Seven Years War showdown.  Now to the action!

Prussians in battle line in foreground.  Austrians both atop the hill and to the northeast of the hill.
I really enjoyed the subtle command rules with testing for how the brigade will move/perform this turn.  The ability to get a double move, or possibly not move at all is neat and this is not modeled in a dramatic or "over the top" way like SOME say Black Powder can be....I will say that most of the time, the opposing brigades were "steady" and were allowed a single move.

Initial Prussian moves towards the hill, leaving a good gap for the 2 batteries deployed to support the advance
 I will also say the artillery ranges "feel" right, as do the musket ranges.  I used half movement values since I'm playing with 15mm troops.

The first few turns pass in relative quiet with only the artillery offering battle.  That will change soon! 

Casualties scored on the Wolfenbuttel Regiment on the left as it approaches the guns.  
 A neat feature of these rules are that you place your commander first, where you think he will do the most good and where you want him to go to accomplish something.  This is a neat feature and allows for a small modicum of planning to occur in the battle.  This became really crucial for me as my Prussian battalions in contact accumulated 4 hits and had to run off to rally!


Lights moving through the woods.  Check!


Another neat feature about these rules are the way firing and melee are handled practically the same.  While there are numerous modifiers, they aren't too bad and the game doesn't feel like an accounting drill like some others.

So far, 4 turns into the game, they've played according to my historical pre-conceived notions.  Like marching a regiment up into the face of canister fire means the regiment is going to get hosed with grapeshot and forced back. 

Note the troops with the red die and a number 4 on them.  They've fallen back to reform.  Trouble is, they're still not far enough away and will require another turn of movement to get right to the table edge.

Your army commander automatically removes hits, provided all of the prerequisites have been met.
 As the Prussians are taking "rookie" casualties, the Austrians are rolling 6's on their command checks and garnering 2 moves!  Yikes!  They deploy to reinforce the hill and block any flanking attempt.  Eventually the Austrian regiments will form a solid line with their lights in the woods.


I'm using my Prussian cavalry to screen for me.  Note the 2 Prussian units at the base of the hill.  Their shooting will prove to be abysmal!  Even  with the modifier!  My rolling is just that bad.
Prussians looking okay now but still not causing any casualties.  
 The Prussians are making good use of their guns to drive off the Austrian guns.  It works and the Austrians take 4 hits, driving off the battery!


Prussian attack falling apart!
 Okay so it's worth mentioning here that I got a little discouraged.  The attack faltered and my beautiful battalions all fell back, one after the other!  It occurred to me, though, that there was no reason I couldn't rally the hits off (at least 3 hits, units always keep 1) and send them back up the hill.  It would take awhile, but that's exactly what I did.  I really appreciate that about these rules - that you can put units back into the fight after they run off.

All 3 Prussian units suffering hits and/or in a state of reforming.
 Payback is swift.  After driving off the artillery, the Prussian guns fire on the Austrians on the hilltop, shattering them.  They're "done for" and pull out!

Austrians.  Now you see them.

Now you don't!


The Austrians send a Hungarian unit to the hill to hold it.  Meanwhile, the Prussians continue to rally
 The Prussian artillery drives the hungarians off, too.  I remembered the bit in the rules about the crest of hills but instead kept the men on the forward slope, a victim of habit!

reformed Prussian assault!
 The Anhalt, by the way, the unit I always select to lead my attacks, is stuck, and by stuck I mean since they are out of command they must roll a 4 or higher to move.  Over the rest of the game, they consistently failed to do this.  Due to the pressure of continuing the attack, I had to use my 2 effective regiments to move forward.

I move my cavalry up to charge the lights, while Hulsen prepares to assault the hill!


CHARGE!


Hulsen is victorious but the Dragoons are sent packing!  Both combats took at least 2 rounds to finish.
I had to call the game on turn 11 as my forces were scattered all to hell and back and dinner was ready...  Also the Prussian infantry "brigade" could scarcely be called a brigade with a unit on the hill, the Anhalt messing around failing their command check for every single turn, and Wolfenbuttel forced back twice.

My units are in a precarious position and all close to breaking again.  Meanwhile the Austrians have rallied the guns and are back on the hill with a light battalion and a medium artillery battery.  I'm not even close to breakpoint for either side yet however I'm 4 turns from turn 15 (OHW scenario 4 victory conditions stipulate 15 turns).  This was a clear Austrian victory.  Again!

Thoughts?

Here is what I liked about Honours of War:

All of the fighting is adjudicated through the same table.  This is a very clean way to do it and it moves the game along quickly.

I liked the subtle command rules, until I had units falling back everywhere and could no longer control them.  This would be handy in big battles with scores of units, but doesn't work great for the whole pocket armies idea.

The capabilities of the units are perfect and the battle has a great SYW feel to it.  You have to think like a commander on a horse and musket battlefield.  (I honestly can't think of a bigger compliment than this, by the way).

This is very much a general's game where planning out your battle pays off.  In that sense, it really captures the feel of the SYW in an efficient and elegant way.

As Jonathan says, I can use my singly based unit stands here and it will not really matter too much.

Here is what I disliked about Honours of War:

Are the standard light infantry too powerful?  I played a test game before the test game and I may have been doing something incorrectly because my lights were kicking a** and taking names and shooting like their line infantry cousins.  This seemed like it wasn't correct, and given Mr Flint's obvious knowledge of the period, I feel like I was doing something wrong.  In my game here, the light battalion threw off the dragoons in melee!  This guys are super soldiers!

The strengths of the rules seem to be in bigger battles - meaning a smaller game with a few units per side probably won't play as enjoyable as if you had 20 battalions on a side.  I hope that makes sense.


So there you have it.  My final batrep from this solo, SYW trio of experiments!  I saved the best for last and this was a very enjoyable battle.  I would like to play a bigger game of Honours of War with even more units, perhaps even an historical scenario if I can get more units painted.  I'm glad to have finally played these rules as I've been wanting to for quite some time.