I asked him for permission to post it to my blog. All pictures and words are his. Reading this report really makes me want to get my World War III vehicles out and have a good battle! (note what Robin did with the dismount sections which I really like).
Battlereport Germans vs Soviets
Scenario played was ‘Defence Line’ with the Germans defending. Germans were outnumbered but
benefited from a new German national special rule when Germans are the defenders ‘Defending our
homes’ which provides them a single reroll of an order die roll of their choice.
Because of the small number of units we played with, we made some changes to the scenario: no
Pins for the defenders in the first round, reinforcements on turn 3 for attacker, turn 4 for defender.
Only two objectives. We also removed all 4 and 5 markers, as well as Air Strike and Artillery marker.
German Forces:
- Iltis Truck with 3 men forward HQ
- Leopard 2 Tank
- Panzergrenadier Platoon
o 3 Marder
o One 4 men command team (Panzerfaust)
o Two 4 men MG/rifle Teams (MG3 and Panzerfaust) ((I merged them))
o Two 2 men Milan Teams
- 2 Officers, BR 18

- BMP KsH HQ (added this, special rules ‘extended radio equipment’ gains it an additional
order per turn, so two instead of the usual one
- T-72 Platoon
- BMP-2 Platoon
- 3 Officers (+4 bonus because of the special rule), BR 20


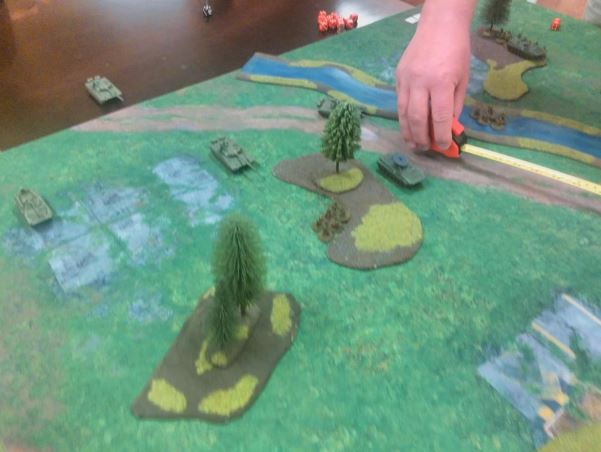
No picture of the table. But one road went from the eastern side of the table to the western side,
south of the road was a small river. The northern and central part of the map was had two larger hills
with some forests on and around them. Two buildings formed the center of the German defense.
Germans rolled only 2 for the units to deploy and deployed the Leo 2 and a Marder with a regular
squad + ATGM Team in it.
Soviets deployed their 3 IFVs .
The soviets started with enough Orders to get things going. They had no LOS to the German units and crawled forward, already deploying some of the infantry.
The Germans answered with the Leo getting in position and blowing up one of the BMPs which alreadyunload and missing another one. The Marder unloaded the MILAN Team which got into good firing position. Even with a reroll there were not enough Orders to move the Marder or the Squad.
Turn Two
The soviets had a bad roll for Orders, but managed to spot and kill the MILAN Team... Damn. At least two Spandrels failed to hit their dangerous target in form of the Leo.
The Germans had enough Orders this time. The Leo opened up again, still benefiting from a really
nice firing position. Taking out another BMP-2 but again failing the second shot while standing still.
The Infantry got out the Marder, which drove into dangerous position and failed to spot the enemy
infantry advancing though the forests. The infantry made the spot and killed a single guy at long
range, thanks to the MG3. The enemy unit was pinned too.
Turn Three
A stunning 6 for reinforcements, followed by a 6 for orders for the soviets. The BMP-2K of the
platoon leader opened up at the Leo 2 which stood still last turn and blew a big hole in the frontal
armor. Ouch. Thanks the only tank down even before any enemy tank was spotted. Every unit except
for one T-72 crawled at the board with the Platoon commanders T-72 pinning the Marder.
Not much to do for the Germans. No Officer on the board, Marder pinned. So the solitaire infantry
unit bravely moved into a building and opened up at the enemy infantry less than 30” away but failed
to spot them this time. No good round for the Germans.

The soviets advanced quite fast, pinning the infantry in the building. Not much to shot anyway. Think
the pinned Marder saw a lot of bullets landing nearby, with one finally hitting him.
The Germans were able to bring their reinforcements which raced towards the ground where the
other units suffered before.
Turn Five
Not much happened. The soviets put massive area fire at the infantry still hiding in the house. They
routed after 4 successful tests. The Platoon Commander of the T-72s got hit by a mine after that, but
only received a pin.
Turn Six
Soviets continued their push, with one BMP flanking in the south crossing the river and a T-72
flanking in the north sneaking through the forests.
Germans positioned themselves, MILAN Team got into ambush, an enemy infantry unit lost two men
and got pinned, Marder opened up at the flanking BMP-2 missing with its autocannon.
Turn Seven
Soviet drove into the Ambush and lost their Platoon Commander T-72 in return another Marder went
down. German situation became worse and worse. The MILAN Team was too close now to the flanking T-72. The Marder missed MILAN shots at the flanking BMP-2. Minor casualties at least were inflicted to the soviet infantry.

The soviets continuously advanced. The German Panzerfausts failed to penetrate T-72 armor but
pinned them both. First objective was taken in Round 8, with only some units left for the Germans
and 3 points away from breaking. Soviets were 5 points away, due to some unpinning. In Round 9 the
soviets took the second objective and the Germans broke, having only the HQ, the Iltis and one
MILAN team left.

Conclusion
The soviets greatly overwhelmed the Germans. The Leo 2 as long as he was active was deadly. ATGM Teams did good for the Germans. Some really bad spotting (I went back on some spotting values to the original rule values) for the Germans did not help them. But most of the stuff felt really right. The Leopard 2 sitting still was a mistake which payed of for the soviet player. The predicted estimate of one NATO tank facing three Pact tanks taught the Germans a tough lesson. The Leo 2 in this circumstances is definitely not to strong, as it’s, while having a superb punch, is vulnerable too. Next time the Germans will get some defenses and the Battlegroups will be enlarged. But we had a great game and loads of fun, with the flanking BMP-2 taking 3 turns to cross the river, even though it’s not wider than 5” and the dumbass German infantry failing to spot anything.
Thanks to Robin for a great playtest and write up and also for the inspiration to make me want to play REFORGER once again! I had forgotten how much fun it was!
This is excellent, and a good analysis of the rules with a view to making changes. Really enjoyed this. I'm inspired to organise a game with your Reforger stuff now :)
ReplyDeleteI was going to use the Rapid Fire variant for a Canadian (eh?) bash, but must use Reforger.
Darren,
DeleteI love battlegroup but it is firmly in the realm of a "tactical" game that is very low level. A single evening's gamw of BG would encompass probably 3 or 4 die rolls of Rapid Fire! Still it is one of my all time favorite tactical games.
If you want to fight entire battles for Fulda say, you could do so in an evening with Rapid Fire Able Archer. Probably not so much with BG.
But boy does it ever deliver on excitement and historical satisfaction.
Very interesting AAR. Nice to see a Soviet victory. I've been playing 'Flashpoint: Red Storm' quite a bit and the scenarios in that can make it tough for NATO. I've never quite accepted that quality would completely overwhelm quantity. But I will have to bow to your experience on such matters.
ReplyDeleteThank you Mark. What i love about the Battlegroup rules is that both sides really do have a chance to win but you have to play to your side's strengths.
Delete