Wednesday, August 31, 2016

Faux-Bar! (napoleonic FUBAR!)

So I was thinking about how damned burned out I am on trying Napoleonic rules sets (but yet I keep thinking about them and purchasing them!) and how I've always wanted to "break in" to the FUBAR rules system as a whole and see what could be done with the engine under the hood. (Darren would say "hack into" them).

Anyways here is my attempt at Napoleonic FUBAR or as I like to call them "Le FauxBar" because it sounds appropriately French...

Basically the "primary" difference between skirmish FUBAR and "FauxBar" is that instead of rolling for each unit, individually, which would take FOREVER for a bigger game, you just roll 1D6 for every unit you have, right in the beginning of the game, prior to even rolling initiative.  If I have 10 regiments on the table (basic maneuver unit is a regiment, or equivalent portion of a brigade) I roll 10D6.  Every die that passes the activation roll equates to 1 unit that can activate.

During the Command phase, I assign a successful die to one of my Regiments, allowing it to carry out an action during my turn.

By the way, those actions sort of resemble the FUBAR actions in capabilities at least.  They are:


  • Advance moves 6" and shoots.
  • March! moves double no fire artillery limbers/unlimbers
  • En Garde! Doesn't move doesn't shoot.  May shoot during enemy's turn
  • Volley!  Shoot at a +1
  • Skirmish: skirmish specialist unit or a light battalion assumes a skirmish posture.  receives saving throw against all fire and may reroll 1 miss.  automatically recoil from charges
  • Charge: enter close combat


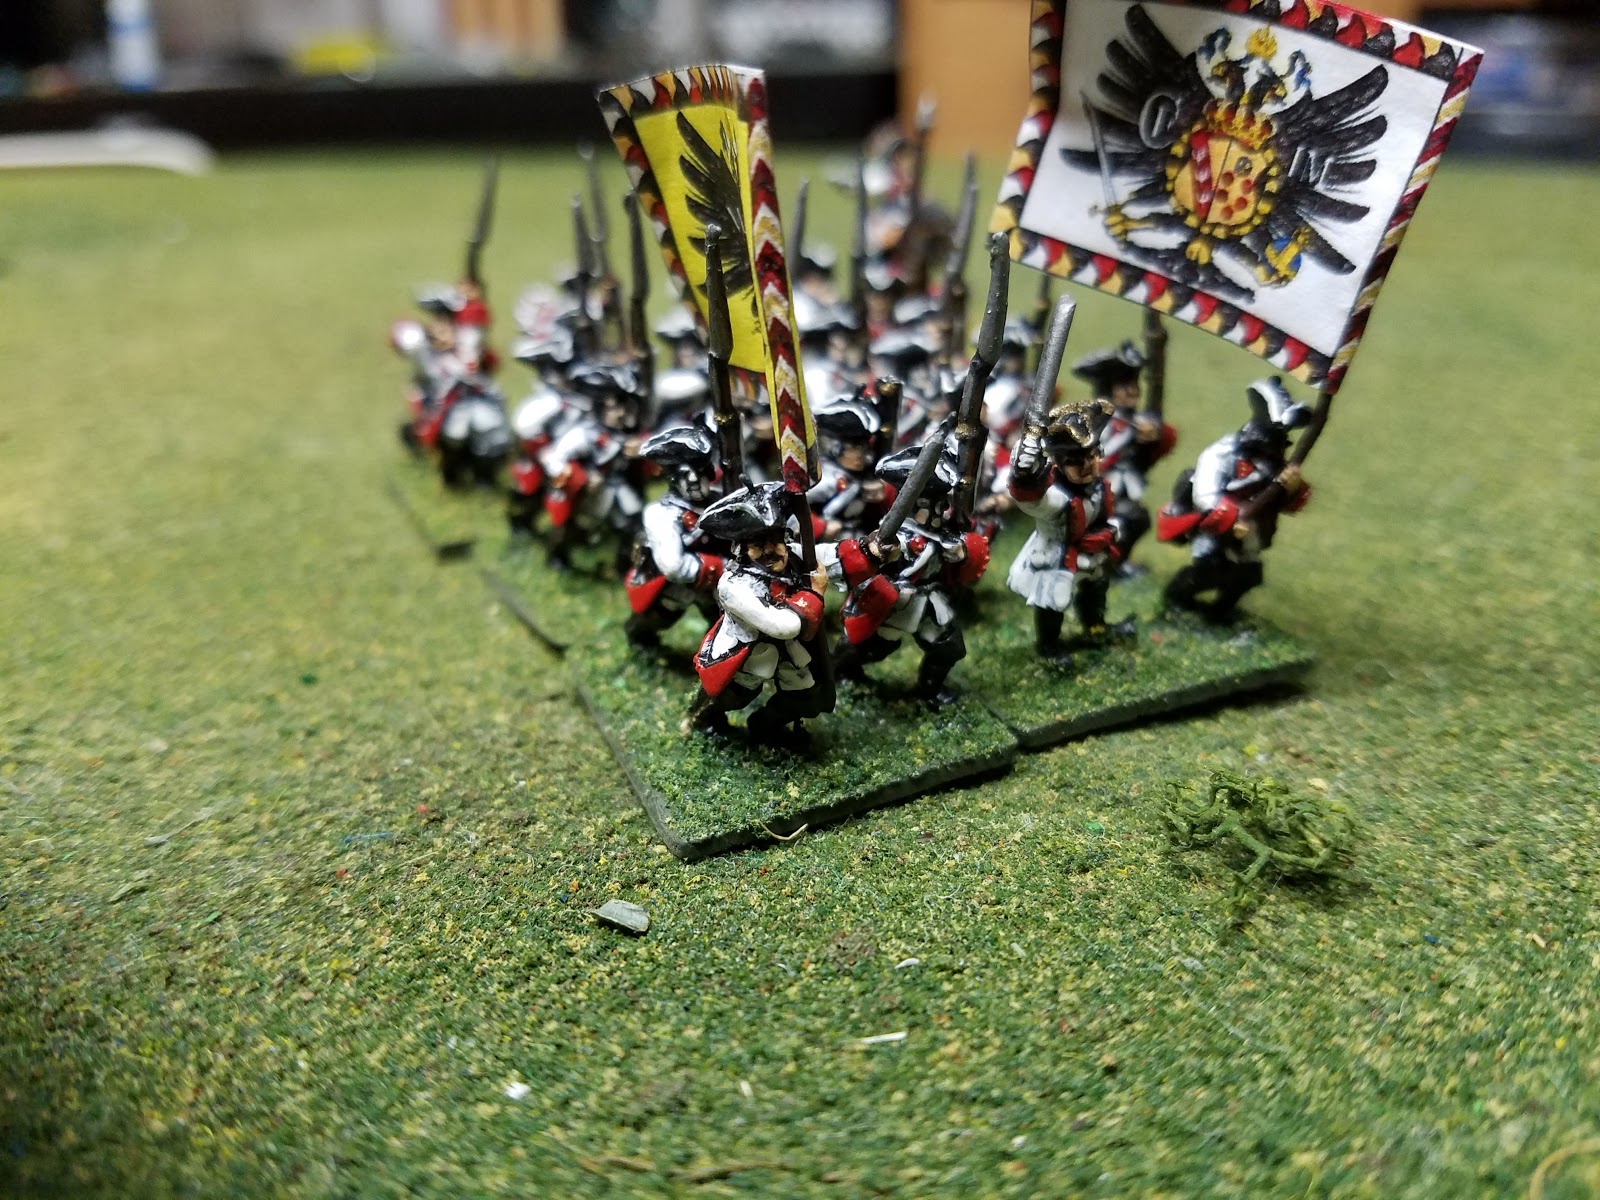
There are 4 grades of troops.  Raw/Conscript, 2nd Rate Line, Regular Line, and Elite/Guard

Units have 3 ratings that determine how effective they are carrying out tasks and fighting or standing in combat.

Those ratings are their:
Activation Level / Training Level (FUBAR calls it "expertise") / Shaken Level (FUBAR calls it "Suppressed")
Activation Level is the D6 number the units activation at.
Training Level is basically the "To Hit" number during firing and melee
Shaken Level are the amount of hits the unit can take before it becomes "shaken"  once shaken, a unit cannot move or shoot.  it must be reorganized/rallied. (eg Regular unit may absorb 3 hits and still function.  Once it absorbs a 4th hit, it is shaken and must be rallied.)

The levels will look like this:
Raw/Conscript:    Activate: 5,  Training: 6,  Shaken:  1
2nd Rate Line:     Activate: 4,  Training: 5,  Shaken:  2
Regular Line:       Activate: 3,  Training: 4,  Shaken:  3
Elite/Guard Line: Activate: 2,   Training: 4,  Shaken: 4

Shaken units must move to cover to reform.  units hit when shaken are removed from play.

Shooting:
Assuming close ordered units, all musket armed units will either shoot 1D6 per stand, or 1D6 per battalion/regiment of 4 stands.

Rifle Armed units will get a longer range and will be allowed to reroll misses once.
Light Artillery get 2D6 to shoot at 24" range
Med Artillery get 3D6 to shoot at 32" range
Hvy Artillery get 4D6 to shoot at 48" range

Cover Saves - To Cancel out Hits
Units hit in light cover get a save of 6
Units hit in med cover get a save of 5
Units hit in hvy cover get a save of 4

Close Combat/Melee - still figuring out how to do melee.  I have some ideas and would like to try and make it close to FUBAR but appropriate for the Horse and Musket era.

My thoughts center around rolling 1D6 against a unit's training level to hit.  Units must roll a successful activation roll to break off combat during a subsequent phase.

Oh and lastly the sequence of play would look like this:

Activation Determination Roll (Roll 1D6 per unit, Corps, and Division commander - set aside each die that is equal to or greater than the activation level of your units)
Command Phase Place successful activation dice next to units you wish to activate
Initiative roll 2D6 per player adding any special modifiers you deem fit (IE Napoleon on the table or Wellington on the table etc)
Operations Side A (winner of initiative), carry out actions including melees, Reactions Side B(units on en garde! orders).
Operations Side B, Reactions Side A
Rout Phase

Sunday, August 28, 2016

Napoleonic Reinforcements: RISK Pieces!

Just Jack from "BlackHawkHet" gave me the idea from his excellent blog that there was a wholly untapped resource for Napoleonic reinforcements - the 1993 edition of the world famous board game RISK!  I looked at the scale comparisons and thought they'd work really well with my 10mm forces and remembered, at the very least, the mounted figures looked like light hussars!

Since i'm light on British light cav (and Cavarly in general on the Anglo Allied side) I thought I'd paint these guys up as my favorite Cavaly unit the King's German Legion cavalry!

Looks pretty sharp I do say!  Admittedly I took my time on this guy.

 I flocked to ebay and noted that most of the auctions and sales weren't more than 10 or 15 bucks for the 1993 edition "board game replacement parts" lol.  360 pieces including infantry, cavalry, and the comical artillery pieces.

 Each RISK faction, identified by a color, has enough Cavalry in the bag to form 4 stand units for my 10mm forces.  There are 6 factions so that's 24 total stands.  That's worth the 15 dollar price tag alone!!  (how much do Old Glory 10mm cav go for???)  So basically, the light cav that I didn't buy at Historicon can now be painted up from these plastic troops.

THe raised detail on the castings makes it easy to paint

For comparison next to some 10mm guys
The infantry are kneeling - which is weird I couldn't find that in the Drill & Ceremonies manual from any country but they'll do.  Their footprint also enables me to do 3 ranks on 1 stand.

Painted up as an Austrian infantryman


A full stand of 9 troops.  They look pretty cool!  they could also be a French foreign regiment?


muskets on the side.


A stand of KGL Cavalry

their other side. 


God I thought I'd work my way through the Napoleonic bug but it's just gotten WORSE.  Finished a Bavarian battalion this morning and sorted 4 more, including my WARRIOR Miniatures Army bag.  God why didn't I buy them sooner???  I love the detail and the compact size of the warrior miniatures figures.  And the price is excellent too.

And everyone knows I'm always keen on saving a buck or two!

Saturday, August 27, 2016

C Grant's The Wargame: Battle at the Moravian Farm

Got up before the chickens this morning to play a quick wargame.  Lately I've been looking for something a little "different" so I thought I'd break out some of my old school stuff and try it out.  In this instance, I thought some good Horse & Musket action was due!  Grant's "The Wargame" seemed to fit the bill for a Seven Years War dust-up.

This battle sees a "brigade" from each size, consisting of 3 regiments each, Prussian and Austrian, meeting at a small farm in Silesia, perhaps part of a larger battle?  A reconnaissance in force?  The scenario doesn't matter.  Both Brigadiers, Major Generals in this case, see the sun glinting off their opponent's bayonets and it's time to commence the battle...


2 Austrian and 1 Hungarian Regiment deployed for battle!  With a battery firing in support

3 Prussian regiments deployed for battle!

 The initial orders were as follows:

PRUSSIAN:
Advance all Regiments up to, and conform to the shape of the road orienting NE to SW.  Braunschweig's left limit will be at the forest.

AUSTRIAN:
Hungarians and IR Kaiser move swiftly through the farm and threaten to the Prussian right.  Artillery advance with Erherzog.


 I used the regular movement values but reduced musket ranges to accomodate 15mm figures.  In the future, I'd like to use reduced movement and musketry, or play in centimeters like Black Powder.

So with those furiously confusing orders, the battle commenced.  Prussian artillery scored some impressive hits against Erherzog Regiment while their steady infantry moved out.

The Austrians moved their artillery and the Hungarian Infantry and the Kaiser Infantry Regiment formed assault columns and moved towards the Moravian farm.

 
Prussians moving according to their Brigadier's plan

Austrians form columns and move out

Prussian artillery scores some roundshot hits at impressive ranges

AWI casualty marker!

columns moving through the farm.
 Probably worth noting that the column only buys you about 1.5 more inches than the line formation.  Is that worth disordering the troops?


Hungarians!

Infantry Regiment #3 Der Kaiser
 The Austrians limber up their artillery and move forward.  The speed of the Austrian advance surprises the Prussians on their right.

Austrian artillery shoots at the Anhalt Infantry scoring a hit
 The Austrians are on top of the Prussians in no time.  The Anhalt let loose their first volley just in time as the Austrians didn't have the movement to charge during the last round.  They knock out an Austrian stand from Der Kaiser (4 troops + 2 additional that will force a morale check).


Austrian casualties

here they come...


In accordance with the rules, the Austrians bring up from from the center companies and there are 8 individual combats which I diced for.  The Austrians receive a +1 for charging

The combat is quick and the Austrians get the better of the Anhalt troops, scoring 4 hits to the Prussian 2 hits.  That is at least double the hits so combat ends this round.  The anhalt lose a stand and also roll a "1" for their morale.  That's bad news as it is below 6 after the morale computation.  (Base Morale 6 - Casualties + 1D6 roll still must be above 6 to stay in good order).  The Anhalt routes from the field and must take another test next round.  They retire with their backs to the enemy.

Meanwhile the Hungarians are still coming.  The Prussians win the die roll and fire their first volley at "close range" which is bad news for the Hungarians, who lose a whopping 8 troops, or 2 stands worth of troops, which will count for the melee tally.

Hungarians coming on strong!

Hungarians will lose another stand in the melee, invoking the 50% rule they will retire

The Prussians only 1 more trooper and pass their post melee morale check and they will hold the field
 The next turn goes way south for the Austrians as the Braunschweig infantry finally join the fight and fire their "first volley" at the remaining Austrian from Der Kaiser, who melt away.  The Prussians are left in control of the field!


 Thoughts
I enjoyed this game and got the "different" that I was looking for.  It's been awhile since I've played a game where each figure was counted.  Playing "The Wargame" with 15mm troops, as well as half-sized battalions presents some challenges however that make it a little "fiddly."

Based Troops & Officer Casualties
I still diced for officer casualties but used a black D6 to mark them in a Regiment.  Charles Grant has 5 officers/supernumeraries within his units and a "6" means the Colonel gets hit.  Only 1 unit actually lost an officer but never had to test morale afterwards.  It was not the Colonel.  None of the Soldiers in my Regiments are individually mounted so this was a little challenging.  The D6 was a good way to remember an officer was hit as I could just check the black die when/if calculating morale.

Losses & Morale
Going from 48 figures to 24 figures isn't too bad of a stretch.  Morale, lost proportionally, can be calculated even simpler than in the regular rules.  Basically, when a stand is lost (4 figures) the unit will have to make a morale check.  That means morale checks at 1/6 strength loss (1 stand) and when 2 more figures are lost, that is the 1/4 strength loss check.

Firing and Melee Calculations
I probably should have taken Grant's advice and subracted 1 from the fire casualties and increased the melee differential to "3" instead of "2" for hits, as that would have made a longer game and not quite so dramatically bloody.  Once the units made contact that was pretty much it.  There was really no way to recover.

All in all, a very fun game which I enjoyed.  Maybe if there is any time left, I'll try "Honors of War" since I still have my SYW troops out!


Thursday, August 25, 2016

GrossDeutschland at Kursk Skirmish Campaigns: BATTLEGROUP: KURSK

Awhile ago, "Paul of the Man Cave" planted the idea that The "Skirmish Campaign" series (available at Brigade Games) would make excellent scenarios for BattleGroup: Kursk games so I thought I'd give it a try - being my "stay-cation" and all.

The first scenario is entitled "Prelude" and is a vignette from the fighting in the dusk hours prior to Operation Zitadelle kicking off.  Up and down the lines, German forces attacked and cleared Soviet forward OPs and trenchlines in order to secure jumping off points.  According to Glantz, some of these battles were savage affairs and were a gloomy omen of the battles to come as, in some cases, entire German infantry battalions broke themselves trying to secure their pre-offensive objectives the day before the Battle of Kursk officially started.


German Platoon Leader and a Rifle Section moving up to attack the forward Soviet OP
 The mission for GrossDeutschland is to eliminate a forward Soviet OP that will be calling down artillery onto GD's advancing elements.  The task falls on you!

GD moving out.  A rifle and LMG section moving up to a small hill overlooking the objective
 The Germans are "Veteran" ranked for BGK and the Soviets are "Regular."  Both sides have 2 full squads, an MMG section.  The soviets have a forward observer and the Germans have a platoon commander.  Per the scenario, the Soviets also have 3 guns standing by of 76.2mm artillery.  Oh great!  These scenarios were definitely written PRIOR to battlegroup kursk as they have no idea how powerful that stuff is in these rules!  Anyways onto the action.

Oh the Soviets' breakpoint is "10" and the German breakpoint is 13.
The Soviets have fortified an old animal pen, making it virtually impervious to fire!  

Soviet squad moves into position to the woods in front of them.  
 The Germans move their 2 squads quietly towards the objective, hoping to flank it and force ivan to withdraw.

Ivan reaches the tree line in time to see Germans to his front!  The battle is joined!

Soviet MMG and loader crew, along with the Forward Observer team.

battlefield looking south from the Soviet lines
 I played with my individually based troops who were originally based for "Bolt Action" but found themselves right at home playing Battlegroup: Kursk!

Germans advancing up to the hill.  Note the woods on the left where The German Platoon Commander and lead squad are moving


 As the Germans exit the woodline on their left flank, artillery screams in overhead, erupting in blossoms of fire, shrapnel, and earth.  The fire is mixed with bursts of Soviet fire from the woodline to their front!  The Soviet FO scores well on all his die rolls and the first salvo of "crash booms" pins the weary Landsers!

Couldn't find my artillery explosion markers.  


GD Soldiers in the woods overlooking the objective!


German LMG section moves up foolishly in the open!

Another Soviet squad comes in on the their left flank!

meanwhile on the German left theyre still trading fire with Ivan!

Barrel is red hot from the MG-42!
 Neither side has been able to get an advantage over the other for the time and both are trading away shots at each other.
The Soviets start taking casualties as German fire from the hill shifts.
 The firefights develop in earnest as a German LMG section pays the ultimate price for moving into the open, and the Soviet squad facing the German left passes test after test taking a ton of casualties before finally breaking.

Then, miraculously, as the Germans draw a counter for losing an LMG section, they draw the "low ammo" marker.  The Soviet MMG is low on ammo and rolls - they're completely spent!  The crew beats feet out of the area!!!

Then the Soviet squads on both the left and right decide they've had enough and quit the field.  The Soviet left flank took off after losing only 2 troops. 
 The Soviet squad on the right takes 2 casualties and realizes they've had enough!

The Soviets reach their BP and leave the field.


German MG 42 position set up in the treeline