Thursday, April 23, 2015

Muskets and Mayhem

Here is the latest version of MUSKETS & MAYHEM for your reading enjoyment.  There are a few changes centered around how units stand fire, and what they do when they take casualties.  Enjoy!  Helpful criticism and comments always welcome. 


Muskets & Mayhem: 

Simple Rules for Horse & Musket Battles Fought with Toy Soldiers

Sequence
  1. Initiative (both sides roll D6 with higher roll choosing to go first/second)
  2. Movement (alternate formations EG I move a unit, you move a unit, units charging conduct their pre-charge morale check now.  If failed, they remain at a halt. Targets of charge make their morale checks now.  If passed they may fire on charging unit instead of in fire phase)
  3. Artillery Fire (apply casualties at end of artillery phase)
  4. Stationary Fire (apply casualties at end of Stationary Fire Phase)
  5. Moving Fire (apply casualties at end of Moving Fire Phase)
  6. Morale (conduct all morale checks as a result of  stand loss through fire combat)
  7. Melee Combat (units in contact resolve melees at this time – initiative player determines who goes first)

Moving
Line units move and not fire 12 units of measurement. Line units who will fire and move 8.  Attack columns move 12. Artillery may move 6, foot limbered may move 12.  All cavalry move 20.  Commanders move 30. Squares may not move.
Interpenetration
Units inter-penetrating other units as a result of a melee loss (if melee push back option used) take 1 additional hit.
Units of Measurement
Inches for troops larger than 15mm.  Centimeters for 15mm and below.  If you're using blocks of 10mm or 6mm troops, consider making hits by base instead of by figure.  (Just say each base fires with 2 D6 and takes 4 hits.)

Unit Composition
  • Line unit sizes are 16 troops, including figures representing officers, musicians, etc (unit represents  most likely an 18th or early 19th century battalion or ACW sized Regiment).
  • Light Infantry Battalions are composed of 8 total troops individually based or based 2 to a base, with each base receiving 1 fire die. 
  • Cavalry Squadrons are 8 to 10 mounts including officer and color bearer.
  • Artillery Batteries are 1 gun model with up to 4 gunners

Shooting
Shoot groups of 2 figures.  So a full strength line battalion gets 8D6 (8 six sided dice).  Game uses opposed shooting rolls.  So firer shoots his fire dice.  For every hit, the unit being fired upon rolls its TROOP QUALITY dice to see how it stands the fire.  Artillery batteries fire based on number of gunners with cannon.  (4 gunners = 4 fire dice – casualties are removed for unsaved hits).

EG: Austrian foot at normal morale (4 stands of 4 troops each) rolls 8 dice.  Normal morale hits on 4+.  He rolls 1,1,2,3,4,4,5,6.  Every die that is "4" or higher scores a hit.  The Austrian unit scores 4 hits.  The Prussian unit he fires at is currently also rated as veteran (needing a 4 or better).  He rolls 4 dice (1 for each hit) and rolls 2,3,4,5, canceling out 2 hits from the Austrian player.  The Prussian player takes 2 total hits to his battalion.  The Prussian player places a small die with the "2" showing behind the left-most stand.

Skirmisher / Light Infantry Battalions are units of 8

To Hit Numbers are based on current morale status.  (Normal 4+, Disorganized 5+, Shaken 6)

Shooting is based on current morale level of unit:
Normal hits on 4+
Disorganized hits on 5+
Shaken hits on 6

Shooting Ranges
Musket and Close Artillery Close range  / Long Range:
6 Musket Range Close Artillery
20 Artillery Long Range


Morale
Morale is the current status of the unit, and is not to be confused with Troop Quality.  Troops quality is a reflection of training and discipline and is the troops' willingness to remain under fire.

Morale
Morale Levels are Normal, Disorganized, Shaken.   Every 4 hits, a unit takes a Morale Check.  If it loses it reduces its morale level by 1.  (Normal becomes Disorganized).

A unit takes a morale check by rolling its troops quality number or higher.

Morale Status Levels:

TROOP QUALITY
Elite: 3+
Veteran 4+
Regular 5+
Second Rate/Conscript 6

MORALE SAVES: Roll as saves when a unit is fired at and firer scores a hit.  Elite units should be used sparingly.

Attached Commanders / Officers
If attached to a unit, a commander can remove a single hit.

Prepared Defenses
Units in defenses: +1 for units rolling morale and saves, and a +2 to their morale roll when charged in defenses.


Melee
Line up Battalions and roll as per shooting.  Winner must beat loser by 2 casualties.  (Prussian scores 4 hits, Austrian scores 2 - Prussian is the winner.)

Melee Sequence

1. Moving player announces Charge and makes pre charge Troop Quality Check during movement phase Moving player moves unit in.  
2. Player to receive charge makes Troop Quality check.  Must pass or retreat full move distance.
3. If Troop Quality Check passed, player receiving charge may fire immediately (if infantry) or counter-charge immediately (if cavalry) after charging player finishes charging unit’s movement.  Both charging cavalry units would then meet in the middle.
4. Join units.  Resolve melee combat dice rolls during Melee Phase.
5. Melee Phase roll 1D6 for every figure in unit, striving to meet or exceed the Shooting/Morale number.  (Normal Morale 4+, Disorganized Morale 5+, Shaken Morale 6).  Both sides make Troop Quality save throws for each hit.
7. Remove Casualties or use marker dice if troops are on bases.
8. Winner is the side who scored 2 more hits than opponent.
9. [Optional Melee Results] 

Option A: Losing side retreats 1 full move facing enemy and makes a troop quality check if a stand is lost
Option B: Losing side is removed from play (makes for a quicker game)

Combat Dice Additions
Cavalry charging infantry in line receive double dice.
Infantry or cavalry charging artillery - artillery receives double dice if artillery battery passes its pre charge quality check.


Wednesday, April 22, 2015

GDW Team Yankee: First Blood / First Battle AAR


UPDATE!  THIS IS NOT THE BATTLEFRONT TEAM YANKEE GAME!  THIS IS THE GDW BOARD GAME PLAYED WITH MICROARMOR AND MODIFIED RULES! 
I played my first game of Team Yankee using Micro Armor and the results did not disappoint!  Set against the backdrop of the scenario in the book, (which is further set against the universe in General Sir John Hackett's "History of the Third World War") Captain Bannon leads his Armor/Mechanized company team against a Soviet Battalion who are probing for the US main line of resistance.  It is the first day of the war.  But there's a twist!  In this game, Team Yankee is equipped with M60A3 AFVs and M113s, not the high-speed M1s they have in the book!

This game was intense and very exciting for all of the right reasons.  Tactical lessons come the hard way and if you're looking for an excellent game, look no further.  This is gritty, WWIII combat at its best!

The Soviet plan along with US dispositions.  Blue markers are platoons.  Red are companies.
Soviet plan is quite simple.  The BMP company will advance through the woods on Hill 229 and be in position to over-run Hill 227.  On their left, the Tank Company will drive through the valley to the village, and push on at maximum speed.  I intentionally let the Fire Support Plan on the Soviet side target the hilltops and not the tree-lines on the first turn since tree-lines are never reliable on maps.  They could/would adjust when the battle began.  The Soviets have 3 Batteries of 122mm firing 20 salvoes/missions of High Explosive [HE], 3 chemical and 6 smoke.

In the interest of realism, the Soviet plan was built off of the map.  The American plan was built from the board after the terrain was placed but before Soviet troops were placed.

Tank Platoon in their initial Battle Positions.  One of the problems I ran into was not having a plan for displacement and alternate Battle Positions, which is textbook.  The Soviets were able to bring some nasty HE down on the treelines and damage quite a few of Team Yankee's AFVs...
 The American plan is to hold key terrain in vicinity of Vogleburg and the village of Amburg an der Vogle.  Key terrain in this case being the high ground to the west of the town itself.  All units are concealed with TRPs sighted and Artillery pre-registered.  US Artillery has 1 155mm Battery, firing  10 salvoes/missions of DPICM (Dual Purpose Improved Conventional Munitions and HE)


More Battle positions.  Awaiting Ivan!

T-72 company arrives on schedule.  End of turn 1 movement.
 The Soviet artillery planners didn't take into account the excessive speed of the T-72 tank and the advance had to halt in order to lift fires in Amburg village.  The Battalion Commander was not pleased.  He was equally displeased when a heat round incinerated his driver and TC and he and the rest of his staff had to bail the ACRV and head into the woods on foot!  Not an auspicious beginning for the first day of the war!

Soviet advance

Soviet Artillery plasters Hill 227!  How do you like those Impact Markers?  They are steel wool cut into various "blast" shapes!!!  I need to spray paint them but on the whole, they'll work!
 The Soviet artillery immobilizes 1 US M60.  The US have no targets yet and no fire missions have been planned.  The US TC's scan the valley below and the Soviet tanks churn the earth and grind forward!

SIX SIX THIS IS RENEGADE TWO SIX SHELLREP, OVER.....THIS IS SIX SIX NO NEED TO REPORT THAT SHELLING I OBSERVE THE ARTILLERY IMPACTING SIX SIX OUT.

The Soviet artillery becomes an obstacle for the tank company.  Amburg Village gets the HE treatment!

ACRV bails out after taking a heat round in the nose and the ZSU 23/4 grinds by.  No targets comrade commander!

The Americans wisely hold their fire and decide not to give their position away with fire beyond effective range.  Meanwhile, US DPICM starts landing on the Soviet tank company with telling results.  2 AFVs immobilized and unable to continue the advance.

US ITOW M901 rides up the hill to fire and gets a nasty surprise.  Soviet T-72 KO's it at long range.  haven't I been harping about tactical driving in this blog for some time now?  Meanwhile Soviet HE rounds continue to fall on Hill 227 in the background.

BMP1 Company exits the woods as smoke falls.  Unfortunately, the smoke only hurt the BMPs as the US player has thermal sights.  The M60s on Hill 227 have a field day with the BMPs.

Gunnery starts to take its toll and more artillery falls on the stricken T72s.

The BMPs advance under the "cover" of the smoke and start to take casualties.  Their dismounts for the most part live and bail out.  And hit the ground!  
 The Soviet advance has located the US MLR and the fight is on!  The T-72s and M60s on Hill 222 in the Southwest start trading shots with a US M60 KO and 2 immobilized.  Meanwhile the US infantry dismount their carriers and bring those Dragon ATGM forward!  Let's get some flank shots guys!


More Soviet Artillery falls.
 The Soviets are able to get 2 T-72 tanks to exit the board and 3 more race for the edge but are caught in the open by US Artillery and an M60 tank counter-attack!  The BMP attack on the left has stalled and 2 M60s leave Hill 227 to fire on Ivan.  At this point, both the BMP Company Commander and the Tank Company Commander have bought the collective farm...

The Soviets have 1 more ace up their sleeve.

Ivan's last best hope for a victory.  2 T-72s KO by US gunnery and a third immobilized by Artillery fire.

GAS GAS GAS!  The Soviets have used up all their HE fire but a new threat -  Chemical weapons - enters the battlefield.  This marks the first time in one of my games where a WMD was used!

GAS GAS GAS!  Button up!  
 In Team Yankee, the NBC battlefield reduces the effectiveness of your troops by 1 level on the CRT.

Mopping up.  This ZSU 23/4 Shilka is all that remains of the Battalion support platoon.

US M60 scanning for targets.  "No more targets, sir."

Soviet chemical rounds still falling on 227, Ivan bugs out.  While his morale didn't break, he has no more vehicles to exit the board with.

Smashed BMP company.  Admittedly, they had the harder job.  The T-72s just needed to race through the valley and exit the map!

LESSONS LEARNED:

And there are many.  School's in, team, so take a seat!

Team Yankee made an excellent micro-armor game!  In my opinion, one of the best where you're truly rewarded for using combined arms tactics, and sensible use of artillery.  I will play more scenarios from the game and eventually use my own.  (the rules have vehicle values for UK, West Germany, and other Soviet units like the T-80, T-62, and T-55).  The inherent strengths and vulnerabilities of the systems depicted in the game/book are all in this game.

Tactical Movement: Use a covered and concealed route, especially if you're not a tank.  (most APCs have an armor value of "1" so a tank, even at long range, will max out the CRT and kill you as happened to the Soviet command vehicle).

Shoot & Scoot:  Keeping your platoons shooting from the same battle position is asking for enemy artillery to plaster you.  shoot then displace your tanks just like in real life, and in "First Clash," "Team Yankee," and other fine WW3 History books...  In my case, the unfortunate US plan only left room for 1 battle position but I probably still would have had movement enough to displace my vehicles.

Leapfrog your attacks.  Everyone loves to line up Soviet tanks and see what a huge tank assault would look like - an irresistible and unstoppable force.  Well that's what it looks like but the truth is a little more grim especially if the defenders aren't pinned.  If you can, shoot with one element, move with another.  The BMPs learned this the hard way, and only started engaging US infantry targets with their short-barreled 73's too late.  The Dragons chewed up what was left of them.

Playing solo was a little tough because as a miniatures game there is some "admin" (board wargamers call it housekeeping") you have to remember to do and the "First Battle" sequence of play doesn't have all those steps listed.  (for example checking morale for hesitation and breakpoint, artillery plot phase, artillery impact phase, etc).  Also if a unit doesn't move or shoot he takes a "reaction fire" marker and can shoot during the enemy's move.  That entails placing the little markers all over my tanks so I can remember they are in "reaction mode."

Also, I apologize I had to use the infantry chips instead of infantry stands.  That will be rectified by the next game!

Cool pic i saved for last.


Saturday, April 18, 2015

Return to Disposable Heroes & Iron Ivan Rules

So after a brief hiatus, I'm back onto Disposable Heroes and Iron Ivan games rules but have decided I'll use them with my 15mm miniatures instead of 20mm 1/72.  Understanding why I'm adopting them again is not possible until you know the reasons why I gave them up in the first place;  terrain, dice, and miniatures.  First of all, I do not have adequate terrain to support good platoon-level skirmishes using 20mm troops.  Instead my DH games turned into shoot-em-up fests that were essentially over when hte HMGs came into play because eveyone could see to all corners of the table.

Also, I wasn't a big fan of using D10.  I prefer D6.  That said, I'm not completely against D10, just not a huge fan.  There is no mathematical reasoning for this.  Just personal preference.

(Speaking of personal preference, if you want to check out any of my old Disposable Heroes games in 20mm, do a search in the upper left hand corner of the blog and you can read some of my AARs from battles in the past.)

Lastly, miniatures - there never seems to be enough miniatures, vehicles, and buildings painted up for a truly satisfying game - unless of course we try it in 15mm!  In that respect, I have lots of troops, terrain, and vehicles!

So fast-forward to  the Grenzer John "This Very Ground" post this past week.  I know I know, completely unrelated to WW2 but still compelling none-the-less.  It reminded me of the great flexibility you have as a platoon leader or higher commander in Iron Ivan games.  The sequence goes something like activate, move/shoot or shoot/move, and close combat.  Brutally simple and effective, and there is alot of "wiggle" room to input your own rules, develop characters (for that platoon-level Stalingrad Campaign game you've been planning for years!), and use different kinds of weapons. I wonder if the "skirmish elite" scenarios would work for DH....

So watch this space.  I plan on putting a DH game together in 15mm when I can and I can honestly say I'm looking forward to it.  Plus it gives me another reason to use my "snazzy" Litko custom Iron Ivan activation tokens!

Also if you get a minute, check out Grenzer John's outstanding blog and read up on their  "This Very Ground" French & Indian War clash!  Huzzah!


Friday, April 17, 2015

Back to my roots...MicroArmor and 10mm Naps.

It's been a long time since I made any significant wargaming plans involving 1/285 scale microarmor. longer since since I've painted any.  All of that changed this week!

I recently played a game of SPI's "Mechwar '77" and it got me thinking about playing microarmor again.  If you must know, I played the very first scenario, the reconnaissance scenario, in the game's rules.  In this scenario, a troop of armored cavalry, all in M551 sheridans along with an airmobile infantry platoon, must deny the Soviets access to the southern edge of the board.   The Soviets start with 4 wheeled recce platoons, and eventually a mech infantry company and tank company join in the fray.  The game was just barely an American victory as the Soviets exited the 3 out of 4 required stands at the southern edge of the board.

While playing the game, I found I missed the larger, operational-level goals that playing at this scale entails.  So I endeavored to break out my old Cold War microarmor and get to painting!  First stop?  The Team Yankee Board Game and the "First Blood" scenario.

 With my microarmor, I can play a variety of types of games and all kinds of rules, from the new 5Core Brigade Commander game, to Battlegroup, to Modern "Flames of War" without really spending a penny.  ( correction, I need to buy a few helo's, that's it.)  I used to collect microarmor (didn't we all) and I have a huge trove of it now.  All just waiting to be used.  I figured for now anyways, I'll continue to paint up my 15mm infantry and use it for skirmish games, with larger games played with microarmor.


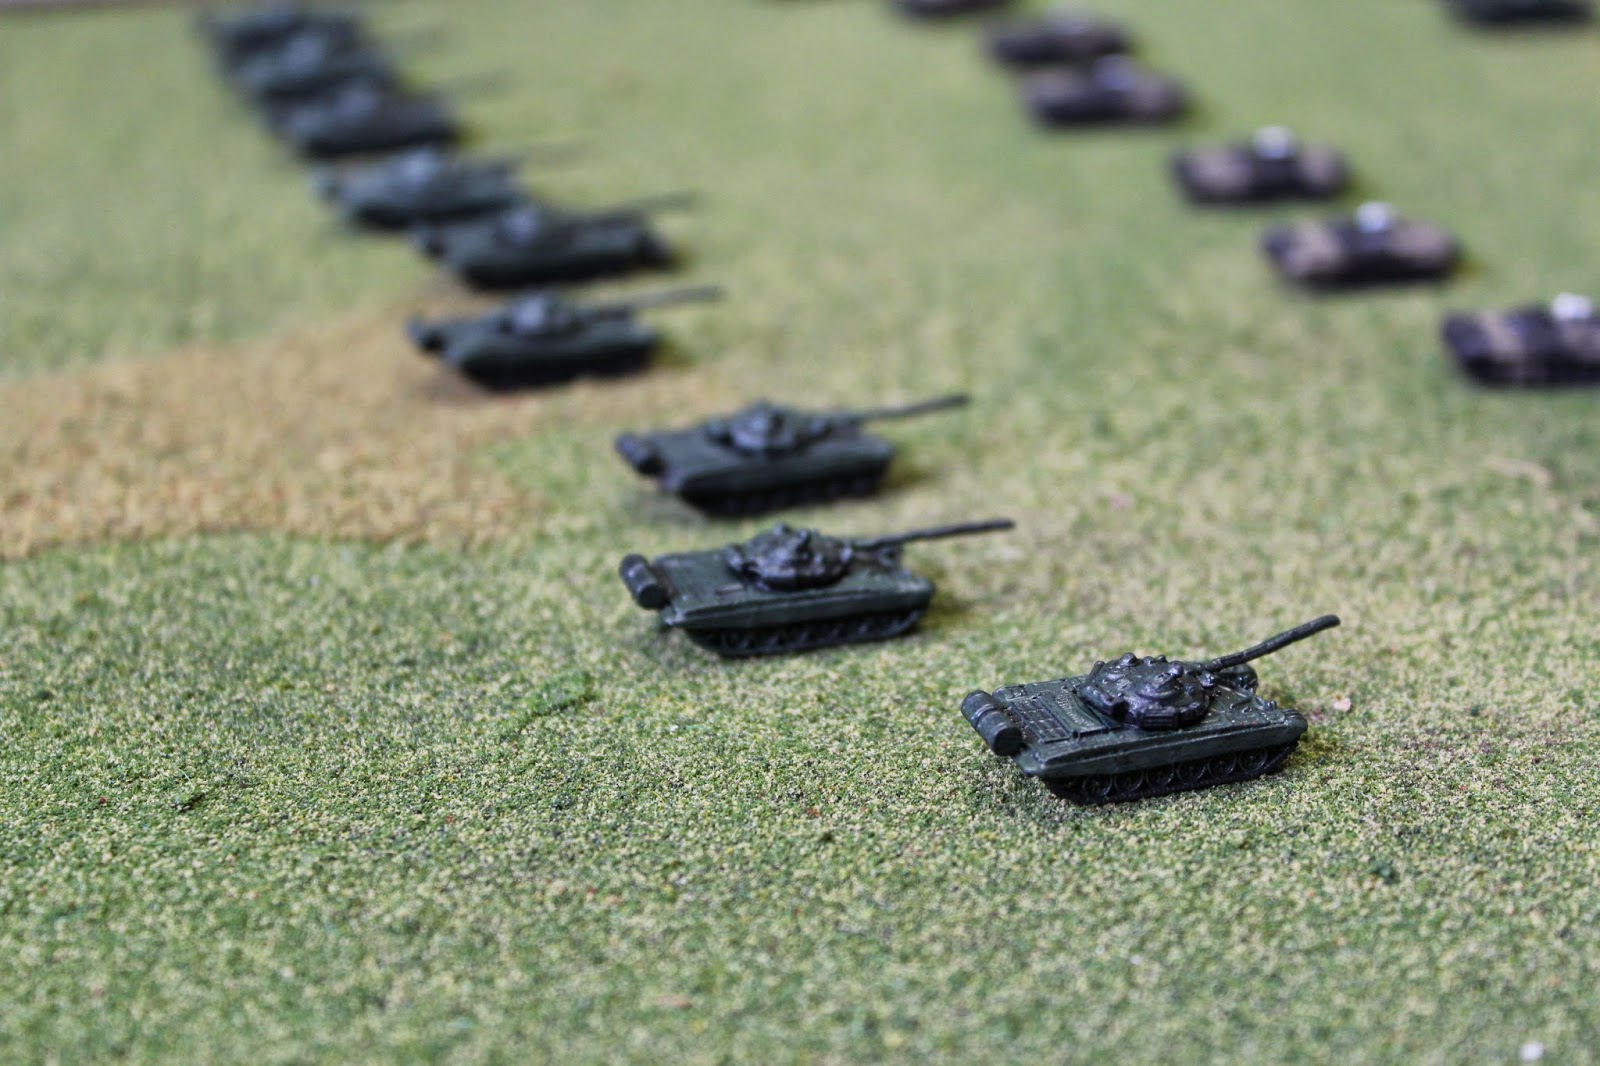
I already have a full Battalion's worth of T-72s, or a Regiment depending on the scale, including all the supporting arms I'll need.  Just have to paint up the infantry...


My plan is to play "Team Yankee" with ranges and movement from the game pieces doubled using 10 T-72s, 10 BMP1s, 2 BMP2s, and supporting arms.

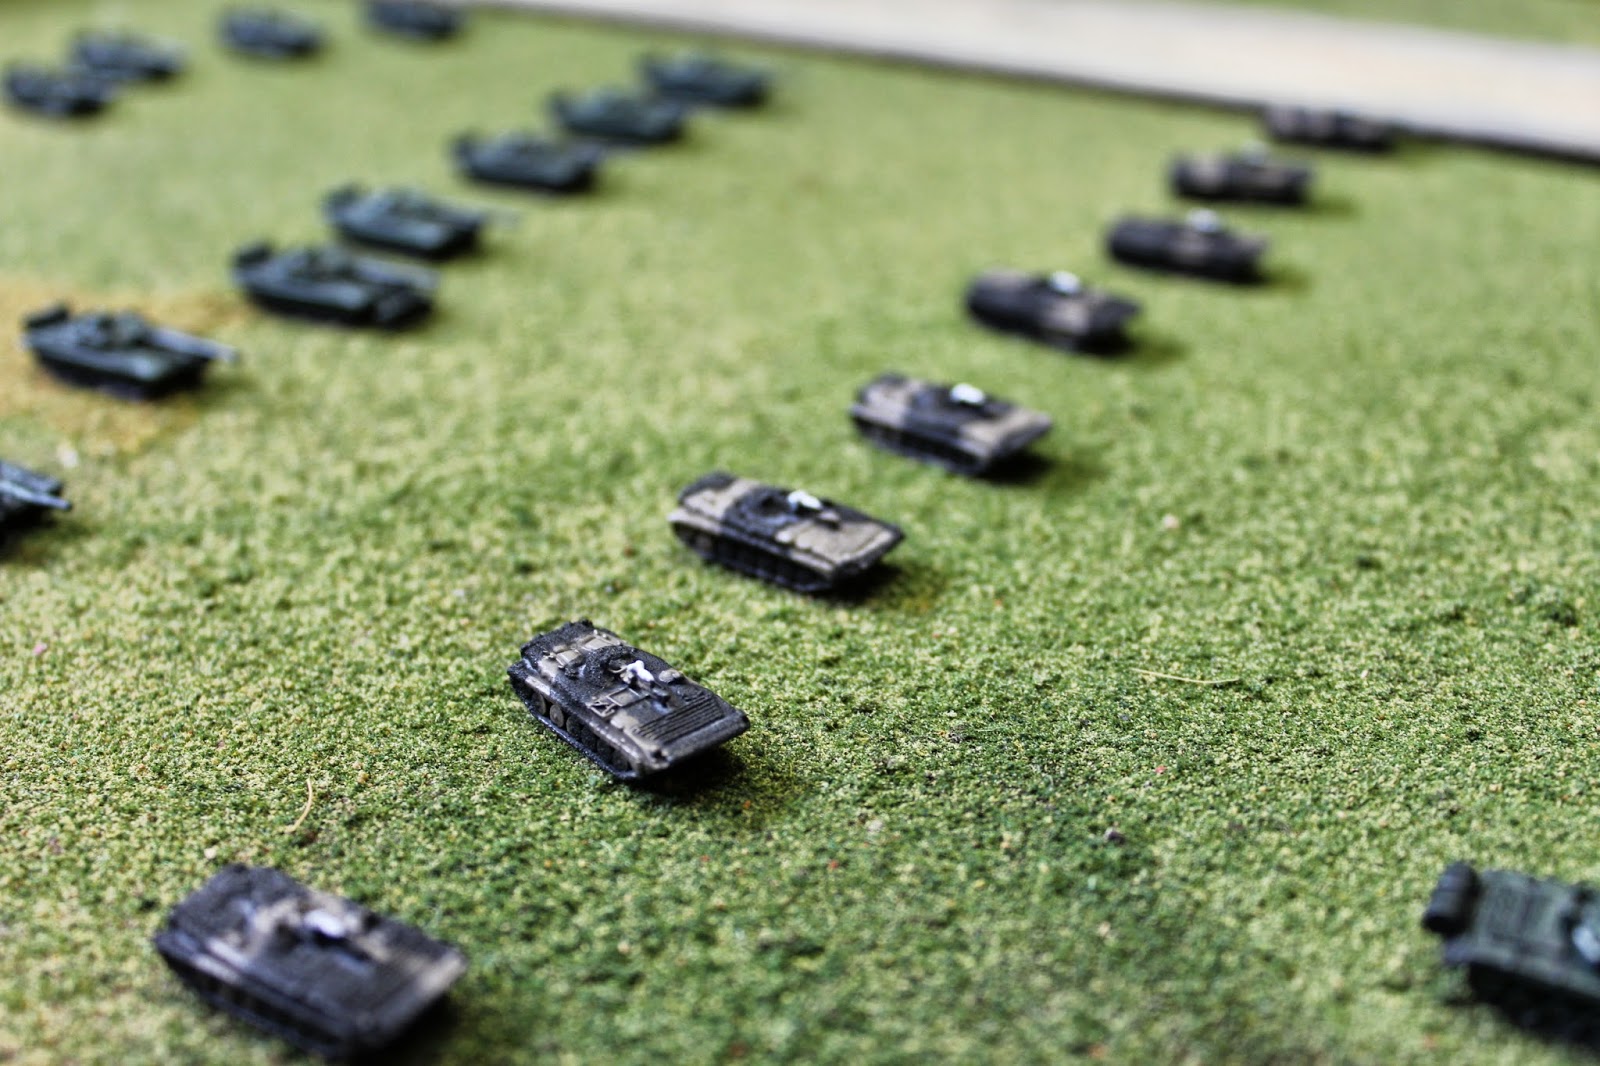
Command Group.  ACRV, Shilka, and of course an SA-13 Gopher for later scenarios.

Can't go anywhere without all the Artillery.  So I brought along a Battery of 2S1s...unfinished as they need their tracks done, weathering and properly sealed.
  I'm very happy with how the BMPs turned out.  I plan on using the same scheme on the T-80s when I paint them up.  There are about 60 T-80s waiting for paint....Where else can you get that kind of quantity?!?!  Battlegroup NORTHAG here I come!!!  All the toys on the table!


The red hordes advance into Germany!


Venerable M60s painted in MERDC await them.


Surprise!  My 10mm Napoleonic troops.  Going to give all of them a makeover as well this summer and finally play "Napoleon at War" with them.  


unfinished skirmisher stand.


Sunday, April 12, 2015

Battlegroup 'NAM Material

So lots of chatter about the Battlegroup series of rules going modern with "NORTHAG '84" and in the spirit of that I thought I would do a little more work with my "Battlegroup: 'NAM" supplement I've been working on.
One of the biggest challenges with converting to more modern battles is the question of firepower.  Gone are your "Bolt Action Rifle" equipped rifle sections.  In their place are Assault Rifle toting infantry with automatic weapons, light and medium machine guns, and it seems like every squad has a LAW or RPG to carry along with it.  Squads must be broken down into their proper sections and teams or you're likely to have a very short game on your hands!

Surprisingly I turned to an old source for building out a proper squad MTOE for Battlegroup - Iron Ivan Games' Vietnam supplement for "Disposable Heroes."  While I gave away the main rules for DH, I still had an extra copy of "Long Road South" laying around and thought it would be perfect to use to build out Squad and Platoon Modified Table of Organization and Equipment to put together a "Battlegroup" game.

If anyone has thoughts, I'm all ears but here's what I've come up with so far:

US Army Squad / Fireteam in Vietnam (11 man section, but with a 2 man attrition built in)

Squad Leader: M16 Firepower (FP) 2 at 10" and under / FP 1 at 11" and greater.

Alpha Team:
Team Leader:  M16 FP 2 at 10" and under / FP 1 at 11" and greater.
Grenadier: M79 "Thumper" FP 3 minimum 6" range.  Rated as Very Light HE.  Fired separately.
Rifleman: M16 FP 2 / FP 1
Purchase 1 additional rifleman

Bravo Team:
Team Leader:  M16 FP 2 at 10" and under / FP 1 at 11" and greater.
Grenadier: M79 "Thumper" FP 3 minimum 6" range.  Rated as Very Light HE.  Fired separately.
Rifleman: M16 FP 2 / FP 1
Purchase 1 additional rifleman

Add on M60 Team (x 3 men) for additional points.
Squad can be "leg" infantry, mechanized, motorized, or aero-rifle (heliborne).

I have not come up with any points values or breakpoint values yet.  Still working on that.

NVA / PAVN Squad / Section

First Section:
Squad Leader: AK47 FP 2 / FP 1
MG: RPD/RPK FP 4
Rifleman/Ass't Gunner: AK47 FP 2 / FP 1

Second Section:
Corporal: Ak47 FP 2 / FP 1
Grenadier: RPG 7 FP 3 Very Light HE / Anti-Tank "2"
Rifleman: AK47 FP 2 / FP 1

Also because I wouldn't want to leave any treadheads out, here are the new and improved stats and vehicle cards for the M48A3 and the M113 in Vietnam:

If anyone is interested, the unit crest in the upper right is the 1st Battalion, 77th Armor, one of the 3 M48 Battalions who served in Vietnam.


Also, if anyone is interested in reading, I found a fascinating white paper written by a Major at the Command & General Staff College about the evolution of the US Army fireteam and its role in small unit tactics.  It talks about the US Army's development of squad tactics, and the evolution of the concept of the small fireteam built around a decent squad automatic weapon.

 If you're interested in any post-ww2 gaming, it's a must have!

You can access the paper here.

Tuesday, April 7, 2015

WWII Eastern Front Skirmish: URBAN NIGHTMARE! (lots of pics!)

Today I played a very large skirmish game using my individually based WWII troops and using the popular "Bolt Action" rules for skirmish actions.

I pulled out all the stops and grabbed every "destroyed building" I had including some really cool Epic 40k ruins I purchased on ebay a few years back.  They blend in well with the other scenery.  I even sprinkled some ballast rocks to give the impression of rubble.  This was a sweet game but the pictures tell the best story.

Mission was the "Domination" mission from the "boltaction.net" website.   3 Soviet squads plus 3 T-34/76 face off against a similar number of Germans, 2 x Panzer IIIs and 1 Panzer IVF.  This mission has it all - Reserves, plus lots of maneuver and decision making.

Urban nightmare terrain!  Even on the roads I made a "bogging check" on a roll of a 1 whenever a tracked vehicle moved over the rubble area.
 Both sides wanted to use their tanks to sweep around and grab as many objectives as they could before the infantry swarmed in.  Still, tanks could only use "advance" orders once they entered the city and I instituted a bog check once the tanks entered.

Panzer IV scans for targets.

The yellow dice are objectives.  The number showing on the die is the amount of points the objective is worth.  The center objective is worth 3 - the most.

T-34 hit by the Panzer IV!  The shell chips the paint and stuns the crew.  1 Pin marker for you!
 The Soviets have a new plan.  Shove everyone right up the middle and see how it turns out.  (actually as it turns out, it was quite an effective plan.)

Troops hop off a T-34 and race for cover.  They grab an objective but come under fire from some Germans in the department store!

T-34 creeping around the flanks.

A Soviet squad moves into the town.
 After turn 1, the turns start to move pretty fast.  The first of the reserves show up and sprint into the town on "Run" orders.  Some of the senior officers present have been slacking off on their PT and arrive winded....(this doesn't go unnoticed by the enlisted men).

Green die is a pin marker.  He's hit by a measly 50mm shell.  More paintwork chipped.

The twin pair of Panzer IIIs goes hunting.

Meanwhile the German main effort reaches the rubble in front of the "big" objective.

The German squad in the department store scans for targets.  They would attract the attention of almost every Soviet unit on the right flank!

Situation!  Soviets advancing from the left, Germans from the right.


"We have the objective in sight Herr Leutnant!"

Russians race around the flank to contest the objective and knock out that Panzer IV.  As you can see he has alot on his mind this particular turn.  Like "which T-34 do I take out now?"
 The Germans in the town remain mostly static waiting for their reserve units to show up and flank the enemy. Movement is slow, however (no running once in the rubble!) and they soak up hit after hit!

German reserve squad not in the town yet.  Slowly but surely.

WE ARE FIGHTING FOR OUR LIVES HERE!  WE NEED HELP!!  The Feldwebel screams to a runner he spots.  The destroyed buildings all around are filling up with Ivan and they all are taking a keen interest in this squad in the rubble pile.


Some lucky German shooting and the MMG joining the affair kills a Soviet squad in the town center but is it enough?  Is it ever enough?!?!

No shortage of volunteers to liberate the motherland!  Soviet reserves pour across the bridge and into the town.

Scratch one Gerry tank!  A T-34 does more than chip paint, Comrade!

Guys follow me!  Guys??  Where is the rest of my squad?

German reserves trickling in.  Too little, too late!

Scratch another Panzer.  This T-34 has set himself up to grab another objective and fire on the reinforcements arriving.

From the vantage point of the department store, the German squad realizes they have one option left.  Charge!  Quick boys, pour out of here and charge that tank!  Oh wait - waht do you mean we have to pass a pre charge morale check against tanks?  Okay, EVERYBODY BACK INSIDE NOW!!  Do-Over!!
 I goofed and didn't know I had to pass a morale check until after my squad charges this Russian tank.  I roll the check prior to any combat starting.  The Germans fail it.  Today's not the day to go after a tank.  So back inside the department store they go!

Party headquarters is spotted intact!  Race to the top of it and pour fire down on the Russians.  I can't believe we didn't think of this sooner!  Hurry damn you!  It's the end of Turn 5!!!

Officers and MMG gunners scan for targets.  There are plenty of them.
 By now it's looking grim for Gerry.  2 of 3 tanks KO'd and even the objectives he started with are melting away.  not to mention the squad in the city center has 8 pins against it!  More than there are even soldiers.  He'll need to roll "snake eyes" to even rally.

By now all the Russian reserves are in and about to open up on the Germans in the center.

8 pin markers!  I want to go home!

End of turn 6 they won't be able to shoot unless we roll to continue another turn!
 The Germans really need another turn to win the game as their reinforcements are finally all set up.  The Soviets have 2 fresh squads ready to rush the "big objective" worth 3 points as well as all their support weapons have been brought to bear.

the Germans have snuck a Panzerschrek team around the woods!  Unbelievably they contest the objective as they're within 3 inches of it.  The Soviets don't get credit for this one.  Especially with a Panzerschrek team pointed at the soft flank armor!

Situation in the city center.  This looks like a Soviet victory to me!


The view from the department store.  The Germans hunker down and prepare to vacate the city!
Thanks for sticking around and reading my AAR.  Bolt Action always delivers a fast-moving game.  This time around I didn't institute my "50%" rule where only 50% of the miniatures in your unit may shoot simply because the hard cover and the building to building fighting make it hard enough to hit.  Gone were the turns where one entire squad is wiped out at a time.

Looks like you need lots of terrain to keep Bolt Action interesting.  Duly noted!  I will play this same scenario with FUBAR (the free skirmish rules available in my links section) to see how it goes.

I learned a few lessons here - namely that if you want to keep your troops on the board, you have to keep them in cover.  Shooting is merciless on targets in the open.
Also I finally figured out where officers benefit your units in Bolt Action - because prior to playing this game I could never figure that out, and my officers usually just sat around the battlefield or were used as an additional fire team.

With officers accompanying a squad possibly designated as "the main effort" you increase your chances that they'll pass pre movement morale checks if they're pinned.  Hell, every little bit helps.  9 or less seems like an easy number to roll, but if you have 3 or 4 pin markers on your squad, that turns into a 6 or a 5.  with an officer providing his morale benefit, you can make that roll a little easier perhaps.  My officers all arrived as reserves with the command group, and I found myself wishing they were closer to the action.

Reserve placement.  Reserve placement is very generous and you can almost place them anywhere on your table edge you want.  I enforced a strict entry-area for both sides and all this did was ensure they they almost wouldnt be used for both sides, with most reserves getting their first opportunity to fire around turn 5!

Tank riders.  Do this.  If you have tanks do this.  That's all I can say.  Unparalleled mobility if you don't have tracks or trucks.  The Russians all of a sudden had 2 squads and 2 tanks in the department store sector while the Germans had what equated to a fire team...

Still have lots of painting to do getting ready for my GWOT FUBAR game coming up at the end of the month.  So FUBAR on the way everyone.

Oh and last summer was the "Summer of Horse & Musket" so what's this summer going to be???
Napoleonics?  SYW??  Finally finishing a single project and getting all my minis from that era painted?  "Howe" about the "Summer of the AWI?"