I can't think of a better way to bring ACW Month to a close here at SOUND OFFICERS CALL than to host a hard-fought ACW western theater battle on the tabletop with Ken and Dave. The battle? Shiloh, of course, using the tried and true "
Altar of Freedom" rules by Greg Wagman. Sit back and get ready for "
the devil's own blog post" as we rewrite history (sort of - I'll explain) .
About 6 months ago, Ken and I embarked on a joint project to paint and base up units for the introductory Battle of Shiloh in the AOF book. About 20 brigades per side in 10mm - totally doable. Ken brought over his outstanding CSA troops. The Union troops are mine. We're using the 6mm bog standard values including basing from the book.
 |
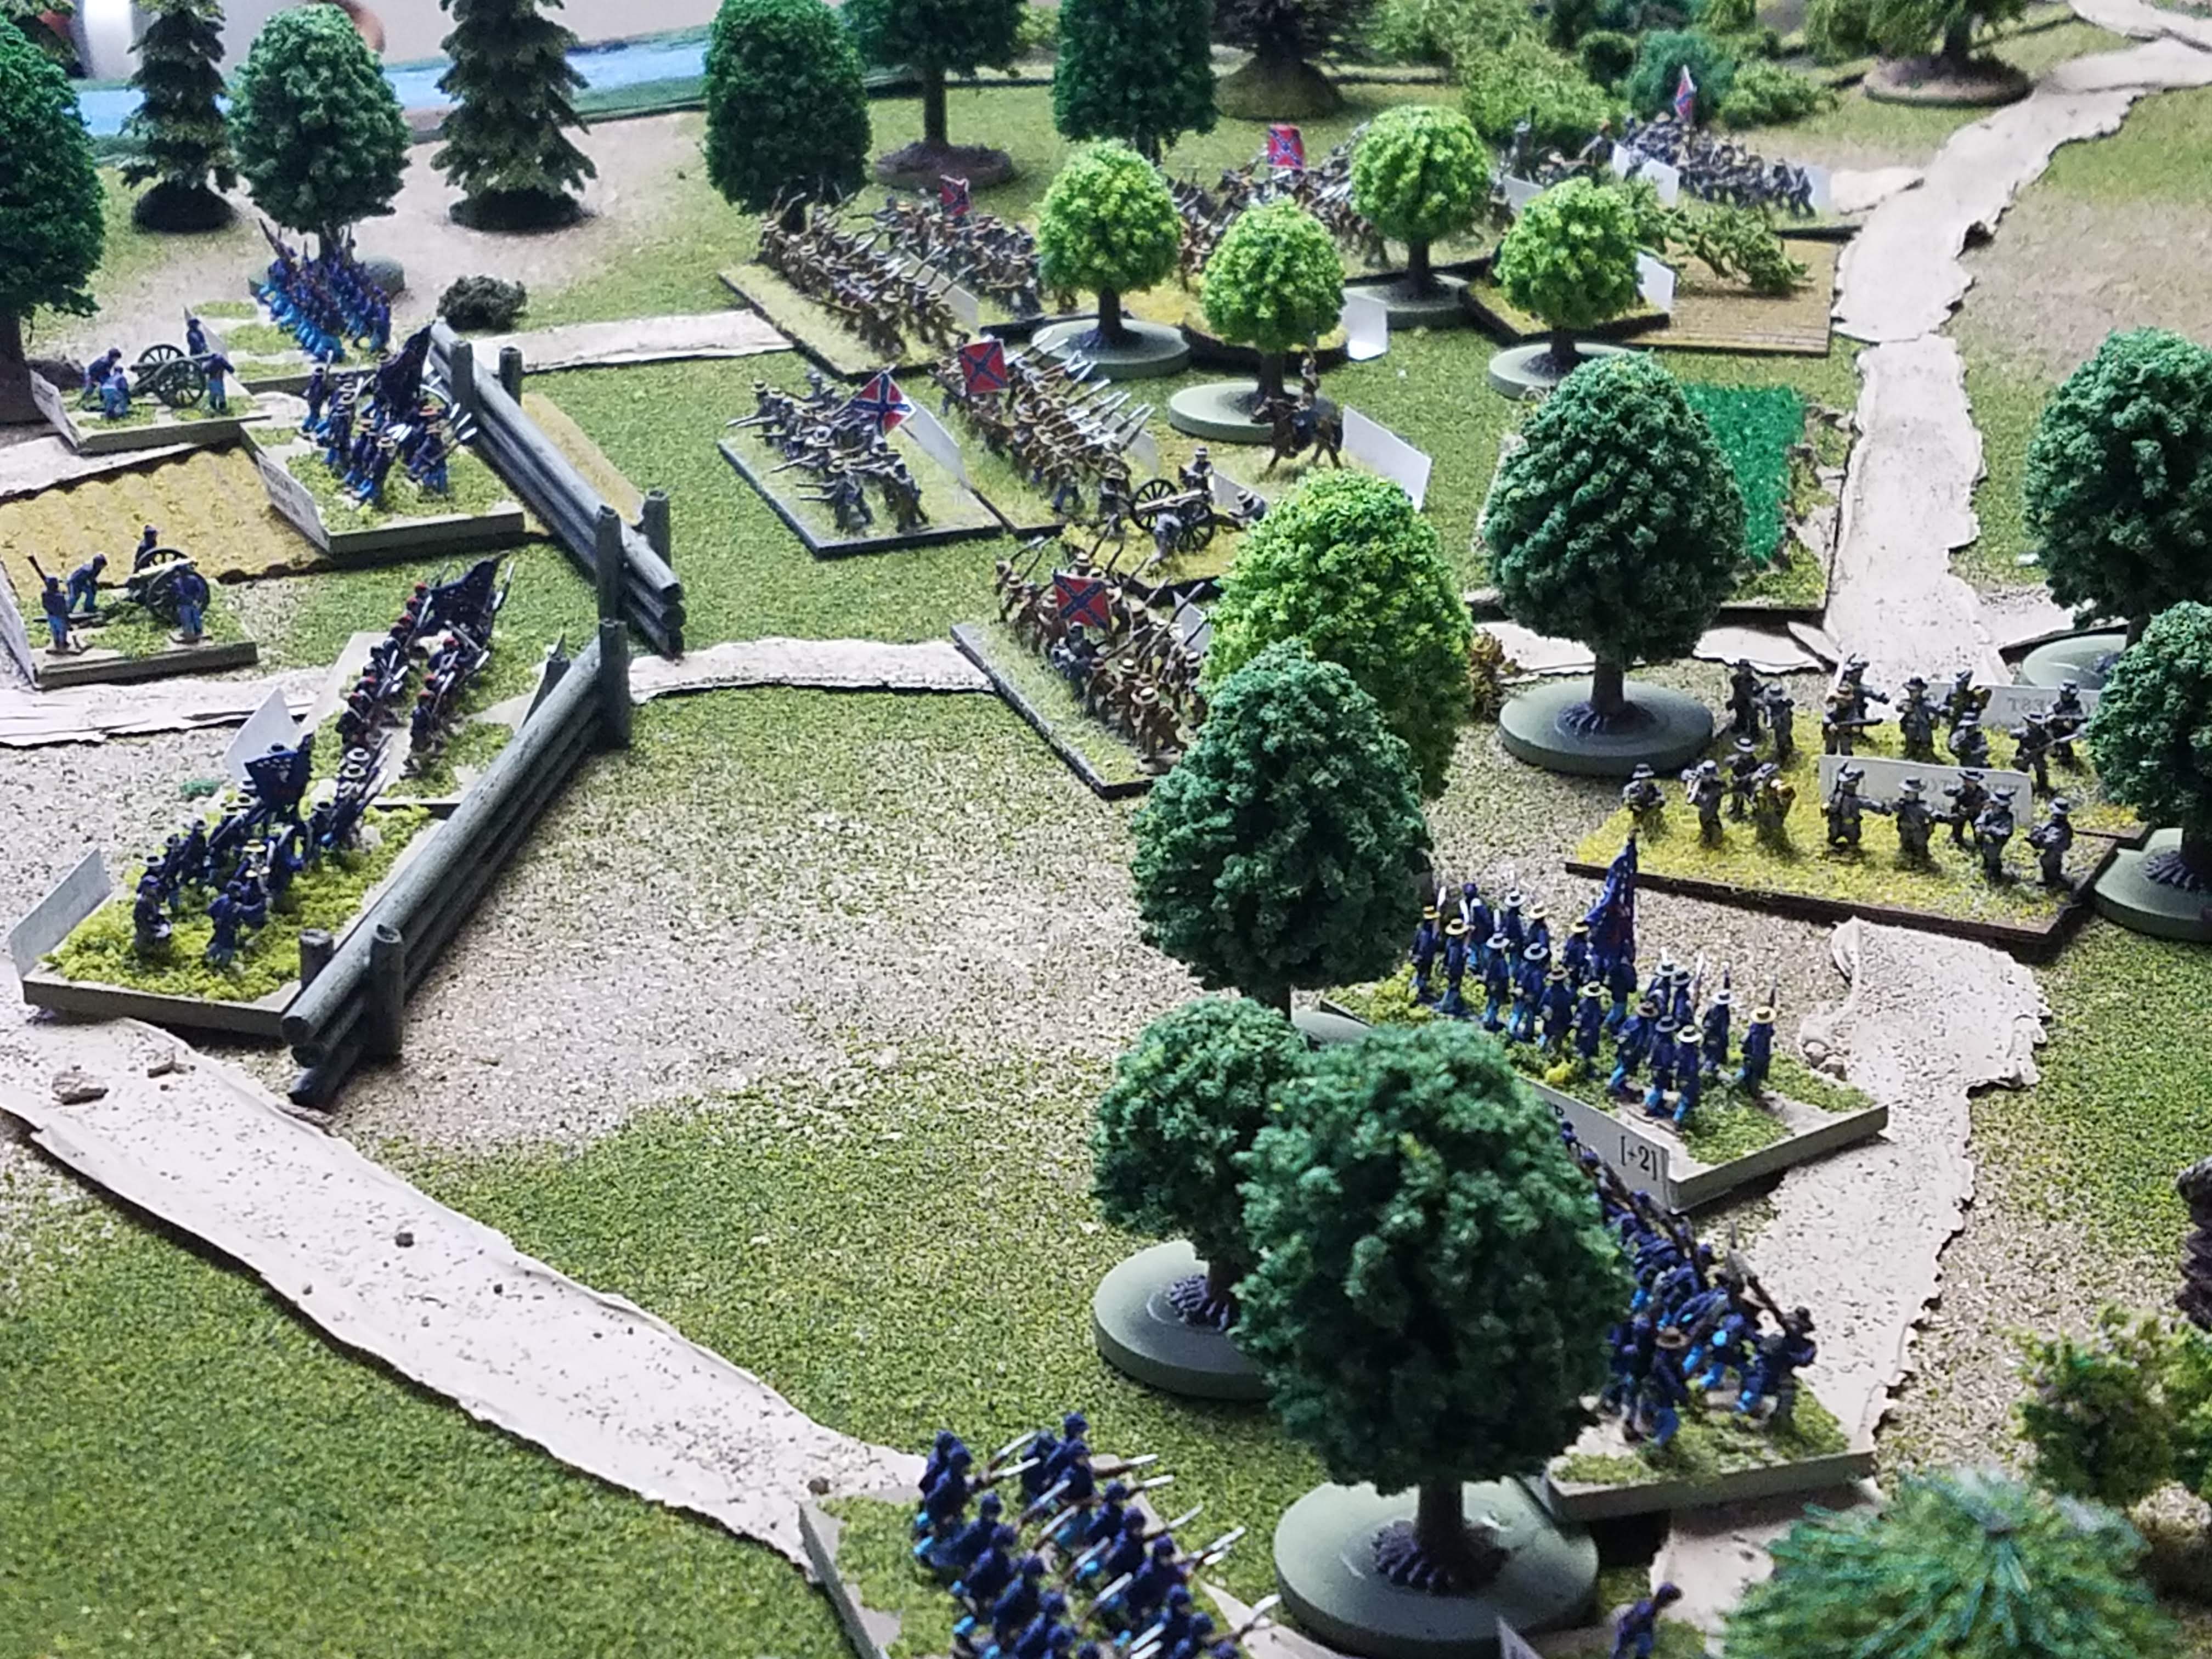
| Dave (standing) playing AS Johnston. Battlefield looking South. |
I deployed the Union forces almost exactly historically, using a map from the American Battlefield Trust website
here. I did place Sherman's Division in reserve with the intent to form a powerful second line for when the jailbreak occurred at the sunken lane.
Dave deployed the CS forces roughly historically, with an eye to pin down valuable Union divisions on his left to keep them from reinforcing Pittsburgh Landing.
 |
| The Confederates under Polk and Breckenridge move up to their diversionary effort against my right. They're about to make contact with Prentiss' Division after smashing into Ignersoll's Cavalry at the 7am turn. |
Dave is getting the hang of the modifiers and the unit capabilities for the first few turns. He commits a modest number of brigades and batteries (Dave is an artilleryman by trade!) to "probing" the sunken lane and a couple of CSA Brigades are sent packing, but Dave is proving skillful at using his artillery to silence my gun batteries in support. This will make breaking up Dave's attacks that much harder! Once he's able to mass forces against the sunken lane, it'll be curtains for sure!
 |
| Probing against the sunken lane occupied by Hurlbut's Division reinforced by Woods' Brigade and an independent battery of guns. |
 |
| meanwhile McClernand's Division on my far right monitors the Rebel advance |
DAve is massing the CS forces along 2 avenues of approach directly towards the sunken lane and the hornet's nest crossroads, just north of Shiloh church. I'm nervous that I won't be able to hold out against a 2-pronged assault. It's not looking good!
Dave launches some limited attacks against Prentiss' Division near Shiloh Church and Prentiss is pressed back.
 |
| Rebel attack against Prentiss with 2 x Divisions! |
Unbeknownst to me, Dave is hamstrung by how he can spend his points. Worse, Polk, one of his Corps Commanders is "inept" and there are restrictions on how he can bid his points. It makes Dave's point bidding to "activate" Divisions that much tougher. Meanwhile I have US Grant (for now...) with his 20 points. I have no trouble bidding 6 points, or 5 points to multiple divisions where i need them. I can also "afford" points-wise to dedicate points to control the turn clock, although I'm rolling badly for the first few hours and rarely able to.
 |
| The Rebel right developing the attack against Hurlbutt's Division in the sunken lane. Note the brigades "stacked up" behind the front line along the road in the background. Dave mentions not having enough space to develop an attack. In my opinion he's not doing too shabby with what he has up front! Meanwhile the Sunken Lane area has absorbed and fought off 2 large-scale rebel attacks, one of which is quite determined, already. |
 |
| A better picture of the assault against the Sunken Lane. I'm holding with 4 Brigades but it's going to get tougher as Dave brings more and more brigades up. |
 |
| Sensing the time is right, I move up Woods' Brigade and the extra guns. It's perfect timing. Even though Wood is "-2" strength, he is able to extend my flank a bit more into the woods and prevent the entire position from being flanked. The "Zouaves" on the right are Veatch's Brigade - they would distinguish themselves many times today. |
 |
| In the center at the 10am turn, I'm noticing that, while Dave sends a few Brigades forward, he is not striking with Polk's or Breckenridge's Divisions. Something is up here? |
 |
| 3 direct assaults against Hurlbutt's position are beaten back. The REbs shift west a bit and try their luck against the other side of the sunken lane. This is 5 direct assaults so far and counting! |
 |
| THe Sunken Lane position starts to buckle under repeated Rebel assault. They're about the gain a foothold in the position. |
 |
| Grant has a bad habit of getting in the way...remember that...Note Veatch's men standing like a stone wall! wait er.. |
 |
| 10am turn. The action at the Sunken Lane is turning into a meatgrinder and numerous Brigades are being pushed back. By 11am, it's obvious where Sherman's Division will be committed to - the line immediately behind the Sunken Lane. The Rebs on my right are just there to hold valuable units like W Wallace and McClernand's Divisions on the right and occupy them. I've been played!! |
 |
| By noon the battlefield is heating up. Dave still is intent on taking Shiloh Church and overrunning the Hornet's Nest. He pushes Prentice back to the other side of the road and seizes all of the woods around Shiloh Church. This will have important implications as the Rebels from Hardee are advancing towards the edge of the sunken lane on their right. In their withdrawal from the Church position, Prentice sees an opportunity and a Brigade smashes into Hardee's HQs, killing him. |
 |
| Prentice's last stand at Shiloh Church before being pushed out by Rebel attacks. |
 |
| Dave's having more success against the left side of the sunken lane, except for attacks against Veatch's Brigade! Although fatigues are starting to build now. |
 |
| Prentiss evacuation of the Shiloh Church position is complete. Retrograde operations are some of the most difficult military operations to undertake. In AOF, that is definitely the case. If you time it wrong, the enemy will literally over run you while you're moving with your back to them. You need artillery to cover your withdrawal - if possible. Note the orientation of the guns. Union Guns firing into the flank of a Rebel Battery. This is at the 12pm hour right as a Brigade from PRentiss' smashes into Hardee's HQs, killing him in the struggle. |
 |
| Dave appoints Hindman to command the corps after Hardee's death. "Sorry sir - we dont have time to draft formal orders. You're needed with the staff up at the sunken lane, past the church. You are now in command of the corps. What are your orders? Dave loses 2 points to bid. War is hell! |
By 1pm, Dave is getting "dangerous" with the rules and flanks the Sunken Lane masterfully, after pushing Wood's Brigade through the woods. He's using his artillery really well at this point and movement by my elements in the Sunken Lane position are getting beat up pretty bad by artillery fire. I feel it's time to evacuate the position, having held on there and absorbing numerous Rebel assaults (at least 8 by my count now), counterattacking, and being pushed back, it's time to leave as Sherman's men have formed a new line behind the position.
 |
| After 5 hours of defending the Sunken Lane, Hurlbutt's Division needs to retire. All of the Brigades are fatigued in some way and I will need them for the follow on fight to come! |
 |
| Dave's starting to move on his left now, having forced Prentiss back to the "Hornet's Nest" |
 |
| The Union will spend no less than 24 priority points over 3 turns to "sort out" the mess of Brigades in the center as I shift W Wallace's Division towards Sherman's new line. I make the unfortuante decision to sacrifice Prentiss' men. I'll bid 0 points with them and they'll remain at the Hornet's Nest as a bulwark against the tide of Rebs coming towards us. |
 |
| Wallace and Prentiss' men all mixed up. Prentiss will take up position to the right of this pic |
 |
| Note the line forming at bottom of picture - Sherman's Division forming a new line. Prentiss and Wallace are tangled up. McClernand is starting to move north and will anchor the UNion right. |
 |
| By 3pm the new Union Line is shaping up. THe Sunken Lane position is evacuated and Grant moves up to Sherman's line (important) to bolster the defense. |
Dave is gathering combat power in the Sunken Lane now. It's important to note that he's only about 8inches (through woods) from Pittsburgh Landing now. Maybe 10 but still. He needs to start chipping away at the Union Line. Sherman launches a desperate counterattack against the far Rebel right and the USS Tyler makes its presence felt and shells the REbel columns as they flood north to attack Sherman. The battle is getting extremely close, now.
 |
| Dave is making more aggressive use of AS Johnston who, remarkably, is not dead unlike the real battle. Sherman and Wallace's line is holding fast, but repeated attacks against the remainder of Hurlbutt's Division pushes them behind Sherman's line. In an incredible and untimely reversal of fortune, and probably payback for the assault against Hardee's HQs, Grant is literally directly behind a Brigade that is forced to retreat. Grant's HQs is assaulted by a Rebel Brigade and he along with his staff are taken prisoner! Union points will go down to 10 as Grant's CoS is now in command... |
 |
| Poetic Justice - the capturing Brigade is from Hardee's Division... This is the scene where Grant is taken down! Fatigued rebels crash into Hurlbutt (who, remember was BEHIND the fresh troops from Sherman's line) and push them back into the arriving column from Lew Wallace. |
 |
| THe final Union position... It's 4pm (5pm in real life and we had to call the game) |
 |
| Veatch's men score an impressive victory and push back another Rebel Brigade. They'd distinguished themselves throughout the battle. |
Post Match Thoughts (there are many)
WOW what a battle! We started at 1100 hours and ended at 5pm when Dave and Ken had to leave. This was an epic game that played and read just like a Civil War battle narrative from a history book or personal account. I felt completely immersed in the game as the Union Commander, and felt the weight of my mistakes (there were many!) and decisions throughout the game. Bidding is tough and literally watching your opponent take the initiative in a crucial section of the battlefield because you were "cheap" and only bid 4 points was devastating!
The use of artillery in the game is genius. Artillery may make "interrupt fire" possible (fire by the defending player) to break up an enemy attack, just as it was historically used. Key considerations are the placement of your artillery throughout the battle to support your attack or defense. Dave got a devious satisfaction out of bringing his guns up to point blank range to pry stubborn Union units out of their positions.
There are some other outstanding and novel features in AOF such as the free facing change/adjustment and the whole use of points and bidding allowing you to do certain things like make additional movement at the end of the turn (if you had points saved up). This is a game where you spend much less time looking at rules, and much more time fighting.
Additionally, movement is not at all fiddly. It's loose enough to allow you, the Army General or Corps Commander, to focus on the movement of troops and establishment of positions, NOT movement rules.
Personally I love the unit labels as I think it's much more impressive and flavorful to be pushing "Veatch's Brigade" around instead of "a Union unit" around. Surprisingly, this makes a big difference and is making me think twice about labeling units in other games.
Game Length
Shiloh is a tough slog and the mostly-wooded terrain means units are moving only 4" throughout (Dave thought it was 2"...yikes...divine intervention?) which slowed the game down considerably. Plus Dave was completely new to AoF and this was my second or third game (if you count the 2 x bouts of Shiloh we played last year). If I had a "beef" about anything (besides my own fumbling of command and getting Sam Grant captured!!!) it would be the length of time it takes to play. "Grant"-ed [pun] Dave and I are newbs, we were fighting from 11am to 5pm and we still had 2 turns left to play through. It's hard to find 4 hours to play sometimes, let alone 6 or 7 hours. That is not a ding against the game, just an observation of mine - you need time to play a bigger battle.
Bottom Line:
I think that AOF really captures the essence of command at the ACW / Army level and the combat is perfectly simple, and suited to big engagements, if you have the time, friends, and units painted. This is one of the most era-evocative rules I've ever played. I enjoyed the game very much and we will play more.
That concludes ACW month here at Sound Officers Call! I played numerous ACW battles (including Shiloh with the Neil Thomas ACW rules, and some not even blogged about like Blucher-ACW Variant)
March is "Seven Years War" month and the SYW painting has already begun! Stay tuned and watch this space!


 Dave launches some limited attacks against Prentiss' Division near Shiloh Church and Prentiss is pressed back.


Well what a cracking game and you all certainly got your moneys worth so to speak. A classic scenario that I've played using the excellent 'Bloody Big Battle' rules, but only the first days action. Hopefully when lockdown eases here in the UK we will be able to resume these sorts of games again.
ReplyDeleteThanks Steve this was a blast. I'm hopeful that you all can resume F2F gaming soon. It was a great time and a fun, tense slugfest!!
DeleteYOU lost Grant at Shiloh? This is a big blow to the Union. Your battle looks good and tense, Steve. Having fought over this ground many times in the past, the terrain, situation, and combatants are well known to me.
ReplyDeleteReally nice job telling the tale!
Thank you Jonathan. Even more ironic that the capturing brigade itself was from Hardees Division because I overran hardee's corps hqs!! Theyll never let me live this one down.
DeleteIt was a splendid battle and a great time. The rules are outstanding.
Absoutely superb sir!
ReplyDeleteWhat a game - those 10mm figures look so dynamic and visually exciting for ACW.
Brought home to me the dynamic nature of these rules - that turn clock excitement, and the commander traits, makes it more than a standard wargame.
There has to be a way to steal this system for other periods...and could it work for WW2 division level actions I wonder?
Thanks Darren it was epic! The rules were great and controlling the turn clock really made the game so mkuch more exciting than just move and shoot. Suddenly there are resources to manage and priorities to dole out. There is much to do and manage but it all works very well on the table.
DeleteI think as long as you could get the clock and points to interact with the play sequence you could pull it off for ww2. Would make for a really intense and hard hitting game.
Steve, a lovely looking table that brings the scope of this battle to life and what a great way to play out the month.
ReplyDeleteIt is a particularly terrain dense battlefield, which obviously contributed to the long playing session, I assume a more open battlefield of the same size might shave around 2 hours off that session?
I have a Shiloh boardgame (unplayed) waiting in the wings, you have just moved it up the queue :-)
Norm,
DeleteJust as long as you dont let General Grant get captured:)
This was a great game and the perfect scale that we were looking for.
Funny we actually commented that a more open battlefield we would have finished more quickly. Poor Dave got confused from the QRS and moved units 2" instead of 4" in the woods!!
A great game, well told Steve. And the figures look great. What make are they?
ReplyDeleteI’m not surprised by your comments about AOF giving the right feel for an army-level ACW game. When I’ve played it, it had an exhausting intensity to it. That may partly be because it was a new system to get my head around, but I think it was also because it makes you concentrate mentally and concentrate your efforts.
Cheers Nundanket, figures are Cracker Line and GHQ mixed. We felt this was a nice compromise between the 6mm and 15mm.
DeleteWow you hit the nail on the head - we were exhausted after playing. We were musing about Gettysburg and Antietam with lots of Corps and Army generals on both sides. How exhausting a game like that must be!
We did Gettysburg. The whole thing. Except we decided by the end of day two that the Confederates had shot their bolt.
DeleteThe whole thing! To me that's the ACW wargamer's ideal. Its like Waterloo or Wagram or Leipzig for the Napoleonic gamer! My hat's off to you and your group, sir!
DeleteA great post which I really enjoyed reading. I have just bought a copy of Altar of Freedom and I am really looking forward to playing it (even more so now!).
ReplyDeleteBest wishes,
Jason
Thanks Jason! My group has really enjoyed AoF so far. Were taking about a larger joint project like Antietam or Gettysburg next but we'll play more small battles to continue to get the hang of the game. It's alot of fun.
DeleteThanks Steve, that is me signed up for this one! Right up my street.
ReplyDeleteJay
Cheers Jay, you wont be disappointed sir! AoF is a great set of rules.
Delete