Dave was over for our bi-weekly Friday night game and this week we tried out "
This Hallowed Ground" American Civil War rules from the "
Jay's Wargaming Madness" blog. I've played quite a few games of Jay's "
Empires at War" Napoleonic rules and I love them for the simple fact that they are smooth and well-playing rules, solid fun and deliver a crunchy game that ticks all the required boxes for me. EAW are quickly becoming my favorite Napoleonic rules out there and look like the Napoleonic successor to THG.
 |
| Jay's Wargaming Madness Blog - a treasure trove of stuff! |
For the scenario I pulled my "old reliable" scenario off the shelf AKA Scenario #4 from One Hour Wargames "Take the High Ground." This is a great scenario for testing any rules set as it features timed reserves and a nail-biting defense with the defender starting atop the hill with 2 units. The full weight of the "blue" army is bearing down on you, and your reserves show up at the opposite end of the table, most likely being committed to counter-attacking the hill.
 |
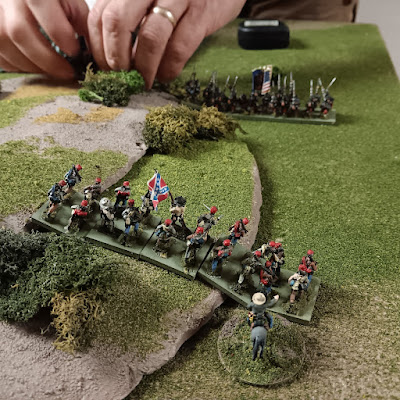
| Rebel units atop "Stony Top Hill" |
So - what happened? Dave and I diced for sides. I ended up with the Rebels and "force composition 2" from OHW, so 4 infantry units, 1 Zouave unit, and 1 cavalry unit (!). Dave ended up with an enviable force consisting of 1 artillery battery, 2 Zouave units, and 3 line units. We made our Zouave units "veteran" in terms of the THG rules so they have the "tough fighters" special rule.
 |
Stony Top Hill gives cover to troops on it.
|
I like the way attrition works in THG. Even units which have taken a beating can still dish out some punishment, and your units have lots of capability. Tough in melee (
if you can press the charge) and tough in shooting, but you take the risk of becoming disordered from shooting and that's bad!
Dave, in typical yankee fashion, starts his assault off slowly and cautiously. He's seen the ranges and knows the rebel rifles are primed and ready to shoot!
 |
| Union troops moving down the road. The Zouaves are advancing against my right |
Dave moves up into shooting and at long range units still have a good amount of firepower. Dave's artillery also gets set up and ranges in on my troops on the hill. Eventually, a combination of small arms fire and artillery drives my troops back! In actuality, they failed a second morale test while already disordered and are forced by 6". I love this rule!
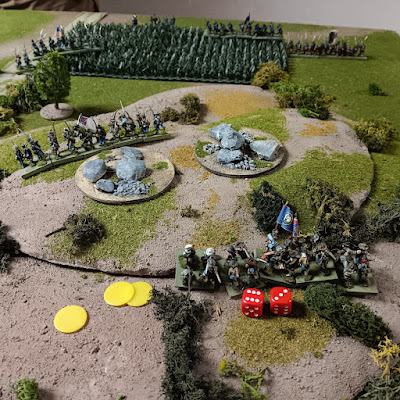 |
| Reb troops on the other side of the hill with 9 hits and 3 (!!!) disorder markers. Disorder markers are removed one per turn and you suffer from CDS when you are disordered (cant do sh**) |
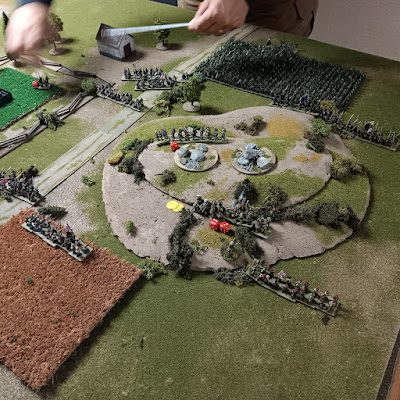 |
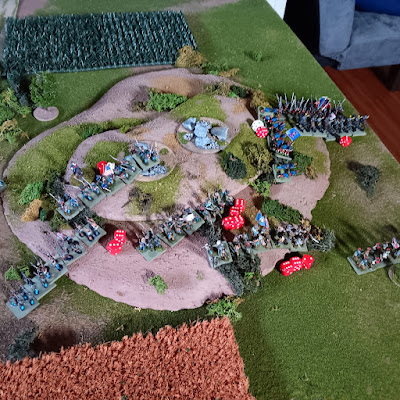
| The battle so far. My troops from bottom, dave's yankees at the top. Dave hasn't gotten on the hill yet, preferring to shoot the hell out of my before storming the heights! The unit in the lower right are my Zouaves! |
 |
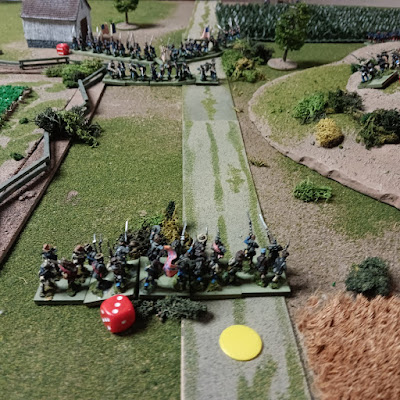
| A sharp firefight breaks out on the road! Dave's yankees trade fire with my rebels. See you in hell, Billy Yank!!! |
 |
| Disorder! |
 |
| My Zouaves on the hill on my right flank. Dave's are creeping up |
The constant shooting against my single regiment atop the hill is taking its toll and they are now "worn". THG has grades of morale much like Fire and Fury when infantry units take 8 hits they worn, 16 hits they are shaken, and 24 hits they are broken. This significantly affects their morale rolling and ability to withstand attacks without becoming disordered and eventually falling back. The whole thing is clever, simply and just works!
 |
| surveying the carnage the next morning - Dave and I tried an experimental charge with my cavalry. First they failed their pre charge order test (some orders, like charging, require a test regardless of unit status or casualties) |
 |
| It says alot when you note "they're still battle worthy they "only" have 9 hits!!" |
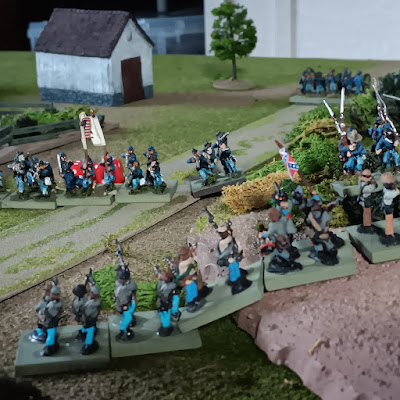 |
| Firefight on the road. Note the union troops off right on the hill. Dave ended the game with 4 units on the hill. |
LESSONS LEARNED
So what did we learn? Well we both loved This Hallowed Ground and will return to them for more ACW clashes in the near future. While the guns are still warm though, and both sides are counting their casualties, there are lessons to be learned from this engagement!
KEEP YOUR DISTANCE! Units launching a charge from within 8" do not suffer from closing fire in THG. This is huge because you get alot of dice at that range with small arms. If an enemy unit is massing against you within 8", give ground or suffer an attack going in against you without being able to deliver a closing volley!
MONITOR YOUR UNITS: I lost track a couple times of the unit status. I'm going to think on how best to make Worn/Shaken units but I was treating some Shaken units as "worn" and that's totally my fault for being careless/tired. A nice reminder during the heat of battle like a marker would be helpful.
SHOOT EVERY TURN: You need to try and force a disorder on your opponent, especially at the point of decision in the battle. A disorder result at the proper time can be crippling. This is also why placing your guns in an advantageous position where they can sit and shoot the entire battle is better than losing a few turns and not getting to fire them.
PLACE COMMANDER WITH THE BAD TROOPS: The Zouaves received a natural reroll for their "Tough Fighter" abilities and so the commander was kind of wasted on them. I should have placed them with the worse troops along the road where his reroll could be better utilized.
THE PLAN: All in all, I probably should have been more mobile with my defense, IE moving the 2 regiments back below the hill top where they would not have taken artillery or small arms fire, then counter attacking with the Zouaves and fresh troops. Dave's plan was a good one which was to soften up the defenders then launch a brutal bayonet assault. All good stuff here and it was blast regardless.
After playing I did have some questions which I'll email to the author - namely:
- do troops in THG pick up a disorder after losing a melee? I am assuming yes but could not find the answer (it was 11pm and I was a bit tired so I could have missed this - will look again)
- It looks like there is a rule whereby the winner of a melee can make 4 x free attacks if the loser retires. I am assuming this is an attack at 4+ like a regular melee To Hit, and that the loser makes a melee save (6).
- is there a risk to attached commanders from fire or melee?
So there you have it, a great fun game for a Friday night and one that we are keen to play again. I'll give this a try with my Chickamauga scenario soon. Next game we may go back to World War II with some Battlegroup Fall of the Reich or Battle of the Bulge gaming!


Nice visuals and narrative .... it felt like there were more than 6 units per side on the table, so a good substantial game indeed.
ReplyDeleteThanks Norm it was a lot of fun to write about as well.
DeleteWhat a great game there and as Norm has said, it felt a much bigger battle. Love the photos and nice post game thoughts too:).
ReplyDeleteThanks Steve it's amazing how good a game you can get from just a handful of units or elements on the table!
Delete