Ken and I are supposed to play a game of "Sabre Squadron" this weekend so I thought I would use the micro armor from that modern Flames of War game and take these new rules for an introductory spin! You can read about Sabre Squadron
here.
This game featured 1 American M60A3 platoon against 2 Soviet T-64 platoons (6 AFVs total). The Americans are defending a battle position. Both sides have artillery in support. The Americans have 1 platoon of 155mm artillery (self propelled) and the Soviets have a battery of 122mm Self Propelled in support.
What follows is my account of the battle in the picture captions, with a specific emphasis on the mechanics of the rules.
 |
| American armor awaiting the "red hordes" |
The first thing you'll is that Sabre Squadron has a very non-standard sequence of play. As the active player, you select a range of options, each with varying degrees of restrictions. For example you can move a "transit speed" which is hauling a** and moving at 150% of your movement. Or you can fire and move, move and fire, etc. The next phase the enemy gets to either request, or actually call for his artillery, which can really play hell on your plans. Next you handle some administrative "tidying" with morale status.
It takes some getting used to, but I really like it. Much better than a linear, more predictable game.
 |
| The "Red Hordes" 3 T-64 disguised as T-72. (actually they are T-72 but you get the idea) |
 |
| Americans went first. The "ranged in" marker was a Soviet request for fire. |
 |
| Ivan enters the battle area! |
The movement values are generous but not too generous. So far, so good!
 |
| gratuitous shot of a tank. |
 |
| another gratuitous shot of a tank! |
 |
| US forces take up firing positions. Good shooting (and some lucky rolling) and the US player KO's 2 T-64s. |
Shooting. I love how the author handles shooting. As I was telling Ken, I didn't think I would like the D10 being used, but it works great! The modifiers are more subtle than when using D6 (I think I read 10% instead of 17%?). There are modifiers for the firer's state and the target's state that are pretty much what you'd expect but have a dramatic impact on your ability to hit the target. Some of those modifiers are:
Target not visible at start of your turn, (
so you were moving him and just spotted him during your movement) Firer suppressed, Target at long range, and suppression.
Here's something different. "Firer and/or target using action option #4" which is stationary firing. So you get a bonus for staying still to shoot - and the bad guys also get a bonus to hit YOU when you stay still to shoot. I really appreciate these subtleties that the author put into the game. They show thought, research, and an appreciation of real-world tactics.
 |
| Artillery plasters the Soviets |
Something else near and dear to this former redleg's heart? The artillery. Artillery has a dramatic effect on operations - and best of all - you call for it during the enemy's turn. So a well thought out fireplan can really wreak havoc on the enemy's plans. In this game, those T-64s advanced into a wall of 155mm HE steel and 1 round actually knocked out a tank and the other tanks of the platoon were suppressed. Granted, it's not very easy to do with HE in the game, but it was good rolling on the American part.
The Artillery stays in place for an agonizingly long amount of time so it can also affect the maneuver plans 1 turn down the road as well. So you have enormous flexibility in using it and it can be used for its intended purpose. Destroy, Neutralize, or Suppress the enemy (all 3 are possible) and if you want to get creative with your artillery you can - like using artillery to "turn" an enemy's flank or force him into an obstacle belt!
 |
| Soviet turn they KO 1 M-60 |
Killing tanks isn't incredibly easy but it's not impossible either. The author uses variable protection which can increase or decrease your armor protection by a few points each time you're hit, Sometimes these points make all the difference in the world and can be life or death for your tanks. I really like that, as in armored warfare, nothing is certain or given. The right shot in the right place with the right physics behind it can knock out a tank.
 |
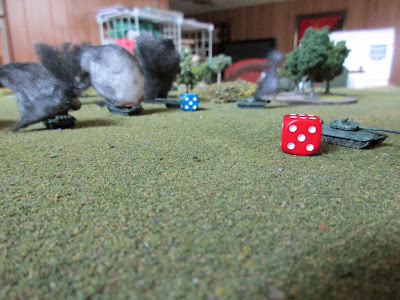
| American artillery plasters the Soviets. 3 155mm howitzers from a platoon fire mission bring enough heat down to paralyze ivan's advance for the time being. The blue dice are "suppression" markers. There are a good assortment of markers in Sabre Squadron. They are optional I think, but very useful. I should have cut some out. |
 |
| Suppressed Soviet tanks driving straight through a nightmare! |
Morale rules are brutal and unforgiving but I appreciate them. If you lose people or equipment, you test morale. You continue to test morale and reduce morale states until you pass a check (like Snappy Nappy), and to let you know how awful that can get - there are 5!
There are rules for company morale vrs platoon morale but I didn't get that far as I didn't have a full company on the table. The author wants you to have at least a company command element on the table to help with rallying though, so perhaps next game will be bigger.
There are also rules for ATGM, "Confusion" (which occurs when platoons occupy or overlap the same space! So cool - when do you see that in modern rules??), and infantry combat in the "rapid deployment" rules, which are the author's introductory rules that are available for free.
The real version of the rules are coming out in a month or so! Sign me up for a copy!
 |
| This platoon this guy belonged to doesn't exist anymore. His morale rolls didn't go so well so he's on "withdraw" orders until I can rally him. |
 |
| Ivan's next turn he would move out of the barrage area. |
 |
| This lone tank has rallied! |
 |
| The Americans fire into the Soviets but fail to hit anything. They beat a hasty retreat from the battle position for fear of Soviet artillery landing on them! |
 |
| the advance continues |
 |
| Ivan's tanks are still suppressed and that's a game. |
Final Thoughts:
So as you can tell, I really enjoyed playing Sabre Squadron and am looking forward to playing it in a bigger battle, hopefully with more "goodies" like infantry, ATGM, and of course more artillery.
I think these rules are really something special and definitely worth trying out at least once in your gaming career.
The author has a real appreciation for tactics and a real respect for the weapons systems that are represented on the table. They were easily learned, even by me, so that's saying something.
If you are going to play it, read up on your field manuals. Failing to do that, take a covered and concealed route to the objective, and remember -
if you can be seen, you can be hit. If you can be hit, you can be killed!


Wow Steve. These seem to be exactly what I am looking for in order to do Fire Team and old CHallenger scenarios - I love the review.
ReplyDeleteI can use 1/300 and also get the 20mm out on the table. Really sounds like a fantastic ruleset. There's another copy sold :)
Darren,
DeleteI actually thought about you when I was playing the first game as there is just enough resource management and things to keep track of that you should feel like a company commander on a Cold War battlefield.
I played these with 6mm microarmor but my intended scale of choice for them is 15mm or 1/100.
As I said in the post - these rules really are something special.
I've been reading through the rules too - and echo your sentiments. Some nice, well thought out stuff going on there.
ReplyDeleteI think the author has a good appreciation of how things are supposed to work on a battlefield. That's a compliment I have not personally given to many rules writers.
Delete(I'm supposed to watching a movie with the family...I'm going to sneakily read the rules as it's on ...ohh Bad Dad... LOL)
DeleteYou will receive no judgement on this site! :)
Delete