So trying to decide between Panzerblitz in Mini and a different "operational" rules set, I said "what the hell" I already had the terrain set up for Neil Thomas' Scenario #7 "Bridgehead" so I tried it with World War II forces instead.
This scenario saw 2 similar battalion sized battlegroups with each force consisting of:
3 Infantry Platoons (on a 3" square Volley & Bayonet sabot )
2 Tank Platoons (same base as aboveT-34 and Panzer IVh)
1 Anti Tank Gun Platoon (same base as above)
I had some thoughts after the Union's loss earlier in the day so I figured I'd try it again with significantly more mobile forces, seeing as how my AAR comments from this morning said I should expand the bridgehead as quickly as possible. Tanks should be able to get that job done, right?
Soviets got extremely lucky with the dice rolling this game and every single platoon came on from the same spot. Which was great for them, not so great for the Germans as they were fighting a constant, mobile battle. This was some tough fighting, with see-saw counter attacks, cuts, and thrusts, exactly like you read about in Eastern Front battle memoirs!
The Germans elect to have a tank platoon starting on the board.
 |
| Soviet armor to the east spotted! (actually, it's NOT spotted, as spotting range is 12" in NT's rules). |
Germans brought on Armor and AT guns first (naturally) as they needed some muscle and some mobility to hold the bridgehead. The Soviets are thinking the same thing.
 |
| German tank reinforcements crossing the bridge. |
So 2 tank companies start to duel for control of the bridgehead. The Germans try to continue the running battle to the north, expanding the bridgehead as far as they can in an attempt to draw off Soviet armor. The gamble partially works but the Soviets are keen on cutting the road.
 |
| Small "village" or collective farm. This will offer cover to infantry or AT guns inside. |
 |
| The Soviets are aggressive and push their T-34s right up to the bridge in an attempt to cut it. |
German and Soviet counter attacks are the order of the day here and the 12" mobility of the tank platoons is welcome on these flat, open spaces!
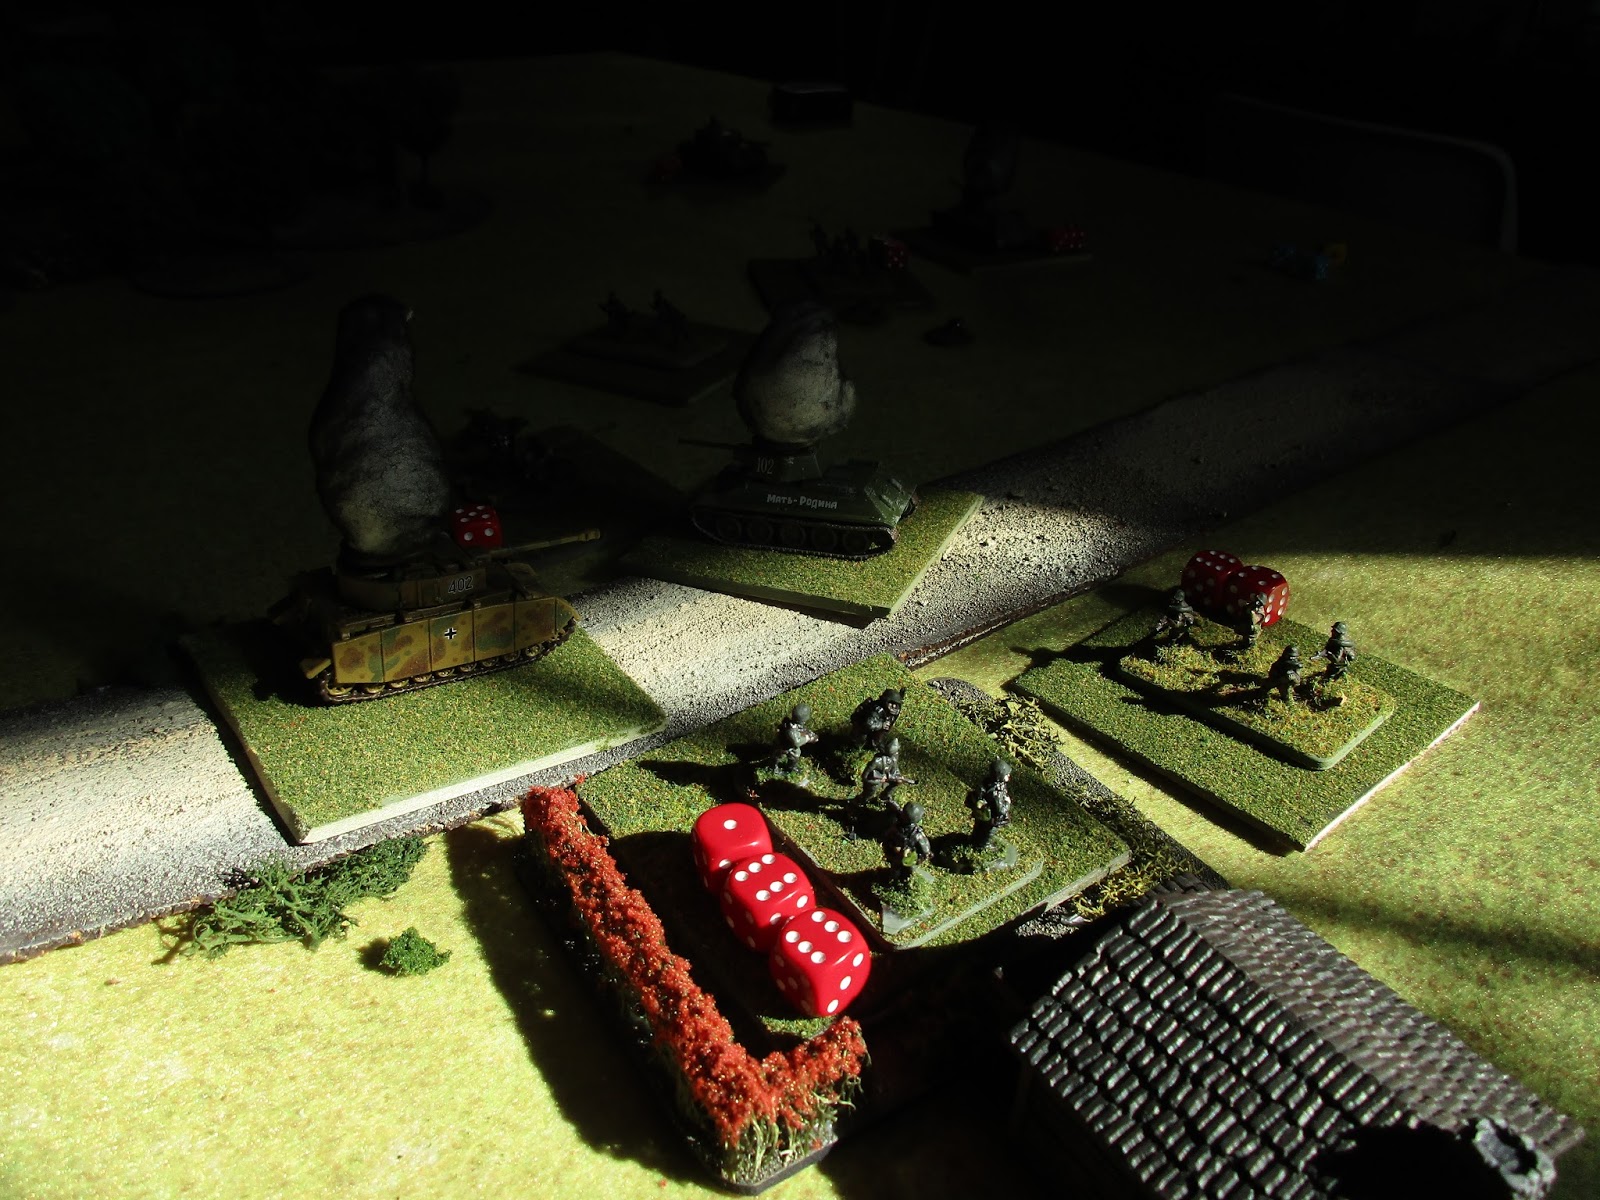
The Germans push up their AT platoon and move it to the "shoulder" of the penetration, immediately left of the bridge to anchor it. The first of their infantry is marching up as well, and the Soviet tanks are still threatening the small expansion. One German tank platoon is knocked out west of the village and the T-34s continue to march!
 |
| German reinforcements moving up. The armor battle is going on, then it will be the infantry's turn - a whole new fight. |
 |
| German infantry on the road southwest of the village. Tanks Herr Hauptmann! |
 |
| tough fighting and the AT platoon knock out a Soviet tank platoon from west of the village. The battle changes shape now and instead of fighting north to south, the Germans are fighting from west to east as the Soviet infantry fan out over the hill. |
 |
| The German AT platoon scores a kill! |
 |
| German armor keeps trying to move west, and the Soviet infantry keep them just within contact. The bridgehead's security is still very much in doubt as an entire Soviet infantry company is bearing down on 2 German infantry platoons and an AT platoon. |
 |
| the fight for the village heats up. |
The village is proving to be key terrain here as it offers cover for units inside of it. In this case, it's traded hands 4 times over the course of the battle! It's also a graveyard for German infantry as each time a platoon enters it, Soviet infantry platoons engage them. The Soviet armor moves out to chase the German tank to the northwest.
 |
| The limit of the German advance. Eventually the panzers had to turn and fight. |
 |
| Soviet infantry moves into position to chase down the German infantry as well. |
 |
| More German infantry in the village. Note the Soviet infantry above them. |
 |
| Lucky shooting on the part of the Germans and not so lucky shooting on the part of the Soviets. The quick and dead! The German armor licks its wounds but the Soviet infantry platoon would destroy them next turn. |
 |
| Herr Leutnant! We have 14 hits!!! |
Once the battle to the Northwest is resolved, Soviet infantry turn their attack back south against the German infantry and AT guns that are left next to the bridge. They throw themselves at the German near the bridge and destroy one infantry platoon, themselves losing an infantry platoon as well. Then turn 15 creeps up, with 1 German AT platoon left on the field! So I suppose this is a German victory as the victory conditions stipulate that no units can be north of the river after turn 15. So while this battlegroup is effectively put out of action, the Soviets failed to dislodge the German attackers, so this is a German victory.
 |
| Final dispositions. The Soviets break contact after this. |
Lessons Learned: I think I proved the lessons learned from the last battle - a mobile and hard hitting force can expand the bridgehead as quickly as possible, forcing the enemy to attack across a broad frontage. If the enemy can focus and concentrate along a narrow front, then the bridgehead can be reduced much easier. The German armor thrusting to the northwest forced the Soviets to go after them. This allowed the infantry to take up positions near the bridge and "mop up".
The Soviets should have concentrated their forces more effectively instead of trying to stop the German expansion. Eliminating units one at a time if you're the "Red" player allows you to cause enough of a threat that any tanks gallivanting around will be forced to return back to the bridge.
This was a great game and reminded me of some panzerblitz games I had played in the past. Very mobile and a very tough fight from the start! Can't wait to play more, and for the cost of 1 Hour, I might be able to do that more often?


Great game report. I really must get round to trying those rules.
ReplyDeleteCheers,
Pete.
I love them, Pete. At first I didn't, but they're growing on me the more I play them. I love the narrative they provide and I feel like I'm fighting the enemy and not the rules, as it were.
DeleteThe choices you make center around the mission.
Fantastic narrative indeed. How does the one hour version compare with Neil's other WWII rules.
ReplyDeleteThat's an interesting scale at work too. Hadn't realised that was scale for 1HWG WWII. Could it be upscaled for 'battalion' bases for operational level games?
Glad you liked the write up, Darren. This game is a completely different game from his other WWII rules, which are low-level tactical rules down to the granularity of what weapon each soldier is carrying.
DeleteThe OHW really is a versatile engine for upscaling I'd say. If you were going to have a stand represent a Battalion or a Brigade, I'd say you wouldn't have to change much (I'd add a supply rule, command units, and perhaps an opportunity to pull units off the line to rest and refit, otherwise it's pretty much off the shelf).
This game brought me the same feeling and level of excitement as when I first played Panzerblitz or Squad Leader in college. I would try a scenario with the sabots (for some reason that just felt right, also...as opposed to playing with unbased tanks or team-sized stands) or even micro armor. 20mm would work as well.
I think with a hit point system such as this, operational level games are very easy to simulate.
I'm very, very happy with these rules. The scenarios, coupled with the force selection system ensures a varied and challenging game each time.
Yes I like the hit point system - especially for operational level, since troops out of supply would simply suffer hits for every turn that they couldn't trace a line back to logistics support. Megablitz does this too, with double expenditure for units in towns. Seems like it would really work for OHW.
DeleteI like the fact that all units have 15 points, but the effects of the fight is different for each one, so some can degrade more quickly depending on nature of combat.
Perhaps gain a point every turn if within say 12 inches of form up point or similar.
I've downloaded some rules from the yahoo group. Great read and many periods. Will try something with these.
For an operational level game what more could you ask for? I've this fantasy of playing Waterloo on my 6x4 Table using 1 1/4" square bases representing Divisions and these rules, I think, would help me achieve that, providing the musket range was something like 0".
DeleteThe rules on the yahoo group are pretty faithful to the book rules. Can't go wrong.
If you have a kindle or the kindle app I believe you can purchase the book for cheap - the 30 scenarios contained within are great and many of them deliver a good game.
Enjoyable report and figures. I use Neil Thomas scenarios all the time now but with different rules. Works out great.
ReplyDeleteEven if you don't play the rules, the 30 scenarios are worth the price for the book IMHO.
DeleteI think so too. I've used them for Ancient, Napoleonic, Modern Africa and last weekend my first ACW game. All ways an interesting game.
DeleteBought the ebook but have not used it yet. But this report makes me want to give it a go. Thanks.
ReplyDeleteChris, for the investment in time you'll spend, trying them out, I feel, is worth it. I've owned these rules for over a year and this is the first serious consideration I've given them. I love their simplicity and the "story" the games tell.
DeleteHey, nice to see that your still gaming
ReplyDeleteJamie! It's great to hear from you. I keep meaning to email the person I think is you on the global, but I'm never sure if it's you or not :)
DeleteHow have you been sir?
I'm good man, what's a good way to contact you outside of this forum?
ReplyDeletesteven DOT whitesell AT Hotmail. or Gmail. or work email (think I sent you one)
Delete