 |
| Battle at start, or mid morning (Turn 8). French II Corps in the center I've all but written off. I Corps on the right is massing to advance and III Corps on the left is starting to have a bad day. |
 |
| Austrian reinforcements massing to take on III Corps on the weakened French left flank. |
 |
| French I Corps reaches the stream! |
Interesting developments as the French I Corps on the right, which I had all but written off last time, managed to cross the stream on the right and seize on of their "special" objectives.
Ken moved against my left with powerful, fresh units who were able to push the French III Corps back to a point where I could no longer use strategic movement for my reserve Cavalry Corps - No shortage of excitement here with these rules! The I Corps' "breakthrough" on the right barely consists of enough combat power to capture the second "special" objective, and Ken has enough units to at least throw in the way of the rampaging French I Corps.
My original strategy was to advance all three Corps on a wide frontage, reinforcing any success with the Cavalry Corps, consisting of powerful French Dragoons. If the I Corps attack stalls out (which it very well might), the Cavalry may be bailing the Army out if the Austrian attacks against the French left can kill the beleagured French III Corps, who are in rough shape at this point.
 |
| French III Corps, or what's left of them moving back! Time to activate the Reserve Corps!!! |
 |
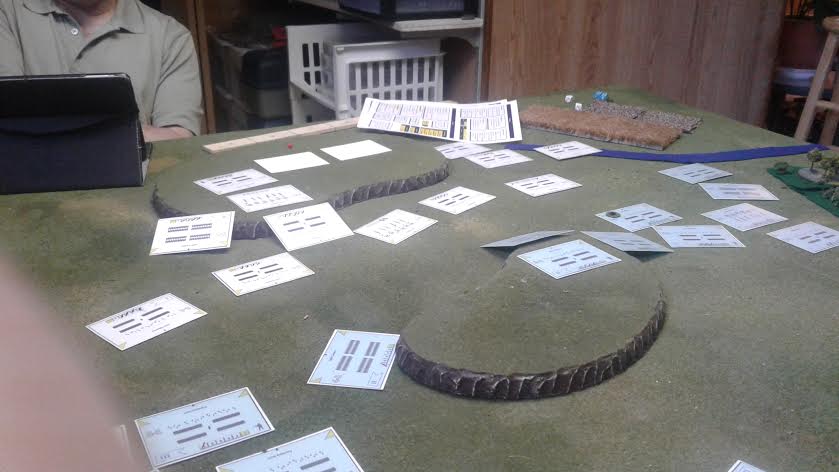
| Final dispositions for today. You can see a mess of units trying to work their way towards my end of the table in the upper left - that's my reserve cavalry corps. I Corps has 2 Brigades across the stream with 2 Austrian Brigades opposing their comrades. See saw action with the end result still in doubt! |
I learned some important lessons with the resumption of today's fight. Namely that the French skirmish advantage is somewhat powerful and that advancing with a few Brigades in line and shooting with infantry and artillery is a great way to whittle down an enemy brigade. I learned this after Ken brought to bear 2 fresh Austrian Brigades against a French Brigade of the III Corps on my left. He pounded them with his artillery, then fired at them with the musketry from 2 Brigades.
I was also reminded of a quote by Wartenburg writing on Napoleon in "Napoleon as General":
"In modern battles, the Commander in Chief has only 2 lines of action available. The direction in which to introduce fresh troops, and the moment at which he may do so. Once in action, the troops march straightforward, they may, indeed leave the field again, but cannot be withdrawn at will."
not sure why but I was reminded over and over of this during the 2 Blucher games I've played so far. Introducing fresh troops into an engagement in Blucher can turn the tide of a battle, and I love how the rules really get you thinking like a Corps or Army commander should.
No pictures of the painting progress yet but I do promise that will change soon as I will be doing a little bit of painting on this long weekend.
In painting news, I'm almost finished Infanterie Regiment #9 Quadt Von Wickeradt of Seven Years War fame and will almost be complete with Hulsen's Brigade from Lobositz (only took me 2 years!!)
The Bavarian experiment is going well also with 1 stand left from my first battalion to complete, then it's time to start the next few battalions in the Bavarian force. I promise to upload more pictures soon!
Very interesting - thanks Steve!
ReplyDeleteThanks Paul. It was a good game. I am liking Blucher very much. I think it would be better played with miniatures but on the whole, a great operational level game that puts you in the General's shoes.
Delete