Ken, Steve T, and Dave came over to play the first battle of "The World War III Project" today using the Team Yankee rules, and forces generated by Mike from "
The Third World War 1987" blog.
Forces included Dutch units from the 41st Armored acting as a covering force for the rest of the 1st (NE) Corps to redeploy to a line further west, behind the A7 Autobahn, who must establish a new main line of resistance.
The Soviets are hot on their heels with heavy armored elements from a 2TA reconnaissance battalion, in addition to a tank battalion. We used the "
Fighting Withdrawal" scenario from the Team Yankee extra scenario mission pack, which has a great covering force battle feel to it.
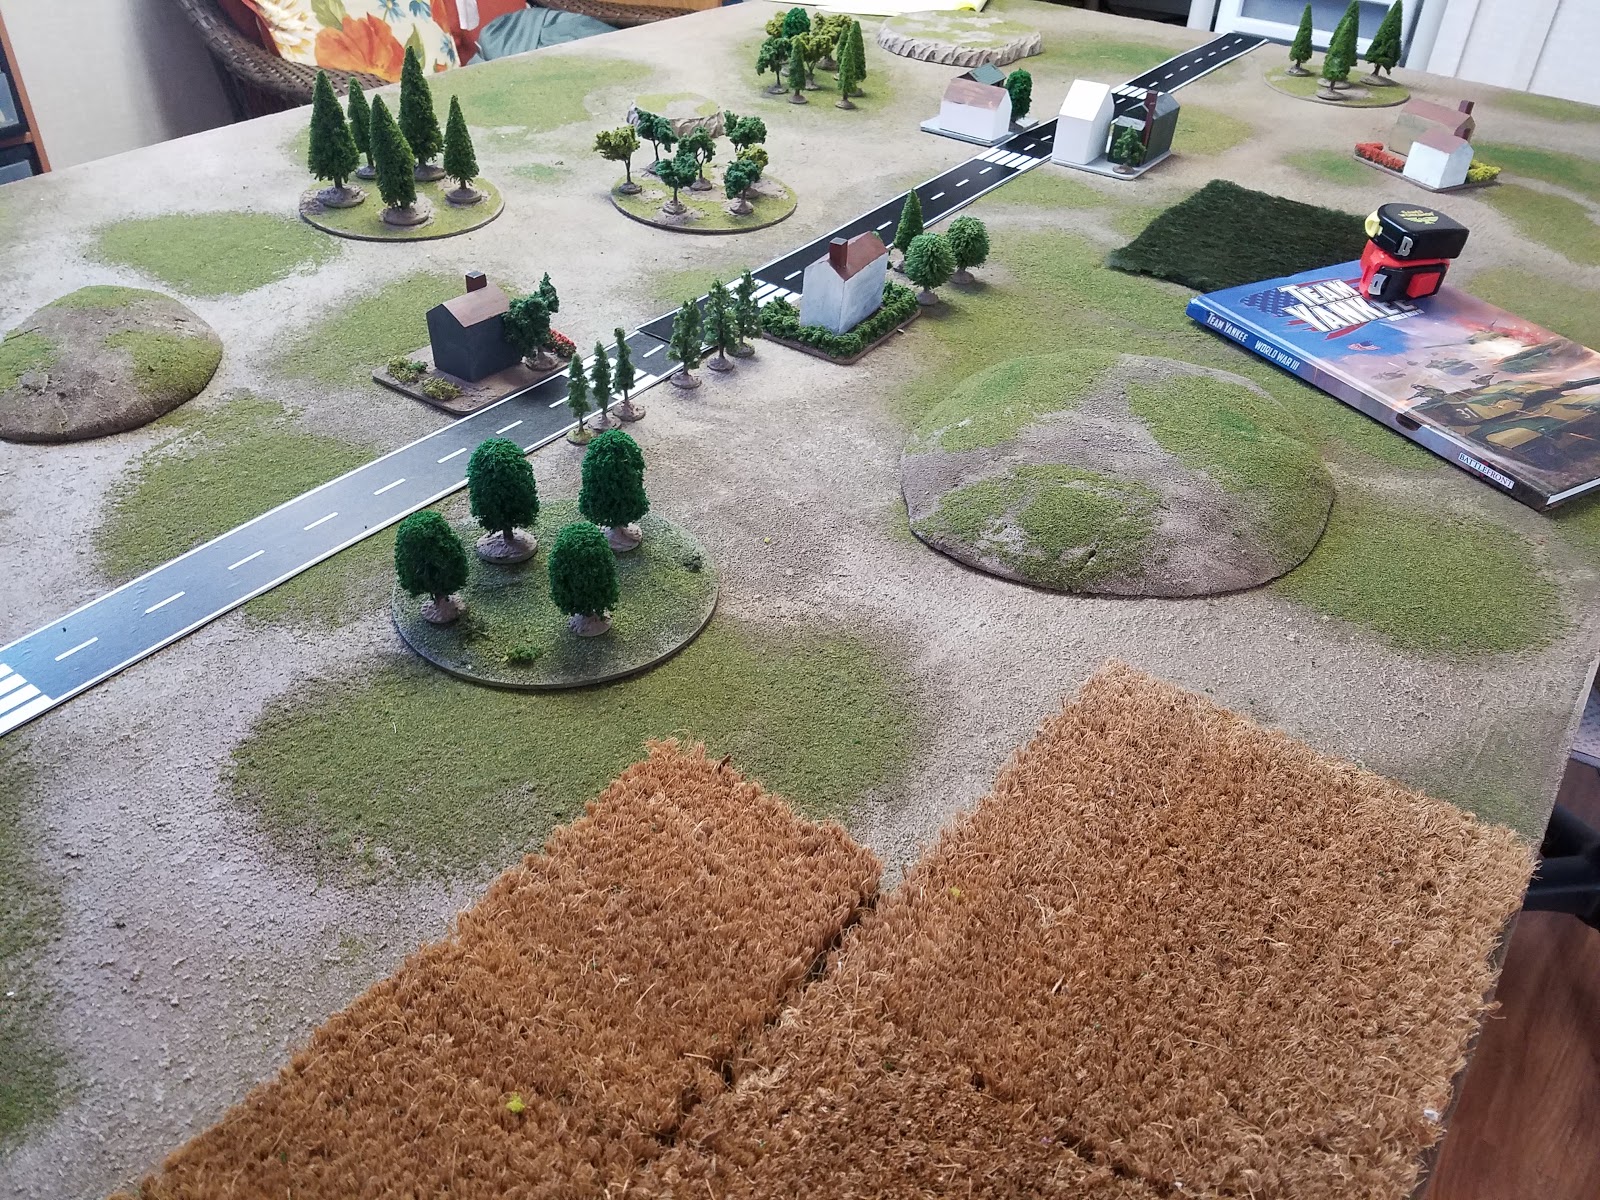
 |
| Looking from the east towards the Dutch deployment area. |
 |
| Looking from the West towards the Soviet deployment area. Lots of small German towns interspersed throughout. |
We started with a platoon of Leopard II's in ambush, awaiting the Soviet onslaught. Additionally, we had the HQs platoon (1 x Leopard II), a Leopard II platoon (3 x Leopard II), and an infantry platoon in Marders (3 MG-3 sections, and 2 x MILAN sections). The Soviets had 2 x Companies of T-64s (playing T-80s), 8 BTR 60s (playing BTR-80s) along with 7 x AK74 teams, 6 RPG-7 teams, and a PKM team. The Soviets also had 2 x BMP2 reconnaissance vehicles as well.
 |
| Steve T (R) and Ken (L) moving out with the Soviets! |
Steve T and Ken take advantage of the Spearhead move with the BMP2s and gain an extended deployment area due to the recon. They deploy behind a town immediately east of the Dutch engagement area and dismount all their infantry into a small orchard and village to the front of the Leopard positions. It's nighttime now, close to dusk so we have to roll for visibility. The thermals on the Leo IIs work magnificently each turn.
 |
| Dutch Leopards awaiting the Soviets. |
 |
| Dutch Company Commander looking over the kill zone. |
Soviet recon skulks up to the line of departure, probing for where their intelligence officer said they'd find Germans, or Dutch, or British. Or basically someone wearing a NATO country uniform...
 |
| BMP-2s probing the front. |
 |
| Dismounts in their foxholes overwatching this key avenue. |
The listening posts can hear what sounds like large trucks out there in the darkness and through their GPS sights, they catch quick glimpses of long, wheeled vehicles. BTRs! Ivan's here!
The Soviets dismount their infantry behind a small town and fan out into a fruit orchard north of it. They're moving slowly, deliberately, towards the west. The Leopards are watching in the darkness. A quick keying of the handmike twice alerts the Dutch Company Commander that they have enemy in their engagement area. A single handmike key back tells them all they needed to hear.
The Leopard II tanks see BMPs getting into position in a treeline in front of them. A quick shot dispatches a BMP and the other one bugs out! The battle has begun! The Dutch Leopard IIs open fire with their AA and coax machine guns on the horde of Soviets in the orchard. Tracer fire ricochets throughout the small fruit trees sending leaves and branches and men flying. The Soviets are losing teams but this fight is just getting started.
 |
| Soviet troops fan out in the orchard. |
Meanwhile the Company Commander sees a different threat in his thermals...T-80s (T-64 in TY speak)...lots of them!
 |
| Soviet armor fans out and drives up to the edge of the crop field. |
 |
| note the minefield markers upper left. The Soviets did a great job of NOT driving through them the entire game. |
Dave and I as the Dutch commanders have the right flank and locked down for infantry but Steve T and Ken have the center locked down with a battalion of T-80 (T-64s). They start firing at the exposed Leopards in the center and are able to kill one and bail 2. The platoon takes a morale check and fails it! They bug out! This is what it feels like to fight with an arm tied behind your back!!
The Soviets see an opportunity and surge their infantry forward into the central woods to take one of their objectives. They're stopped cold by Marder and Tank COAX fire but they've got enough bodies to spare! They get a toe hold in the woods. This was one of the decisive moves of the game and a great and bold move on the part of the Russians.
 |
| Dutch transports and commander's Leo overwatching. |
 |
| tank knife fight starts with the T-80s. Unbelievably our rolling is so bad we don't kill a single T-80 in this volley but instead bail out one. |
 |
| Ken's tank company moving into position using a town as cover. |
 |
| Dutch infantry overlooking their engagement area and an objective. |
 |
| Ken's tanks moving up! |
 |
| The Soviet infantry fights their way into the woods. The burning markers are where teh Leopard IIs used to be after they bailed and BOLO'd their morale check. They're 4 inches from their objective. |
Dave wants to move the infantry platoon into the town to get some shots off on Ivan and it's a great call. They move out as quick as their 8 inches will allow.
 |
| Dutch infantry huffing and puffing their way up to the town. |
 |
| Ivan pinned down by auto cannon fire from the marders on the way into the treeline. We're at least making them fight for the objective. |
 |
| This single Leopard II is keeping the Dutch in play, for now. |
The Dutch attempt to reposition their forces to meet the greater Soviet threat but it's night and the tanks, 2 out of 3, get bogged in the woods. Of all the luck! This is not going well! Meanwhile, Ivan wants to keep the pressure on the Dutch before they can reorient themselves. They send the empty BTRs forward to pressure the furthest westerly objective. Another thing to worry about!
 |
| bogged down Dutch Leopards. Another common sight. |
As the gaggle of BTRs crosses the road, 2 of them are knocked out by Leopards.
Meanwhile, the tank battalion consolidates and forms a base of fire, trying to knock out Dutch armored vehicles wherever they appear.
 |
| T-80s sitting in front of the minefield. |
Dave's infantry are now in the village, holding out, and hoping to threaten Ivan's flank if he charges through the minefield.
 |
| Commanders tank bogs down! |
 |
| BTRs next to the objective. Note the Leopard II facing east. |
 |
| Soviet infantry fans out in the central woods, stepping over dead Dutch tankers. They have the objective! |
 |
| Leopard engages the BTRs on the flank. The Soviet plan is working! |
 |
| This Leopard is keeping the objective bottled up, and is one of the only elements keeping the Dutch in this fight. |
 |
| The Dutch go for broke and move into the western woods. |
It's getting close to when we need to start evacuating our platoons, and also lift an objective from the table, per the fighting withdrawal rules. The Soviets start surging their armor forward to end the knife fight with the Leopards and infantry.
 |
| Soviets crossing the road with T80s now. They mean business! |
 |
| Until the very last, this Leopard kept shooting. He is eventually taken out by a Soviet T80 company at the end of turn 5. |
 |
| Dave gets incredibly lucky and kills a T80 with a flank shot from the Panzerfaust44. |
 |
| Ken's tanks on the objective but ready to race back if we remove it. |
That's it. The destruction of the Leopard next to the central woods means it's curtains for the Dutch who, although they fought hard, rolled awfully bad. Losing the ambush platoon after only a single turn, and then having infantry flood the central woods put us on the backfoot for the battle but it was a highly mobile, hard hitting fight.
The Soviets played this fight smart and instead of sending everyone "up the middle," they used their armor to exploit successes. Dave and I discussed that we could have done a few things differently for this battle, and the location of the Marder IFVs was discussed as a possible mistake. Same with the infantry who were dug in far away on the left flank.
Still though, a great time and thanks to Mike from his blog for providing the inspiration for this engagement. While we didn't have the outcome we thought we would have, the Soviets put up a great fight and the Dutch retrograde turned into a rout, with pretty much the commander's Leo, MILAN teams, and a single Leopard from another platoon escaping and evading out of the AO, a trickle of beat-up armored fighting vehicles limping their way west.
Hot on their heels were 2 Soviet tank companies who lost only 2 tanks, and a Soviet infantry company who took a little bit more serious losses, but who are still in the fight and are now licking their wounds.


Really interesting battle report - we're using TY in much the same way and it makes for a really nice fast playing scenario!
ReplyDeleteThanks James,
ReplyDeleteWe were discussing the virtues of using rules like Team Yankee, which allow you to get a bigger battle in but still retain that tactical flavor. Linking these battles to a bigger narrative also has the added benefit that it feels like a campaign game.
Cool fight Steve, and when I saw those OOBs I figured it would be tough sledding for the Dutch. But a fun read, nonetheless, and I hope you guys had a great time playing it.
ReplyDeleteI look forward to more fights, and you gotta keep it up with the Leopard IIs, I love those tanks!
V/R,
Jack
Lots of fun Jack. It's great to tie the fighting to a storyline (as you well know and as i am figuring out).
DeleteGreat game report- have been following the ww3 fiction blog with interest and it is nice to see it inspring tabletop games.
ReplyDeleteCheers,
Pete.
Thanks Pete it's nice to have a storyline to go with your battle. The fact that it's a well researched and historically plausible storyline makes it that much better!
DeleteHi Steven. Thanks to your advice i am following the ww 1987 blog. Do you Think you'll mantain Company level scenarios or may be you could play higher level ones (Battalion/Brigade) changing scale ? Thanks. Ciao.Marco
ReplyDeleteHi Marco,
DeleteYes ill be trying out some different options that will allow larger forces on the table, especially when the Soviets locate the Main Line of Resistance. 1 stand will equal a platoon just not sure of the rules yet. That should get me a brigade sized fight on the table at least. Stay tuned.
Great story and great looking game. A nice scale too, and the pics of Soviet tanks driving across that field are epic.
ReplyDeleteWill tune into the next episode soon - keep up the good work.
Thanks Darren! Stay tuned as the Soviet steamroller continues west!
Delete