Ken and I recently finished a Sabre Squadron game with Ken's BAOR British and my Cold War Soviets. That's noteworthy because we actually played a full game to completion and I'm also getting around to finally blogging about it!
Game was played on Ken's excellent table with his scenery.
We played the same scenario (planned attack) from our last Sabre Squadron game, but on a much bigger table (about 8' x 6' this time I think?). My Soviets consisted of 2 x T-80 tank platoons, an infantry platoon mounted in BMP-2s, an infantry platoon mounted in BTR-60s, and a recce team and AOO (FO for the Americans in the room) mounted in a BRM. I had a battery of 122mm SPA on-call as well as 2 echelons of artillery for a pre-assault bombardment.
Ken's forces consisted of a Chieftain platoon and an infantry platoon mounted in FV-432s along with elements from the Battalion Anti Tank company cross-attached to Ken's force. He also had a recce Scimitar attached to his force as well, making for well-balanced and pretty solid force.
We randomly set the terrain up and realized after the fact that we should have assigned objectives before-hand per the book, so we decided on using the village as the Soviet objective. (single objective mission).
 |
| My Soviets |
I was very happy with the terrain setup and thought it looked very "northern German" with open flat areas and many wood copses. A few hills but not too many...
 |
| Ken's Brits |
 |
| Soviet Infantry |
 |
| British FV432s |
Plan is pretty straightforward. Right up the middle and see what sticks! I'm hoping the BMPs can provide adequate fire support for my infantry dismounts on the right. The tank platoons in the center need to keep Ken's Chieftains busy. And as the game progresses they sure do - Ken is busy killing T-80s!
 |
| The battlefield. The close edge is the jump-off point. Ken would defend the far edge up to 2/3 of the table. The village on the right with multiple buildings is the Soviet objective. |
 |
| British in the woods! |
 |
| British defending |
 |
| First turn! Soviets move up through the woods on the left |
 |
| Ken's pic of the action starting! |
 |
| Ken's British occupy their fighting positions |
 |
| Ken's Chieftains in their Battle positions! (small rocks to indicate hull-down) |
The first turn sees my tanks on "transit speed" and my BMP infantry transiting as well. The BTR mounted infantry move up to the woods and dismount.
 |
| Attack shaping up. Tanks down the center. Infantry on the right and left! |
From the pictures you can see the attack develop. The advance-guard commander is happy surveying from the hatch of his tank. Overhead the artillery starts to plaster the treelines, hilltops and anything else that could be hiding British infantry.
 |
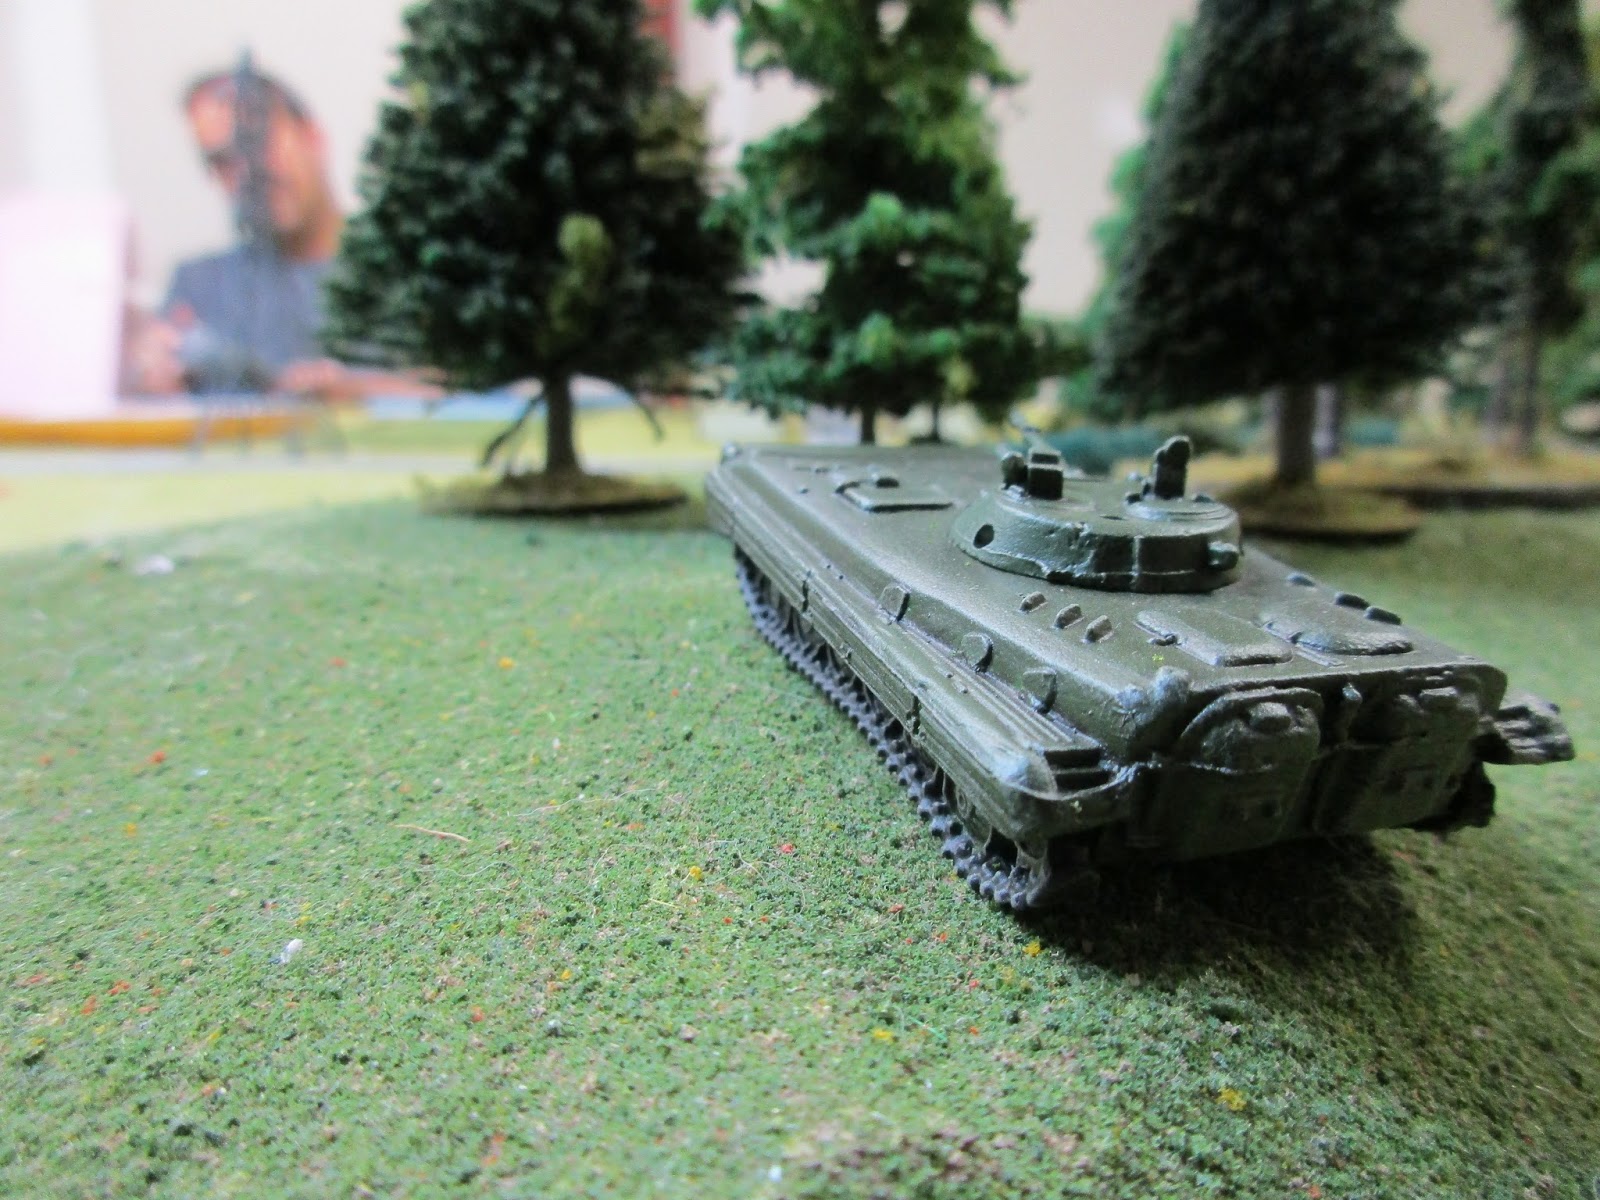
| BRM sneaks up the hill to occupy a hide site and call in artillery on the British. |
 |
| you can see the BRM pulling away from the BMPs as the assault moves into position. |
 |
| Ken's Chieftains can be seen. They are in hull down prepared positions. |
 |
| British CO in the bottom of picture in the village with his track. |
 |
| Just like last game, an FV432 is hit and KO'd. An infantry team is caught in the open during the preliminary barrage and also KO'd. |
After the preliminary bombardment, Ken's Chieftains and MILAN teams start to take their toll on my advance. I lose a T-80 and a BMP gets a "dodge" marker for swinging fast to avoid a missile. The poor guys inside....
 |
| BMPs moving in on the right |
 |
| The majority of the British infantry are out of range but the MILAN teams are starting to earn their pay. |
 |
| green chit is a dodge marker |
 |
| Chieftain knocks out a T-80. (Actually he kills the Soviet CO....Didn't realize at this point that the opposing player chooses the order in which I activate my units now...) |
 |
| red cardboard chits are the limits of the mixed minefield. Ken skillfully placed these to canalize my movement into his field of fire. My T-80 platoon drives right through it! 1 mine is set off but does no damage to the vehicle. The big red marker is Ken's artillery spotting round. 8 tubes of 81mm mortars!!! |
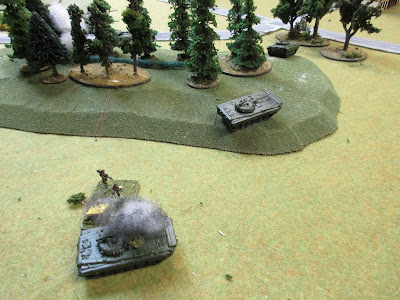
Ken's mortar barrage is laughed off by the T-80s but the BRM carrying my artillery observers is knocked out and the passengers inside are KIA. Big trouble for me as the 122mm artillery waiting in the rear would remain silent throughout the battle.... To be honest I never expected that to happen.
 |
| BRM (actually a QRF BMP2 substituting as a BRM) burns in the treeline. |
 |
| Ken's recce will cover the withdrawal of an infantry squad as my Soviets advance. |
 |
| Chieftains kill another T-80 at a decent range. Damn fine British gunnery! |
 |
| MILANS start to take their toll...1 infantry fireteam is KIA and the other is neutralized. |
So on the right, a different approach is attempted as the BMPS start leap-frogging towards the treeline to dismount. 1 BMP would cover fire with its 30mm autocannon while the other dashes forward at transit speed. It's a little reckless but time is of the essence.
 |
| BMP on the right has transited toward the far treeline while the one in the rear peeks over the crest to take a shot at the MILAN section. |
 |
| Meanwhile the bulk of Ken's infantry in the woodline still have not fired yet, making them un-targetable! |
 |
| T-80s continue the advance. |
On the Soviet left, I really underestimated the Scimitar's autocannon as it slices through my BTR and kills the crew and passengers. That would have been really ugly to witness in real life I think...
 |
| Scimitar firing away at my BTRs... |
 |
| Some small gains on the Soviet right as a squad occupies the treeline and starts firing away at the MILAN gunners with some success. |
 |
| Another BMP is knocked out and things aren't looking so good anymore for Ivan. Well at least we still have the tank platoons... |
 |
| Soviet team with the RPK |
Okay here's where things started to go really, really badly for the Soviets (ok aside from losing their company commander...). The right T-80 platoon takes a casualty, and completely bombs the morale check, going from normal or good morale all the way to "withdraw." That's 3 straight below 5 rolls in a row. They must pull back behind the hill and that's almost a whole platoon out of the fight.
 |
| T80s rushing for cover. |
Ken had an infantry fireteam in the woods on my right who felt that this was the right time to peek out and "make it rain" on my advancing infantry! They score a suppressed result and my 14.5mm return fire from the BTR has absolutely no effect, failing to score a hit.
 |
| Final T-80 in the left tank platoon is finally taken out. |
 |
| Combined Scimitar and small arms fire wreak havoc on my mech troops. |
 |
| Ken's nicely painted APCS! |
 |
| Coincidentally these are 4Ground buildings! Didn't I just post about these earlier in the week? |
 |
| Soviets pour fire on the British in the opposite treeline. Ken starts KOing my fireteams now. It's a hell of a firefight with the British getting the upper hand. |
 |
| He eventually would lose his infantry escorts |
The last ditch effort by the Soviets is mounting up the BTRs and trying to race like hell to the village. Unfortunately they'll never make it in the allotted 3 turns remaining so as the Soviet commander I called the game. It's impossible for the Soviet forces to win now, as the distance to the village is too great and there are only 2 Soviet turns left.
 |
| BTRs rushing to reinforce. Ken moves his Scimitar behind them to chew up more Soviet metal! |
 |
| A lone Soviet fireteam wondering if they should advance or not... |
LESSONS LEARNED AND THOUGHTS
Well another great game of Sabre Squadron and I definitely learned a thing or two about the game and the rules after a good nose bloodying like this.
The author is definitely trying to make a point about moving along a covered and concealed route. For one thing, if you are playing with tanks that have a large difference between their firepower and armor, then even the variable protection roll will not help you. This ensures a hit is a kill and you would be well served to remember that your vehicles, especially the more vulnerable ones, should take advantage of cover and/or concealment at every available opportunity.
My BMPs got shredded by Ken's MILANS for that reason and I believe they should have utilized a more tactical movement scheme from the beginning. (leapfrogging).
As far as the armored advance, my initial plan was to give those tanks something to contend with while my infantry advanced on the objective. Well they melted away much quicker than I had anticipated. Frankly that morale failure of the tank platoon at the crucial moment helped seal the fate of the whole unit's advance. So sitting still and trading shots with the enemy is not a good plan, it turns out.
I believe the trick in Sabre Squadron is fire & maneuver. Firing, then displacing to a new position, and maintaining the advance is important for victory if you're the attacker. (and that point could also be argued for the defender as well by shooting and moving your AFVs).
Infantry should be used aggressively as they are very well armed (1 squad of 2 fireteams armed with a modern rifles, and 2 SAWs gets 4 fire dice and if they have some kind of RPG the enemy cover save is less likely to pass.)
Final Thoughts
Sabre Squadron delivered another great game in my humble opinion. Sound tactical principles are much more useful than gamey tricks.
Use a covered and concealed route where possible.
Suppress or Neutralize the enemy before moving into his kill areas.
If you're the attacker, you shouldn't take more than 1 shot from the same location. If you're the defender, maybe 2 shots if you can.
Protect your command elements and forward observers! (I really could have used that 122mm Battery...)
Use your infantry weapons.


Great report and a great battle!
ReplyDeleteA well earned victory for Ken
Thanks Paul! It was a great game.
DeleteGreat AAR - keep posting them please!
ReplyDeleteGlad you liked it! We intend to! Look for bigger games w/more armor or infantry. Also planning some smaller games with hopefully Soviet airborne and US National Guard forces fighting it out. Stay tuned sir!
DeleteDon't forget the German Reserve Panzer units too!
DeleteI've got plenty of them around, Paul. Also need to paint up the JP Kanone unit and the Jaguar units! With all that gear, I should be able to put the hurt on Ivan - provided I stay in hull down ;)
DeleteTasty AAR. Nice execution here, by the Brits. Defensive normally has the last laugh. Get that point of the spear sharpened Steven and make the FO invisible.
ReplyDeleteGlad you liked the AAR, Paul. Yes the Brits had a field day with my T-80s and I learned the hard way about taking a more covered approach to the objective. All nuggets of wisdom to put in my toolbox for next time!
DeleteGreat report. I'm really excited to stay using these rules with my 6mm collection. Again great stuff.
ReplyDeleteGlad you liked the AAR Chris. I hear you - these rules are my absolute favorite modern rules hands-down. Great with microarmor, 15s, 20s, etc.
DeleteI'm trying to pressure Nick as many times as I can to start work on a World War II version :)
What a fantastic report Steve! This game looks superb. I'm very impressed with your observations re. using real world tactics - the true test of a game system. Fire & Maneuver should make every game a solid hit with these rules. wow
ReplyDeleteI really must get something organised for these soon. They also seem perfect for the old 'fire team' scenarios.
Thank you Darren. This was a great game and very much a learning experience for me. You have to approach everything from the standpoint of "can I survive this move?" which as you said is a true test of a game system.
DeleteYou may also want to consider joining the forum on the Sabre Squadron website. The author is extremely responsive to rule queries if you should have any.
I would love to see you try your 20mm Falklands game, or even your Team Yankee microarmor game with them.
That said, the Fireteam scenarios would actually be perfect learning vignettes for these rules.
The Falklands game is a great idea Steven yes. The Lebanon and FireTeam scenarios require me to find and paint some armor, so the Falklands would be a perfect start.
ReplyDeleteI cant wait to see it! If your troops are individually based, I think you could get away with putting 3 or 4 on "sabots"
DeleteAlso in other news, I'm getting ready to try out our BATTLE rules with the alternate sequence of play.
Excellent to hear about Battle and eager to see it.
DeleteI was thinking of rebasing the Falklands stuff actually for Sabre Sqd - two to a base for a fire team - though your sabot idea may work better.
Also - still in my AWI thing atm - posted the Freeman's Farm battle earlier. Still love V&B *sigh*