Alex hosted a North Africa themed "MEGA GAME" at the FLGS this Sunday afternoon with forces and scenarios based around OPERATION CRUSADER / OPERATION SONNENBLUME (sunflower), the infamous German "TottenSonntag." 6 participants with lots of hardware!
We used Alex's "UP THE BLUE" quickplay rules based off of Neil Thomas' One Hour Wargame rules and it seemed, at least to me, that the players heartily enjoyed themselves.
While not necessarily linked, each combatant paired off against another combatant and fought a scenario based off of the action of their historical counter-parts. The scenarios were based off of a specially selected scenario from Neil Thomas' One Hour Wargames book that matched the situations that the units found themselves in.
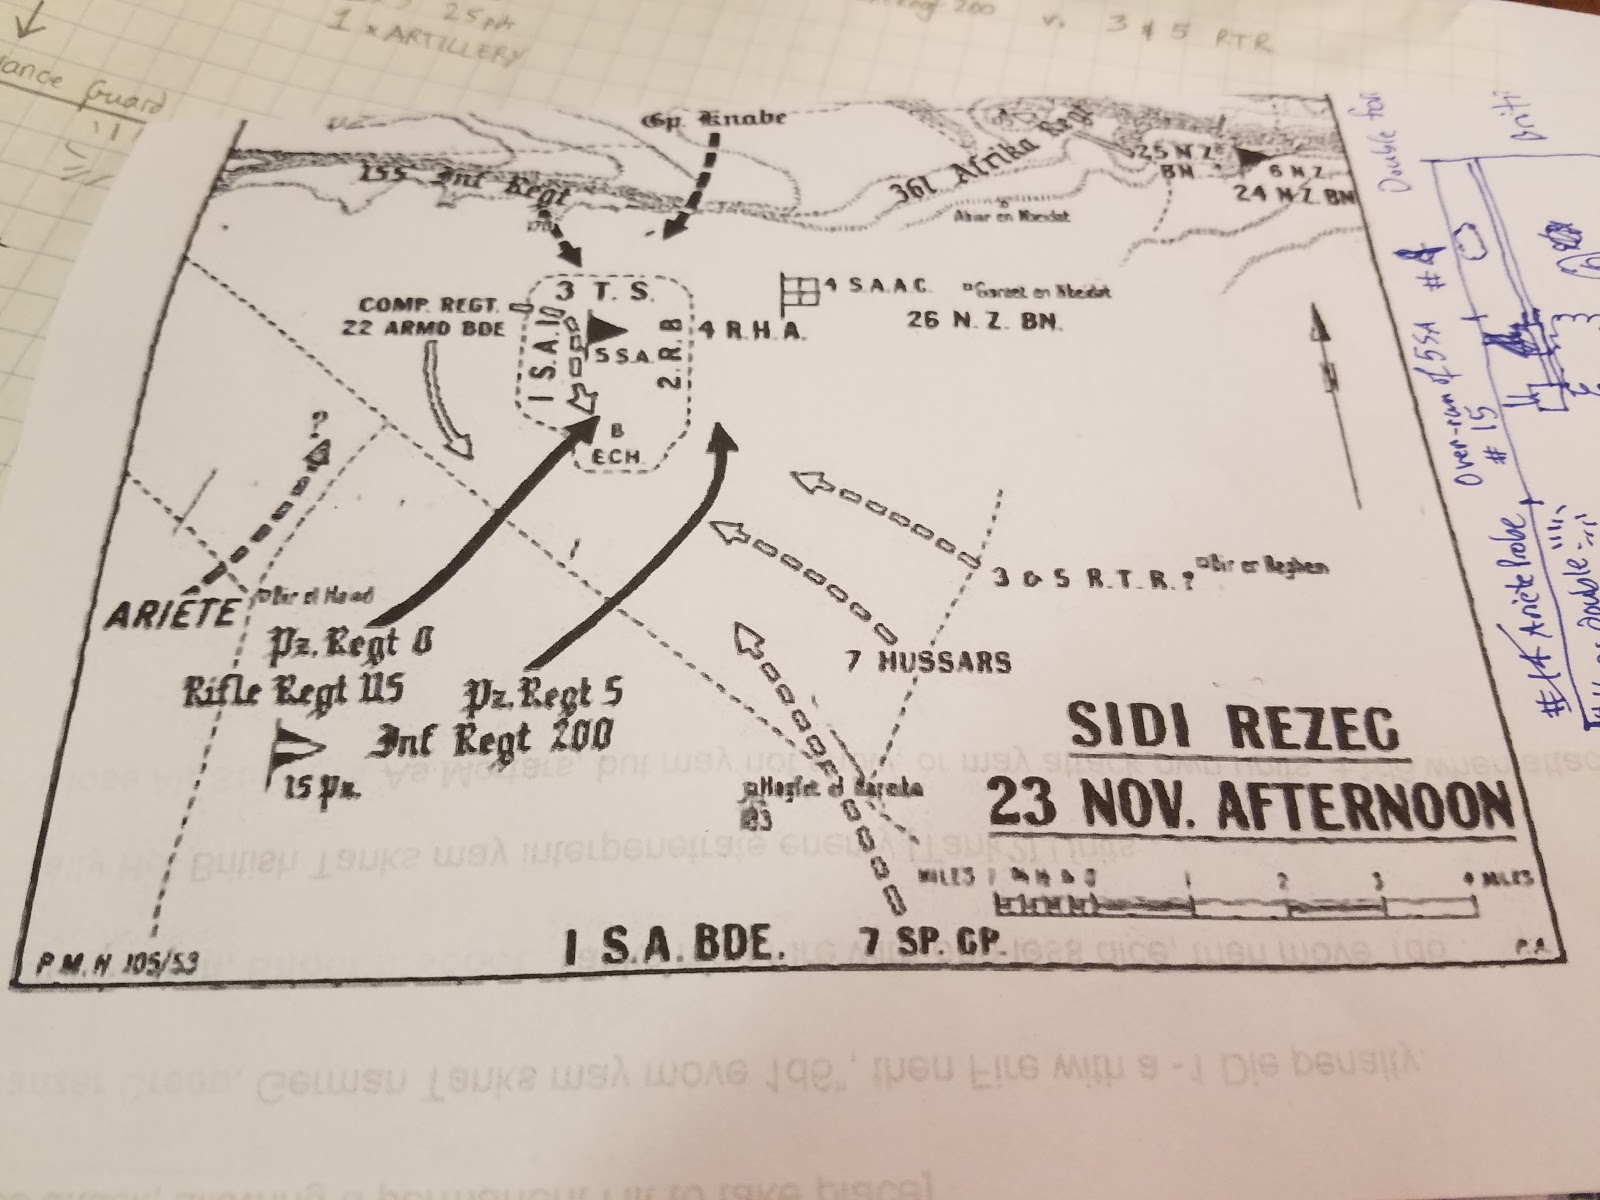
There were 3 separate games occurring as per the map above, in sequence with each other. My scenario was "Flank Attack" in which I had to hold a strategic hilltop against the British counterattack with 7th Hussars using forces from Panzer Regiment 5.
The center scenario (Dave played the South African-Brits in the center) was a real meatgrinder with an "up the middle" assault against prepared nightmare positions and on the extreme left, the Italian Ariete Armored Division fought a meeting engagement battle with the British 22 Armored Brigade.
 |
| Alex explaining the rules |
 |
| More lavishly painted and equipped Germans (much nicer painted than mine!) |
 |
| My German support platoons |
 |
| More hardware! (that starbucks cup is one of the reasons I was late....) |
 |
| Setting up for the battle. The 2 x green felt pieces in the center were the South African prepared positions. |
I looked at my portion of the battle as a sort of flank guard for the rest of the force. By holding this hill, I was enabling the Germans to conduct their main assault in the center. Speaking of the hill, I had a platoon of PAK-38s and "elite" infantry dug in at game's start. Coming onto the board was an entire company of armor, and my heavy mortars. They'd also have spotting ability for heavy artillery located off-board!
 |
| Note the line of German armor in the center ready to step off. On the far right, Italian Armor is forming up to meet the British advance |
Worth mentioning here that all of my reinforcements would show up on turn 2.
 |
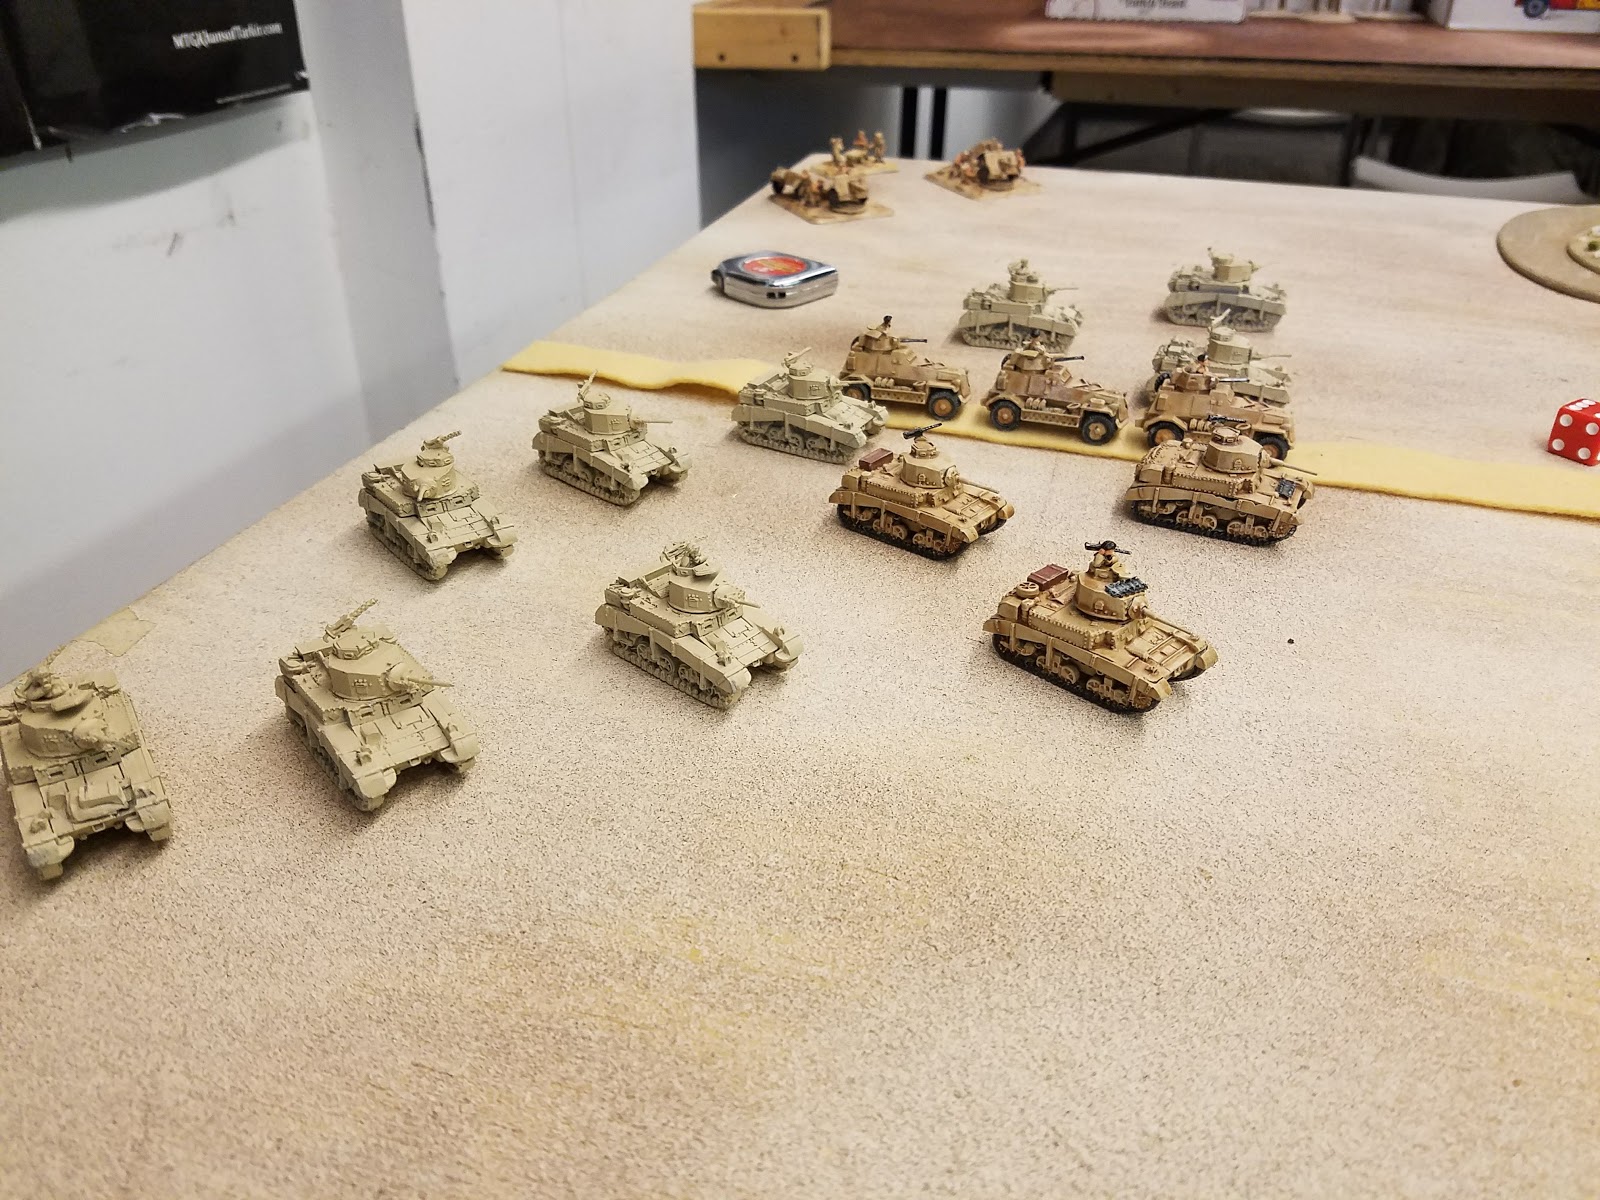
| British 7th Hussars! |
 |
| Suddenly I'm feeling a little vulnerable |
 |
| Dave's hilltop and prepared positions turned out to be a very tough nut to crack. |
 |
| Casualties mounting but we're in good shape so far. |
 |
| Ahhh that's more like it! Armor reinforcements and my mortars present for duty and right on schedule. |
As my armor shows up, the great wedge of armor heading towards the hill veers off to meet them and a shootout starts that would last pretty much the entire game. A grueling tank battle!
 |
| British Armor maneuvering and German armor (upper right) beginning the advance. I had some traffic problems getting the tanks into positions but it all worked out. |
Ouch! British gunnery right off the bat hits my Panzer III platoon in the lead and forces a "permanent" hit. Break out the yellow dice!
 |
| 2 more hits and they're toast. |
 |
| Dave's fighting positions are loaded with artillery and infantry, along with roving killer AT portees. He'd use them to good effect too, forcing the Germans to advance straight into a killing field. |
 |
| Meanwhile to the far right of my position, British armor (armour?) moves into position - there's a massive column of Italians coming down the same road! |
 |
| And here they come! |
A massive vehicle battle breaks out to the far right as the action in the center turns into a real "tottensonntag."
 |
| German Panzerkiel moves out! |
 |
| South Africans. |
Lots of back and forth, thrusts and parrying as he takes out a platoon, I take out a platoon.
 |
| Action on the far right - British maneuvering to get a jump on the Italians. Looked like a fun game. |
 |
| My armor on the left crossing the start line with 3 hits already! |
 |
| British tanks move close to my position on the hill. |
I'm using my mortars and heavy artillery to good effect, trying to whittle down the British armor.
 |
| Overwatch positions. They'd pretty much stay here at the startline the entire battle. |
 |
| Meanwhile in the center |
Most of the tanks end up shooting each other to pieces and are driven off on my side of the board. The end of the first battle on the flank leaves us with a platoon of British guns, and a platoon of German armor with my infantry still holding the hill.
The second game we played, the British player focused most of his efforts at the hill and pretty much had it sacked by turn 10! I conceded the battle at turn 12 i think when it was obvious the British tanks would reach the hill and my infantry were driven off.
 |
| The first assault is held at bay - just barely! |
We decided to play one more game with the same forces and same sides. This time the British player changed his strategy to use more firepower against the hill right out of the gate and my AT guns barely last 3 turns! Not good!
 |
| Reinforcements fresh off the boat from Europe! I replaced them with my painted troops. No wonder they did so poorly in the second battle! |
I start the second battle with the infantry dug in and "ready" as well as the AT guns dug in. This gives me some advantages and lets my troops last much longer than they normally would have against all those tanks out there.
My strategy doesn't really change from the first battle. I'm working on whittling away at the british armor with my indirect fire and tank guns. Just the presence of 3 German Panzer III platoons on the British left is enough to keep some of his armor from moving over to assault the hill.
 |
| My mission in life is to destroy the recce cars. I think I succeeded in that - even if I did lose the second battle! |
 |
| hits on the guns already. The British armor would be up in my business so quickly I didn't have much time to rally off the hits |
I pretty much stopped taking pictures after that and was focusing on playing the game and watching the rest of the game in the center. This is probably the 10th or 11th time I've played Alex's "Up the Blue" rules and I really enjoyed them. Lots of decision making, plenty of combined arms opportunities, and the units act like real units for the most part. Some of the observations I noticed, for better or for worse were:
Some of the guys noted that the dug in infantry were taking a serious toll on advancing armor. I personally attributed this to small AT guns and anti tank rifles at the platoon level, maybe even prepared obstacles or mines placed in the desert. Either way, it was an observation I'm putting down for Alex's notes as he continues to build his rules out.
Also noted that the inclusion of off-board heavy artillery made a huge difference on the game and on the decisions of the players. Even though I was one of the loudest voices for this kind of added feature, my heavy artillery gave me a massive advantage and made life really difficult for the British. I'm not sure if it was impossible, since the British did win the second game, but it basically ensured that I'd be wiping out a tank platoon every 2 to 3 turns. So something to consider. Perhaps both players have the capability, if at all. Or use a dedicated, single spotter stand for off-board stuff?
Personally, I'm a big fan of the rules and will continue to play them. From what it seemed like, the guys got into their games and seemed to have a really good time. Mission Accomplished!
Also worth mentioning that I bought the
ruined train station from Novus Designs during their Black Friday sale! Ponyri Station next July anyone? I'm already starting work on rubble drop-terrain!


Thanks for your commentary Steve! I'll probably have to use your pics since - quite in character - I not only totally forgot to take pics, but I forgot my camera!
ReplyDeleteWe'll keep noting our observations. I certainly wouldn't claim perfection with the rules. However, this was more about putting an historical battle on the table and introducing the rules to a group of guys who had quit 15mm WWII - to the extent of selling off much of their stuff. So I consider it a win that some of them are talking about either finishing up their projects or at least getting out to play some WWII more often.
The overall win ratio was Axis 2, Allies 1 in the first round. Then I won for the Brits against the Italians in the second round [but if I'd had my Italians, I think I could've won for them - they consider me a real buon'amico!] and then you guys played two more times and exchanged some more wins and loses all around. The center Dave just beat the heck out of Gary with his ridiculous dice, and I think Gary could've concentrated his firepower more. As it was, he got one of his two objectives. So strictly by game results, and player skill and luck, it seems like it was about even.
There is certainly some more possibilities to check out for handling things that were tried for the first time, like off-board artillery. I could've left it the same as mortars, but wanted it to be a bit different so made it heavy and not consistently available [you had to roll a 3+ for it to show, so it was only available 2/3 of the time]. The combat ratio of dice over three turns would be 8 dice. A Mortar unit that was on the table would've had 9 dice, so if all things were average, an on-table mortar puts more dice on the target. But I think it is worth having things that are different sometimes, b/c perhaps those 4 dice are worth putting on a particularly tough target at the right time.
Lots to think about!
a.
So basically we were doing it wrong. I gave myself the heavy artillery every turn which swung things decidedly in mt favor. Not impossible to have it every turn but still.
DeleteI think from my foxhole (desert fox...see what i did there?) It went very well. On the strategic flank, i was 1 for 1 against the british. They quickly adapted their strategy in game 2 and things moved along. Cant wait to play again.
A tasty looking action!
ReplyDeleteThank you sir!
DeleteSuperb stuff. I can see how the armoured grind became telling but the rules make it exciting!
ReplyDeleteThere are lots of little nuances in the posts that you guys have been putting up. The rules sound fascinating, and keen to see how they differ from the first draft of Up the Blue.
When are you publishing these Alex? :) I have a Market Garden scenario I'd like to try with them ;)
Cheers Darren lots of fun and it seemed the group enjoyed their games very much. I would have liked to have seen the games linked but that would have been a ton of extra work for Alex with a similar result. Frankly im mot sure i could have spared any reinforcements from my table anyways. The games were fast ( we finished our first game in under 30 minutes) and brutal and i personally think these rules could be expanded to use historical TOEs for forces on historical terrain, unrestricted by the 1HW scenario constructs but all in all i was just happy to get out and put my toys on the table.
DeleteIf Alex hasn't done so already, id be happy to send you a copy of his latest. Im sure hed be happy to hear your thoughts and even happier for a playtest!
Cheers and Merry Christmas!
Beautiful and atmospheric, a great looking desert game!
ReplyDelete