The usual suspects, Ken, Dave, and I, got together last week at Ken's house to play through our first game of the second edition of Sam Mustafa's "Lasalle" tactical Napoleonic rules. A completely revamped game, Lasalle features an innovative turn and initiative sequence, governed by player decision and momentum points, and a very straightforward combat sequence which we all agreed was much fun and quite decisive.
 |
| Same body, but different engine under the hood! |
We played the introductory "Battle of Eselbach, 1809" scenario from the Honour website. Yours truly played the French, and Dave played the Austrians, with Ken as umpire and ref (although none is needed for a game). We played with Ken's outstanding 15mm collection - always a treat! This is a meeting engagement to seize a village in the center of the table.
 |
| Ken (r) and Dave (l) at the table. The French coming from upper right. |
Off the bat, each turn is chock-full of decision making. Youre not just sitting around waiting for your opponents to finish. Instead, you have a decision to make if an action occurs within close proximity to your troops, enabling you to perform an action if you would like to. There is much leeway in the actions you may perform, however you may not have the momentum points left to do so. It's an elegant system and it just works.
 |
| textbook assault into the flank of a worn-down Austrian battalion! The kaiserlicks would evaporate after this gallant charge! |
 |
| Ken sent as tactical advisor sent from the Archduke Himself. General Dave looks at him bewildered. "Who told the Archduke we needed any help here?" |
Dave is hanging on by his fingernails, but holding back the fresh battalion in the village is a thing of genius, and therein lies the genius of Lasalle. You can completely decide on the order you want to do things in. Meaning you can carry out your plan, but the enemy gets a vote in your decision making. You need to pick the right time to charge, to hang back, and you need to bring your artillery with you! THe game feels like a well written history book, and it plays quickly.
Not lighting fast, but if you have been reading my battle reports over the years you know that we rarely get to finish games. I'll say this - we played through all 8 turns of the introductory scenario and they played faster as we went on. We started at 1 and ended at 430 with a clear decision.
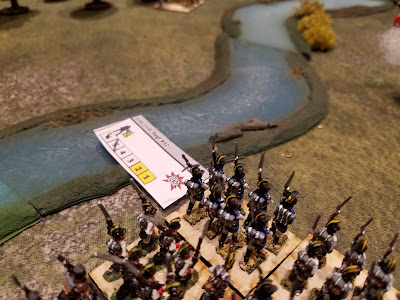
Speaking of decision - you're dying to know what happens eh? My columns approached Eselbach through the cornfields east and north of the village. THe Austrians were able to re-orient their flank to fire on me.
 |
| The massed brigade moves into assault Eselbach! Will they make it in time? |
 |
| Assaulting the village |
In heavy fighting my assault columns are beaten back on turn 8! The game is over! Hard-earned victory to the Austrians! This was an excellent game and very much enjoyed by all of us. We will most certainly play again for tactical battles, and it's even got me thinking about collecting a 15mm army to fight Ken's armies!


