Saturday, February 18, 2017

Friday Night CROSSFIRE! HOLD vrs DIG-IN.....

Dave came over Friday night for another game of CROSSFIRE and suggested we do something a little different than Eastern Front gaming so we opted for a Western Front game with US vrs Germans utilizing the Mac's Missions mission orders from Steven's Balagan.

If you've been following the CROSSFIRE action from the previous few weeks, you'll notice we've been "fighting" through adapting Mac's Missions as well as utilizing the more enhanced vehicle rules from "Steven's Balagan"

Naturally, David rolls for the Germans and I roll the Allies (starting to see a definite pattern emerge here!).  The cool thing about this game is the US player (yours truly) has 5 Shermans, including 1 76mm-armed Sherman that we affectionately nick-named Fury.[BEST JOB I EVER HAD!]  The Germans have 2 x Panthers at their disposal and both of us are "Regulars."

I have to say fighting on the Western Front gives a different feel of a game, especially when there is closer, more dense terrain and more restricted lines of sight.

Unfortunately, I drew "dig in" and David drew "hold" which allows him some flexibility in conducting a defense.  While I did make cards for this week, I did not limit the defensive missions per Paul OG's recommendations, so we both embarked upon a battle with double-defense orders!


The addition of all those tanks definitely gives the game a meaner feeling and using the Balagan house rules, your tanks have much more flexibility, but it's still not too overpowering in the game.  Essentially just the right amount of offensive power (treating tanks more like infantry stands), and you get the feel of tank-infantry cooperation as you try to use your tanks to whittle down infantry positions and break through.

view from the German side.  Note the panthers watching over "Tank country" in the rear of the German position  Also note the upper left where all those Shermans are getting ready to step off

US Player view of the town


 David advances his shermans up to the town and moves his FO into the town.  he starts bringing down HE mortar fire onto my infantry in the field.  The US left is where the majority of the fighting will take place.

First blood!  A panther in the village "takes out" a Sherman.
 My rolling is even worse than usual this game and while my tankers' gunnery is solid, their shots fail to penetrate the tough hides of the Panther.  David's penetration modifier is +2 so all he has to roll is a "2" or higher and he'll KO a Sherman!  Yikes.


David pointing out which Sherman he'll target next.

Good kill!
 I have to do something about that big cat in the village so I smoke the Panther and bring my Armor up.  It works like a charm and I get my tanks on a better footing to secure the infantry's flank in case David tries to advance his infantry (I still don't know his mission is "HOLD").

blinding one big cat
 David advances his infantry up my left, his right.  Drawing on our past experience of how nasty infantry can be assaulting tanks up close, Dave (and if I'm honest, me too) is keen on close assaulting that armor.  We didn't check the mods first though...

Fury sitting there on the field, watching the approach to the US positions


Dave moves his entire platoon up to the hedgerow. They're in good shape to close assault the tanks!  Both tanks are facing well-away from the 45 degree arc to their left
 Dave's assault doesn't go well.  Even with the PC and outnumbering the defenders, Brad Pitt's tank Fury wipes out 2 squads and the Platoon Leader while the supporting tank wipes out the other assaulters.  It was a gamble admittedly, but turreted AFVs in the open get a +3 in close combat!

Dave loses a platoon but shakes it off quickly, and starts massing on his left.  I noticed David's infantry is concentrated around his "forward area" and Dave notices my guys haven't left the rear area.  We're about halfway through with the turn clock now.


PSC Panther 401 owns this town!


By the way, buildings are "Crescent Root" buildings

Some pictures of the close asasult

 To try and break the impasse (remember, both of us have defensive missions) I move a platoon out across the road to take up their sister platoon's positions.  David shot the daylights out of them and the platoon was essentially wiped out.

This squad, pinned from the Panther overwatching the road, was my first attempt at moving to occupy the old positions.

 We're at 50 out of 70 on the turn clock, and with the loss of another US platoon, I call the game (I think that's the first time i've ever called a CROSSFIRE game before!) but there was just nowhere to go.  I had virtually no reason to move into the forward area, and David had no reason to venture into my forward area.  Plus with Dave's skillfull maneuvering of his armor into position watching key avenues of approach, he had me bottled in.  As the Company Commander, we folded this flank!  Opening the way for Gerry.  (This had a very Mortain, Operation Luttich feel to it, despite out thoughts it could have been Normandy.).

Dave had my forces pushed into a Kessel, and you always know what happens after that!


Infantry platoon overwatching the US positions

Germans holding the flank!
 FINAL THOUGHTS
Another good game of Crossfire although I have to say we did both draw defensive missions again.  I need to take Paul's advice and limit the total number of defensive missions so their ratio is 2 or even 3 to 1 so you can mitigate the odds of the other player getting another defensive mission.  The game would have had an entirely different feel if David had to move infantry into my forward area, or vice versa.

Playing with vehicles using Steven Thomas' house rules was great.  The vehicles add a really powerful offensive option to a player, and David used his decisively to lock down an entire flank!  Had I used my Sherman numerical advantage (IE not been afraid to lose any) I could have possibly changed the game a little but I was cautious and afraid to take too many risks on the left.

I'm going to take a look at the CROSSFIRE Mission Rules (Mac's Missions) and see what I can do to mitigate the possibility of both of us receiving defensive missions.

We both agreed to continue our Friday night CROSSFIRE games and also agreed I need to standardize my terrain packages better to make them more suitable for CROSSFIRE.

Monday, February 13, 2017

Saturday Et Sans Resultat (ESR) Game!

I can't think of a better way to cap off an epic day Saturday of Napoleonic gaming than with a rules set that captures a truly epic scale of Napoleonic command.

We played our first game of "Et Sans Resultat" a set of rules aimed squarely at Army and Corps level command.  Aside from getting into a lengthy rules discussion here, I will say that ESR delivers on its promises fully.  You have never felt or experienced the problems of commanding a Napoleonic Army as you will in this game.  You have my word.

Now onto the ESR game.  I stayed on my side of the table (closer to the donuts) and Dave stayed as the French.  We kept the terrain the same but the missions changed.  I needed to breakthrough and capture, what I thought was a road leading to a Danube River crossing site, when in actuality I was supposed to capture the crossing site itself!  Oh sh**.  that courier we just sent to Archduke Charles?  Get him back here......

The first thing I'll say is the table really looks like a Napoleonic battlefield.  Large, ponderous columns of infantry marching up to the battle area.
Austrian columns 


French columns!

Austrian cavalry on the Austrian left.


The smallest infantry grouping I made as sort of an ad-hoc Garde du Corps who I thought I could use as a holding force.

Ken helping out David with the movement!  
 Your job is to figure out what orders you want to give your forces, in light of a greater, over-arching geographical objective.  Then your columns move out "ployed" (opposite of deployed) and you have to roll to see how many of your battalions can deploy out of line when you need them to.  Huge decision points here, folks and lots to think about in terms of how and when you want to deploy divisions for the upcoming close fight.

The Austrian columns about to collide head-on into the French!
 At this point, given the proximity of the French, I spend a fatigue point (more on this later) and decide on deploying here to fight.  My cavalry will end up keeping their orders and move straight into the French without as much as a second thought.  This would result in the utter destruction of my Cavalry division!  All due to a poor decision on my part to keep their orders.


Austrians deploying for battle.  The rear of the Austrian infantry column is in the bottom right
Units coming out of their divisions have to "shake out" as best they can when they deploy in order to maximize the Division's frontage as well as maintain units to support them.  It's a balancing act to control all these units!


Battle unfolding
 The one thing I'll say, is this game is about the movement and fighting of Armies, and the table looks like a painting of a Napoleonic battle, with swirling masses of infantry and cavalry locked in combat!


 As my cavalry plow into the French, Dave's Cavalry plow into mine!  Ouch!  not only do the Bavarians route the Cavalry squadrons who attacked them, Dave launches squadrons of Dragoons into my flank.
Austrian Cavalry up the middle.  French Cavalry to the left of the picture.  Ouch!

"They were just following orders" My hussar squadron moves straight up the hill they were assigned to capture.  Only to find a battery of guns up there.
 Fatigue at this point is killing my formations and for every battle I get engaged in, the sheer amount of fatigue points is ensuring I pay dearly for losing a fight.  You really must manage your fatigue points or else they will get out of control and you'll end up paying dearly, if an "assessment" is forced upon you.  Think of assessments like morale checks, where multiple factors are taken into consideration and applied against a die roll.  In some instances, fatigues are multiplied during assessments, so the more you have, the worse it can get for your units.

The battle unfolds with the Austrians getting a terrible beating.  2 Divisions are gobbled up by the French!  Note the successive lines of troops in the background.  This wasn't intentional to take a picture, but rather how the troops deployed out of their Division's column.

Dave's rampaging Dragoon squadron who won battle after battle after battle before Ken came in and put a stop to it!  I told him to give them a special paint job and retire them to the shelf, covered in glory.

There is no more Austrian Cavalry!
So you can see how decisions led to the destruction of my Austrian Cavalry, and we're in the process of losing another Austrian division!
The last action of the game would see the Austrian Garde du Corps go "up the middle" against deployed French with artillery support and suffer greatly due to skirmisher, artillery, and infantry attacks.  What a waste of damned fine infantry!


10 fatigue points!  Oh lord!
 Thoughts on ESR:
So as you may have been able to tell, this is a game concerned with the movement and placement of divisions, placing you in the shoes of the Army's commander.  True, you're maneuvering battalions around, but the placement, deployment, arrival, and management of your divisions is crucial.  Think of the Battalions as components of the larger force.  You also have to shepherd your resources and manage fatigue points as they become very devastating after awhile.

Deployment of infantry is very important as is the decision when to deploy and how to deploy.  Placing your guns is a special action made by the division commander, which I love, and combat is handled in a very effective and streamlined way (think about it this way, the combat sequence is not really the star of the show like in so many other game systems, it's just another component of the bigger system).

In ESR, I believe you are really punished for bad decisions, as I certainly was in this game!  I believe ESR is a simulation where you can really match wits and ply your trade as a general.

You can read more about ESR from the Wargaming Company's Website.


Sunday, February 12, 2017

Saturday Shako and a Bonus Game: Et Sans Resultats (ESR) Napoleonic Wargaming Rules!

Ken was gracious enough to allow us to keep our epic SHAKO II game up through the week so we could finish it this weekend.  I know you were all on the edges of your seats in anticipation of the final chapter of the battle - the death-knell of the Austrian invasion of 1809!

When we left off last week, Dave's Bavarians (my painted Bavarians) were just arriving in my deep right flank from a flank march mission, to which I promptly sent the entire Cavalry division against them - heavy horse as well as light hussars.


I rolled well for Division initiative (i LOVE this feature of Shako II and it really adds an element of tension as to which Divisions will move in which order) and launched a spoiling attack against Dave's French who, in their current frenzy were preparing to over-run me this turn.  The attack went off fairly well and sent back Dave's leading Battalions.  To be fair, all of our leading Battalions were suffering from the 4 turns of firefights along the line.  I just capitalized on winning the initiative roll and sent in my Austrians who by virtue of having 1 more strength point, were able to absorb more damage.

Austrian Cavalry Division enroute to attack the Bavarians emerging from the woods.

Dave's lead battalions are sent to the rear after the Austrians launch a spoiling attack

I give a little ground at this point, just in case my horse aren't able to dislodge the Bavarians.


Dave lording over the French.  he skillfully handled this small Corps.  I for one am looking forward to more Shako!

Situation at the end of th battle

Austrian left
 My spoiling attack kind of ruined Dave's plans for exploiting a breakthrough on the Austrian right.  At this point I should mention my orders, straight from the Archduke, to hold the crossroads to my rear.  I am happy to report to his excellency that the crossroads remain in our hands.

Dave continued to move in with his second line as I move up fresh troops to absorb them.
 So it's worth mentioning here that we goofed and Dave formed his Bavarians into square in the woods to defend against my Cavalry charge.  Well, Cavalry cannot charge stuff in the woods and we didn't fully realize this rule. We regenerated the Bavarian battalion and kind of were like "do-over".  The cavalry could not attack the Bavarians. So anyways the Cavalry, following their orders, galloped right around those Bavarians in the woods.  Still however, if I could keep them bottled up in those woods, all the better!


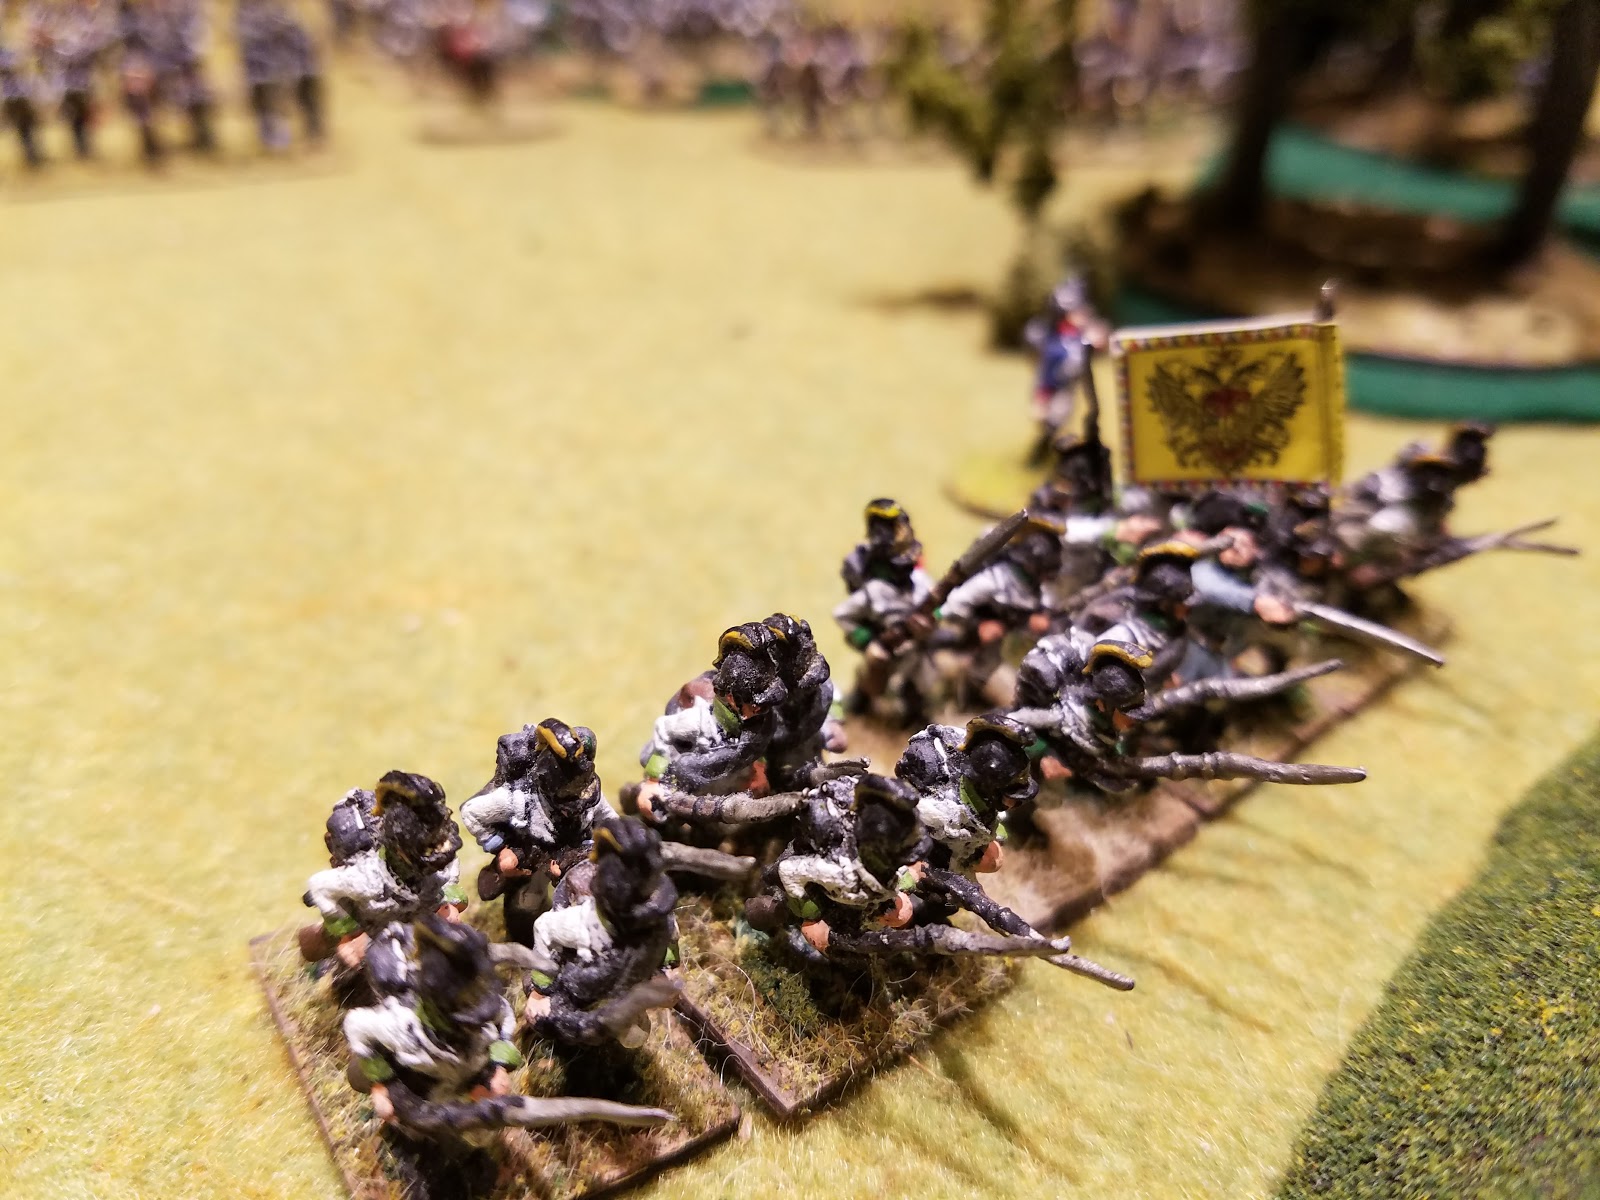
The heroes of the day.  The tough Austrian line.

Dave capitalizing on a breakthrough moves in for the kill!
 we also realized the folly of trying to melee with elite troops.  Tough work, as Dave found out going head to head against my Austrian Grenadier battalions.

View from the French side.
 At this point, the French broke off contact and withdrew in good order.  The Austrian shoulder of the army was saved.

And now?  BONUS SELECTION.  or as I like to call it "Dave's Revenge!"  We played our first game of "Et Sans Resultats" a set of rules aimed squarely at Army and Corps level command.  Aside from getting into a lengthy rules discussion here, I will say that ESR delivers on its promises fully.  You have never felt or experienced the problem of commanding a Napoleonic Army as you will in this game.  I promise.

Now onto the ESR game.  I stayed on my side of the table (closer to the donuts) and Dave stayed as the French.  We kept the terrain the same but the missions changed.  I needed to breakthrough and capture, what I thought was a road leading to a Danube River crossing site, when in actuality I was supposed to capture the crossing site itself!  Oh sh**.  that courier we just sent to Archduke Charles?  Get him back here....

The first thing I'll say is the table looks like a Napoleonic battlefield.  Large, ponderous columns of infantry marching up to the battle area.
Austrian columns 


French columns!

Austrian cavalry on the Austrian left.


The smallest infantry grouping I made as sort of an ad-hoc Garde du Corps who I thought I could use as a holding force.

Ken helping out with the movement!  
 Your job is to figure out what orders you want to give your forces, in light of a greater, over-arching geographical objective.  Then your columns move out "ployed" (opposite of deployed) and you have to roll to see how many of your battalions can deploy out of line when you need them to.  Huge decision points here, folks.

The Austrian columns about to collide head-on into the French!
 At this point, given the proximity of the French, I spend a fatigue point (more on this later) and decide on deploying here to fight.  My cavalry will end up keeping their orders and move straight into the French without as much as a second thought.  This would result in the utter destruction of my Cavalry division!


Austrians deploying for battle.  The rear of the Austrian infantry column is in the bottom right


Battle unfolding
 The one thing I'll say, is this game is about the movement and fighting of Armies, and the table looks like a painting of a Napoleonic battle, with swirling masses of infantry and cavalry locked in brutal combat!


 As my cavalry plow into the French, Dave's Cavalry plow into mine!  Ouch!  not only do the Bavarians (my Bavarians!) route the Cavalry squadrons who attack them, Dave launches his Dragoons into my flank.

"They were just following orders" My hussar squadron moves straight up the hill they were assigned to capture.  Only to find a battery of guns up there.
 Fatigue at this point is killing my formations and for every battle I get engaged in, the sheer amount of fatigue points is ensuring I pay dearly for losing a fight.


The battle unfolds with the Austrians getting a terrible beating.  2 Divisions are gobbled up by the French!

Dave's rampaging Dragoon squadron who won battle after battle after battle before Ken came in and put a stop to it!!!


There is no more Austrian Cavalry!

The last action of the game would see the Austrian Garde du Corps go "up the middle" against deployed French with artillery support and suffer greatly due to skirmisher, artillery, and infantry attacks.  What a waste of damned fine infantry!


10 fatigue points!  Oh lord!
 Thoughts on ESR:
So as you may have been able to tell, this is a game concerned with the movement and placement of divisions, placing you in the shoes of the Army's commander.  True, you're maneuvering battalions around, but the placement, deployment, arrival, and management of your divisions is crucial.  You also have to shepherd your resources and manage fatigue points as they become very devastating after awhile.

Deployment of infantry is very important as is the decision when to deploy and how to deploy.  Placing your guns is a special action made by the division commander, which I love, and combat is handled in a very effective and streamlined way (think about it this way, the combat sequence is not really the star of the show like in so many other game systems, it's just another component of the bigger system).

In ESR, I believe you are really punished for bad decisions, as I certainly was in this game!