Tuesday, May 25, 2021

BAOR Neustadt Junction Redux: Team Yankee 50 Pt Battle

Cold War month grinds inexorably forward like a Soviet tank division as Dave and I linked up on Sunday for some much-needed face to face wargaming.  The battle?  Neustadt Junction - again!   For those needing a quick orientation, see my Tactical Decision Game post here. 

This time Dave and I refought the battle with different rules.  The rules in question?  BF Team Yankee.  The minis?  GHQ's 1/285 micro armor.  The war?  The big one that never happened - World War III on the North German plain.

T-62s split into 2 "companies" of 6 tanks and 4 tanks.

Dave and I played a smaller Team Yankee - 50 points.  I have to say with a smaller number of points, the choices one must make to support are critical!  How do you weight your force?  Tanks?  Mech infantry?  How much artillery or is there even enough in the budget to support artillery?  I had much fun building a force of a Company-sized element from the  BAOR's 1st Staffordshire, as well as an older Soviet tank division with T-62M models.  The reader will also note we had much fun with "special" weapons such as Krasnopol guided projectiles, tank-launched ATGMs, and Harriers!

The motor rifle company in BMP-1s and ZSUs in support 

The Soviets brought in the "big guns" in terms of supports and had a battery of 2S3 "Acacia" SP howitzers in support, which could fire the Krasnopol laser guided projectile!  Cool!  The reader will also note Dave brought his excellent 6mm tree stands along to populate the table with.  Love those trees!  

British Milan Teams sit and await Ivan from their fighting positions

The British have a company-sized element with a troop of Chieftains from the Royal Scots Dragoon Guards in support, as well as RAF Harriers in reserve.  Dave naturally placed the "Jocks' " Chieftains in ambush!

British GPMG (jimpy?) teams in fighting positions - unpainted Blowpipe section behind them.

Scimitars lie in wait - ready to shred any Soviet recce that comes through.

I step off onto the attack in the same way from the first thrust against Neustadt Junction - BMPs up the middle, and the tanks on the right.  The armor's job is to isolate the powerful hilltop position, and the BMPs will go straight up the middle as fast as their tactical movement speed allows - I need them to move and shoot constantly to keep the resilient British infantry pinned inside their foxholes.

Soviet Heavy Guns pound Le Haye Saint, er, Neustadt Junction pinning the Brits there.

Meanwhile, Soviet recce is shot to pieces by the Scimitars in the cornfields

THe Soviet guns bring a very good firepower total into the mix and the artillery is crucial to whittling the numbers down on the objective.  Guess where those guns will fire next?

Progress on Turn 2 - note the BMPs only successfully "crossed" through the treeline with 7 BMPs from the MRC.  There are 3 more bogged at the treeline behind them.  Meanwhile the T62s fan out to knock out British forces on the hilltop.  Important consideration here - the T62 main gun is "brutal" meaning I should have made the Brits reroll their successful saves against it.  I forgot to do that.

BMP company struggling to stay together - "we'll be good provided British artillery doesn't start dropping on us now"

Right on cue, British Artillery plasters teh BMP company in the open, with a direct hit on one of the tracks, knocking out the BMP and killing a team of dismounts.  

Turn 3, the Soviets continue to plaster Neustadt Junction with shelling and the BMPs grind forward, with their stragglers racing to catch up.  The T62s are forming a cordon around the hill to keep the pressure on the infantry.  THe MILAN gunners take the bait and start destroying T62 tanks instead of going after the BMPs.  Perfect!

LITKO destroyed/burning markers are perfect for KO's vehicles playing with microarmor

I'm biting my nails so far and incredibly pleased that the Soviet plan is working.  The BMPs will be at the doorstep of Neustadt Junction in a turn with almost all of their dismounts present and ready to over-run the town.  I can almost taste the German bread raided from a "liberated" bakerei now.

One important consideration is the "danger close" aspect which is 6" for falling artillery.  I have to get my Soviet troops in far enough, blast the British to oblivion, dismount, then assault during the assault step.  Bear in mind that the British also must be pinned because their unpinned rate of fire is devastating.  

Doctrinally, I'm going to use smoke from the artillery to cover my infantry's advance, also.  

You have to sequence and time this dance perfectly for it to work.  

BMPs fanning out to assault Le Haye Saint / Neustadt Junction

Dave is still banging away at the tanks, knocking out 1 or 2 each turn as the BMPs edge closer to the junction.  Am I actually going to be able to pull this off?!?!?

Viktor "Suvorov" once said in his "Inside the Soviet Army" book - tanks are grapes to the USSR - made to be squished!  


Soviets isolating the hill with fire

British are getting whittled down but is it enough?  
DAve's outstanding painted Timecast 6mm German modern buildings adorning the table - what a pleasure to game with!  The British are going to be supporting in the fight of their lives in a few minutes as the BMPs come into view.

The Soviet commander calls in the smoke rounds and they fall in a beautiful line, protecting the dismounts as best they can.  The BMPs move up in perfect, parade-ground precision.  They've practiced this maneuver many times.


I should also mention that the British have sprung their RSDG ambush last turn finally and the Chieftains  join in the slaughter of the T-62 companies!  UNfortunately, my Soviet FOO is tied up with the smoke mission and cannot target them this turn with the special Krasnopol rounds!

The Chieftains pouring fire into the Soviet companies 

The BMPs quickly lurch to a stop - the commander squinting through his field glasses, only able to see through fleeting gaps in the smoke.  "This is it" he whispers to himself and keys the radio - "ADVANCE!  ATTACK!  ASSAULT!" The BMP doors spring open and before he can even put the mike down, throngs of men are moving forward in a surprisingly coordinated and violent fashion, firing bursts and moving forward towards the village.  Murderous British tracers spring from virtually every direction as the ground in front of the village becomes a killing ground of defensive fire.  "Even while pinned the Tommies are a dangerous foe" the commander snarls.  British FV432s were brought up in support and the town opens up with fire from concealed positions.  The men's momentum is sapped and they go to ground or fall back to their BMPs!

Soviet dismounts make their way along a hedgerow inching towards Neustadt Junction

The brave defenders from the 1st Staffordshire are successful in defending the town from this wave!  Soviet troops fall back, pinned!


Bigger picture.  Ivan is still dangerous, but the assault has lost its momentum!

The heavy defensive fire really saps the assault, even though "only" 3 teams are lost.  The British turn is up next and the FV432 machine guns along with the abbots and infantry exact a high toll on the Soviets in the open.  Meanwhile, I am able to take out a Chieftain with a side shot from a T-62 that appeared around the corner of the right hill.  The Chieftains adjust and prepare to even the odds a bit with the armor next turn!


The next 2 turns would see much of the Soviet infantry eliminated trying to get back to their carriers, etc.  

A bit confusing on the "tank attachment" rules here and figuring out when and how the Soviets would bug out due to morale.  Dave kills the Soviet Battalion commander with a well placed Chieftain shot, and completely shreds the Shilkas with 30mm rarden fire from the Scimitars.  This is ugly, but pretty desperate fighting on both sides.

Turn 7 the Soviet motor rifle company retreats from the field due to high casualties and failing its "good spirits" morale check.  The tank battalion ceases to exist as a fighting force with only 2 tanks left in total.  The British have successfully defended Neustadt Junction against tough, determined Soviets!  A tough, near-run thing!

Lessons Learned
So a gripping and edge of your seat battle - but what did we learn?  Well for starters, we were a bit rusty with the Team Yankee rules, especially rules around morale and transport units, as well as some of the myriad of "special" rules for certain weapons like the "brutal" feature of the tank guns, etc.

While many balk at bringing artillery due to points, or the high cost of tanks, I find that the combined arms approach is extremely important and validated.  Mechanized infantry are a great bet to bring along and are worth their weight in points.  Artillery has its use simply in pinning enemy troops (unfortunately the Soviets still need a 5+ to range in, so having your TRP smartly placed is important)

Ruthlessly, I find the tanks are great "throw-aways" to bring with you to attract fire of the infantry and the AT guns, while trying to over run with dismounts.  Artillery is wonderful to have to root out dug in troops and much better than relying on your infantry with direct fire shooting (but combine if you can - again - combined arms is key here).

Unfortunately we never got to test the AAA fire against the Harriers as the flyboys never showed up but the British were able to save the junction from being over run.  

All in all, a perfect and relaxing game for a Sunday afternoon and a great Cold War themed battle to close out May.

The 2021 Gaming Calendar lists June as another World War II month and frankly I can't wait to get some Flames of War, Battlegroup, and maybe even some Iron Cross 15mm games back onto the table!  

Stay tuned as I am in the process of building out some American Armor in 15mm - perfect for some Kasserine Pass games!  Work also marches forward on painting some 15mm Ancients, and it looks like Napoleonics are coming back to the workbench and gaming table soon.  All great stuff going on here.

Many thanks to Dave for showing me how to "Brew up" a "proper" cup of tea for the game (Fortnum & Mason with milk and sugar.  Fancy!), and also bringing his splendid terrain to fight over.

Saturday, May 15, 2021

Tactical Decision Game: Battle of Neustadt Junction #1

 Last week I posted the first installment of a World War III tactical decision game featuring a British mechanized battalion defending a road junction against a forward detachment of the Soviet 10th Guards Tank Division.  

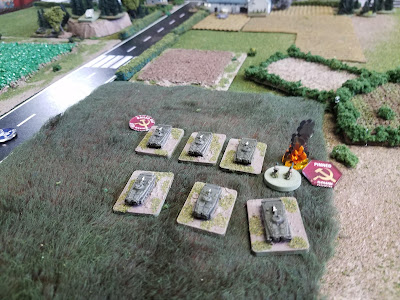
Looking from the Soviet start line.  Neustadt Junction in center.  Woods Alpha on the left.  Big Woody Hill Bravo in center, and Hill Charlie on the right.

I enlisted the help of fellow bloggers and wargamers to help place the British forces and this morning I gamed out the battle as we had jointly planned and here is the comprehensive AAR!  

Some professional armies call this a "murder board" :)

The Plan:

Situation

Enemy.  Elements of the Soviet 10th Guards Tank Division Forward Detachment are attacking to seize Neustadt Junction for follow-on forces of the Operational Maneuver Group.  (Soviet plan is below)

Mission

1st Battalion, Staffordshire Regiment, Defends in vicinity of Neustadt Junction in order to prevent Soviet Operational Maneuver Group from outflanking 1st Armoured Division (UK) position.

Execution

The battalion (3 mechanized infantry platoons with cross attached armoured troop and recce troop) is deployed in defensive positions with multiple engagement areas to destroy Soviet forces by fire and set conditions to move over to the offense.  Fire Support plan is tied into the defense with 3 x FASCAM missions and 2 x fire missions on standby to break up Soviet dismounted attack.

Per your suggestions 

  • 1st Platoon is posted dug-in in front of the "Alpha Woods", with fall back fighting positions within the woods.  
  • 2nd Platoon is posted dug-in front of Le Haye Sainte (Neustadt Junction) with fallback positions identified in the village to fall back to.  
  • 3rd Platoon is posted atop Hill Charlie, dug-in with the Chieftains posted behind Hill Charlie in reserve positions.

Most of these positions are force-protection measures to keep the platoons safe from the Soviet artillery that is expected to hammer forest edges, the town, and the surrounding hilltops.  Once the barrages lift, the plan is to move back into the actual Alpha Woods and the town.

There are 3 FASCAM missions to attrit and/or slow the attackers enroute to the objective which have been fired in front of both hills at the Soviet start line.

The Enemy Plan

I developed a Soviet plan which was ruthlessly stuck to before the British plans came in.  The plan was brutally simple.  Attacking up the left and clearing out those woods would have taken the entire company's effort to root out NATO troops.  So with that in mind, the BMP company would go over the big hill in column, fan out and attack Neustadt Junction directly, while the T-62 company on the right would go around the big hill, and demonstrate against Hill Charlie, keeping it occupied.  Soviet recce would secure the left flank of the mech company and keep anything in the Alpha woods occupied.

The Soviet fireplan was predictable.  5 missions of 122mm medium artillery were available for planning.  Turn 1 would see artillery fall directly on Woods Alpha, Neustadt Junction, and Hill Charlie as predicted, with another mission falling atop Hill Bravo to the rear.

The Battle

Soviet recce engaging Scimitars in the fields in front of Neustadt Junction

Turns 1 and 2 go predictably smooth.  Soviet artillery falls harmlessly into the positions that you all predicted it would, except for light casualties against 3rd platoon on Hill CHarlie (1 single hit), the barrage falls against the Alpha Woods, Bravo Hill, Neustadt Junction, and Hill Charlie.  

While using Alex's "Oil Cheaper than Water" modified 1HW rules, I added a Cold War rule for the Soviets that they could move as an entire company off of 1 die roll provided they all moved same distance, direction, etc.  Extremely handy when attacking an enemy position while in column.   

While the "plan" had the BMPs at the doorstep of Neustadt Junction on Turn 4, postulating a 10" move per turn, the woods slowed the BMPs down considerably.  It also took a turn to move into line from column, and also saw a turn engaging troops from multiple directions.  The FASCAM caused a single hit on the mech company's platoons as they moved off of the wooded hill.  The Recce and MILAN fire caused considerably more hits against them.

BMP Mech Company shakes out from column to line.  Note the casualties caused by either recce troops or the FASCAM minefield.  Units are gone at 7 hits.

The British have a field day with MILAN ATGM fire and their volleys are successful against the BMPs on the Soviet left, and T-62s on the Soviet right.  It doesn't bother the Soviets all that much, though, all the BMPs have to do is survive until they dismount 4" from Neustadt.  

The British shoot MILAN fire the whole way, and the Chieftains get into the fight on Turn 3 and, coupled with MILAN fire, make extremely short work of a single T-62 platoon from the Company.  The T-62 company continues to charge Hill Charlie, however, keeping the MILANS and deadly CHieftains at bay.  Remember that.

Chieftains mixing it up with T-62s with a whopping 4 fire dice hitting on 3+

The BMPs get sorted out but some get nasty "permanent" hits which will transfer over to the infantry dismounts and represent casualties.  Still, the advance continues.

Turn 4 Big Picture.  T62 Company on the right doing its job of keeping CHieftains and British 3rd Platoon tied down.  BMPs getting online to assault the Junction.  The dice all represent hits.  Note the yellow dice on the T-62 company on the right, who are suffering tremendously against the Chieftains but still charging...

Recce pulled back to Neustadt Junction.  While their presence was a God-send to the troops there, they were needed on the British right flank to free up 1st Platoon to come to the aid of the 2nd Platoon who are now facing an entire company of BMPs and dismounts in front of Neustadt Junction.

The British, getting nervous at this point, drop the remaining 2 missions of 105mm HE onto 2 x platoons of BMPs that already have a high number of hits, hoping to break up the attack combined with ATGM fire.  THe original plan was to use the HE on the dismounts.  

While the shooting isn't bad, scoring a "permanent hit" on a Soviet BMP platoon and eventually eliminating a platoon of BMPs, the dismounts get on the ground, and the other Soviets dismount, a bit furhter out than the planned 4" but still enough to threaten Neustadt with new units to fire at.  The defending British infantry platoon, feeling quite alone in the world right now has 4 hits and is on the ropes.  They cannot, however, afford not to shoot this turn.  The Battle has reached a critical point.  The British platoon is going to fold under the continuous pressure of the BMP company and 3rd Platoon is decisively engaged on the British left atop Hill Charlie with a platoon of T-62s still trying to overrun their position.  The Chieftains, now at 6 hits, break contact to rally off some hits before launching into the flank of the mech company as planned.

Soviet dismounts on Turn 6, 2 turns late, in front of Neustadt entering into close fire range.  Note how the BMP IFV platoons are in bad shape with a yellow "permanent" 4 hits, and the 6 hits on the other.  This was thanks to great British shooting, but they still to to drop off their dismounts in front of Neustadt to close assault the British 2nd Platoon dug in there.  Note the recce also there helping with shooting.  Turn 7 the British 2nd Platoon had had enough and pulls out with 7 hits.

2 x BRDMs held down a British platoon for the entire battle.  Note the attack going in against Neustadt to the upper right.

So there it is.  Turn 10 and I stopped play.  As your "observer / controller" there are some lessons to be learned here that I wanted to review.

1.  2nd Platoon was asked to do too much on its own.  The Chieftains at the onset of the Battle fell for the bait and immediately engaged the T-62s directly in front of Hill Charlie.  Their use probably should have been incorporated into the engagement area scheme a bit better with pre-planned firing positions that could cover the whole EA with their 40 inch tank gun range.  This was my mistake I believe, as their reserve position was sound.  They should have been able to help against the BMPs as well.  When fighting doctrinal Soviets (I made the attack plan after reading John Curry's "Why Warsaw Pact Tactics Work So Well in Wargaming" article...) every tank gun, every rifle, every ATGM, and every auto-cannon needs to be accounted for and pointing at something!

2. Fall Back position and mission for the Recce was needed.  While the recce Scimitars did their job magnificently, forcing the BMPs to deploy in order to shoot early, they simply ran like hell next to Neustadt Junction instead of Hill Bravo.  This turned out to be fortuitous for the 2nd Platoon, however they should have had a pre-programmed fighting position to move to.  THeir assistance in the counter-recon fight could have freed up 1st Platoon to move to Neustadt.  Which brings me to my next point...

3. British 1st Platoon allowed itself (the controlling player - IE me) to become decisively engaged in fighting the Soviet Recce and should have been moved immediately to Neustadt to support 1st Platoon.  By Turn 10, it is likely too late to defend and it is likely they may have to be used in a very costly counter-attack to recapture the town.

4.  Now that I briefed some issues with the engagement plan, probably best to discuss strengths, too.  The platoon dispositions were solid and I'm not sure I would change any of the deployment of the defenders - just modify where they either fall back to, or displace to.  I would not change the location of the defending platoons, but rather would move the Chieftains up to the opposite side of Hill Charlie so they could range the entire engagement area, not just the area in front of Hill Charlie.

5. The Fire Support Plan was solid, also.  The FASCAM deployment was a great idea and enabled a 3D6 attack roll against each BMP platoon as it crossed over the hill and onto the valley.  This caused a total of 5 hits spread throughout 3 platoons, which were hits that the PBI did NOT have to cause.

6. Finally the force protection measures were genius.  Digging the platoon in, in front of the woods and the town avoided a 4D6 attack from medium Soviet artillery which was undoubtedly coming.  That's a great NATO tactic to emulate in future games.


Now that the game is at Turn 10, there are 5 left.  What should we do?  Reset the forces and try again?  Or try to mount a desperate counterattack to recapture Neustadt with 1st and 3rd Platoons?  

Thanks to everyone who played!  I am looking forward to more TDGs!


Sunday, May 9, 2021

Tactical Decision Game: What Would You Do, Brigade Major?

"Neustadt Junction" (fictitious) 1984.  Federal Republic of Germany.  Northern Army Group Area of Operations.  British 1st Battalion, Staffordshire Regiment, 7th Armoured Brigade, 1st Armoured Division (UK).


You crouch low and enter the tactical operations "centre" track and the Major hands you a steaming hot mug of tea.  It's black, not usually the way you drink it, but it'll do as you're running on 2 hours of sleep from the last 48 hours.  The men in this vehicle have scarcely had that.  Artillery rumbles in the distance.

The BM directs you to the map of the area of operations, which is covered in blue and red pencil marks, tics, and arrows.  An hour ago, time you don't have, you charged the staff with developing a battleplan to defend Neustadt Junction from a Soviet assault.  

"Okay, where are we at, Andrew?"  

"Sir, Much like our exercises, the Soviets have penetrated at Kirchenheim and are making top speed for the MLR, which our wargaming assumption had postulated."  

"Right.  Stage is set.  How did we get here?"  You point at the disposition of squadrons on the map.

"Intelligence is confident we are facing the advanced elements of the Soviet 10th Guards Tank Division.  Their forward detachment will consist of a tank company, and likely a motorized rifle company in BMPs with recce and organic artillery support.  They'll need to take Neustadt Junction, where we are posted.  

Division needs us to hold in order to organize the defense west of our position.  The Soviet operational maneuver group could be committed to multiple courses of action more easily if this junction is captured, which is where the we come in. We must hold them today in order to launch a counterattack and blunt the 10th Tank.  Andrew knows that you know all of this but he's a thorough one, and this is also for the benefit of the staff present.

Fair enough.  What's the plan?

Neustadt Junction from the British perspective - the Soviets are coming from the table edge at top of the picture.  British may set up to halfway down the table (3 feet from the British edge).

The vignette above nicely sums up the actions that you, my Brigade Major, were asked to develop an hour ago.  Our Mechanized Infantry Battalion has been tasked organized as follows:

  • 3 mechanized infantry platoons mounted in FV432
  • 1 squadron of Chieftain main battle tanks cross-attached to us from the Royal Scots Dragoon Guards.
  • Battalion Recce section in Scimitar light tanks.
  • 5 x Fire missions  of 105mm from the RHA's Abbots. (FASCAM, Smoke, and HE available on request)

There is no time to develop hardened positions, however the men have time to prepare fighting positions, just no vehicle dugouts.  Engineers are tied up elsewhere.  Tank guns and ATGMs have a 40" range.  The entire length of the table, down which the Soviets will be advancing, is 72" and British forces may start at 36".  Neustadt is 2/3 of the way from the Soviet baseline, so 48 inches from their edge.

You know the Soviets have a company of tanks, a company of mechanized infantry in BMPs, probably plentiful artillery, and recce in support.  All told about 25 vehicles total.  This will be a Soviet hasty attack.

My questions to you were as follows:

  1. What is the defense plan?  Where should we post our platoons and the attached armor to stop Ivan?
  2. What is our Fire Support Plan?  Where are we requesting to drop our artillery to support the plan?
  3. What should we keep as a reserve?

Some coordinating instructions:

  • Platoons must stay organic (due to the rules I'll be using) so the armor stays with the armor.  We cannot break up the platoons.
  • We can start halfway down the table.
  • all woods are light woods.  Neustadt Junction is a small built up area and will provide cover and concealment to the defenders.

Here are some more pictures to help with your plan development:

View from the Soviet point of view 1.  Woods Alpha is visible on the left, along with Hill Bravo to the rear of the British position

View from Soviet approach 2.  Hill Charlie is visible on the right

Aerial view from Soviet approach.  You note the forested area to the front of Neustadt Junction on the left.  The forested hill on the right that commands the valley, and the large hill behind the position.
Let's call the woods on the left, woods Alpha, the forested large hill to the rear is hill Bravo, and the hill on the right of the picture as hill Charlie.  What is the plan, Brigade Major?

Please submit your plans to me in the comments below or via email.  I have already drawn up the Soviet plan on how I'll assault the position, so I'm looking for a defense plan on where to post the British platoons and the fire support plan to support.

Post your questions in the comments and I'll answer them as either the S2 or S3.  Good luck ladies and gentlemen!!

Saturday, May 1, 2021

Battlegroup: Overlord - Shaking off the Cobwebs

 Well WWII month was a bust, but not a total bust.  I worked 1/2 of most weekends and lots of family stuff occurring that demanded my time and attention but I last week I did find myself with a bit of free time to throw some troops down on the table and fight out at least 1 x WWII engagement during "World War II Month" on the wargaming calendar!

The scenario featured almost all infantry forces and I used the "Defense Line" scenario from the Battlegroup: Kursk rules.  The Ami's are rated as "inexperienced" and the Germans as "regular."  Infantry platoons were the core force for both sides and they got to bring along some nice supports as well.  The Americans must break through and capture the village at the other end of the table.  Unfortunately there's a wooded area, crops, and a small farm to overcome first.  Naturally the Germans weren't going to let them walk in!

This was a "Squad" sized game, meaning 1D6+officers for action points.  American breakpoint was 17 and the German breakpoint was 20.  A hard, bitter fight is shaping up!

The patrol makes its way up to the hedge.  The Artillery FO is with them as there is a battery of 105mm guns on standby waiting to adjust fire.

The platoon leader scans the field.  "it looks deserted. let's go!"  An NCO grabs his arm.  Wait a minute sir - use your field glasses.

Upon first glance, looks pretty safe.  

But through the field glasses they notice what looks like a vehicle...

The Lieutenant brings up some firepower and a plan is formed to edge their way along the field to the left.  The entire platoon is making its way up here to the line of departure so they'll have the remaining squads flank the woodline while artillery plasters the treeline ahead.

These GIs are firing through a break in the hedgerow

It turns out that Ernie Pyle was embedded with this group of American Soldiers.  He took some classic World War II photos of the action!

A GI with a BAR gets into position.


As the GIs move up to the hedgeline, a German MG42 team which was on ambush fire in the woods across the field opens fire on them, causing havoc and pinning the GIs.  The FO, with the "radio network" special ability (yes, the Americans come with LOTS of cool abilities in Battlegroup) rerolls the comms failure and reaches the fire direction center.  Unfortunately the spotting round is way off target.  Cancel Mission!  Cease Loading!  He yells to the FDC.

The Fire Support Officer and his observer and RTO trying to get steel on target.

Meanwhile the Germans have a correspondent from "Signal" who was embedded with them!  He snaps a few pictures of the Landsers at the front!  This MG42 team is creating havoc for the advancing Ami's across teh field.

An MG-42 heavy team sets up and starts plastering the Americans at the base of fire.  It's getting ugly and forcing some chit pulls as the lead American squad in contact loses their BAR team and is about to lose their rifle team, also.  Meanwhile, on turn 3, the Americans get lucky with their reinforcement roll and almost all of the elements from the platoon show up, including the HMG team, the additional squads, and of course, "the old man" shows up with them...

Alright Lieutenant, what's the situation here???

Then of course brass shows up.

meanwhile the HMG sections starts hammering away at the treeline while second and third squad go "up the left".  Careful!  There's a sniper in those woods!

It's looking really grim for the Americans right now.  The MG42 with the tripod gets a whopping 8 fire dice and is forcing lots of chit pulls!  The Germans are playing very conservatively, however, because while their BR is high, they dont have the infantry numbers to spare.  They do, however, have 2 x armored fighting vehicles, a Marder and a Panther, that they're going to start using!  The Marder starts blasting away at the Americans, prompting  the bazooka team to come up.  The flanking force is just starting to get moving.  THis seems too easy.


Trading shots with the German teams in the woodline.  The Americans would get lucky and force a bunch of German chit pulls now.  The battle is see sawing with no clear indication of who is winning.  It could go either way!

With the threat to their front neutralized, the Americans cautiously make their way forward.  The armored vehicle in front of them has "Beat feet" and withdrawn.

more pictures for the folks back home!

The Americans gain the treeline, and the farmhouse to their front (one of the objectives) and the Germans have pulled back to the village.


But the GIs hear the tank tracks and engine of a heavy armored vehicle coming their way!

THe Germans are cagey.  They've pulled back to the village with the MG42 team escaping through an orchard as the Americans just came into sight trying to flank them.  While they're setting up a new position, the Panther engages the flanking force in the open with co-ax fire!  WHere the hell is the bazooka team!  Meanwhile the Americans close assault the sniper in his hide site to the loss of 1 man who gets hit on the way into the assault!


Note the Americans at the farmhouse and the Panther in the upper left!

The destruction of an American rifle team at the farmhouse seals the deal for the Ami's and they pull their final chit that surpassed their breakpoint.  The Germans were only 3 away at this point.  What a close game!  The Americans took heavy casualties to gain that treeline and the farmhouse, but couldn't hold onto them.  Tomorrow morning they're going to try again.  The artillery was a complete disappointment, and the "old man" plans on speaking to their commander about it tonight.  The Germans are still in the village and waiting for the Ami's to move up.


Thoughts
Well that game pretty much made up for my sad lack of posting for April!  So it's safe to say WWII month wasnt a complete disappointment.  I had been wanting to play a Battlegroup game for a bit now and it didn't disappointment.  What's even more impressive?  The game was played on a 3' x 4' surface with 15mm minis.  Half of my 6 x 4 table.  The shorter ranges meant the units started in contact with each other and made for a nice, brief but really sharp game.

The Squad sized game was perfect for solo action because you really have to focus on decisions to make as you'll only have on average 4 orders per turn.  It's also impressive how a single squad and a SP gun can hold up infantry forces and Battlegroup really shines here with tactics at the small unit level.

Unlike Flames of War (which I plan on playing through with this same scenario) the terrain is extremely important to how the game plays and I made sure to put alot of it down.

A small, 300-400 point game is literally perfect for a Friday evening of gaming with smaller breakpoints.

Well I hope you enjoyed this game.  "Cold War" Month for May and I'm hoping my team can link up to dust off the cobwebs from Team Yankee and hopefully Battlegroup: NORTHAG!  Stay tuned!  Lots of Cold War goodness coming up!