Sunday, August 28, 2022

Frigate Action off Hispaniola! It Is Warm Work!

Last night I tried out the Age of Sail rules "It Is Warm Work" which I purchased from Wargame Vault for  the tidy sum of $5.95  I'd been on the lookout for a good set of Age of Sail rules for awhile now that hit a "sweet spot" in terms of their ability to play a large battle in a reasonable amount of time, and still deliver on that "Aubrey -Maturin" series or "Hornblower" saga feel that you get from the novels or screen.


My objectives?  The rules would need to be simple enough for a land-lubber like me to "learn the ropes", and yet still be satisfying and engaging, and play well solo.  So no counting bilge rats in the lower galley, or rolling to see how long it takes Sailor's Mate Corcoran to fix a sail, I want the experience to meet my expectations for a naval game from the Age of Sail, be authentic, engaging, and suitable for fleet actions.  I think I've finally found my white whale!

Our action today takes us to the Caribbean, somewhere off Hispaniola in 1805.  The French are escorting a Spanish ship holding an "item of the utmost importance" back to Europe, and must slip past numerous Royal Navy patrols.  The Royal Navy have strict orders to intercept and destroy the Coronado.   Let's get to the action!

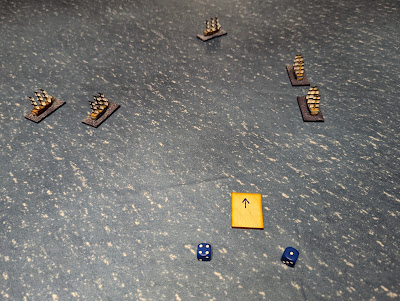
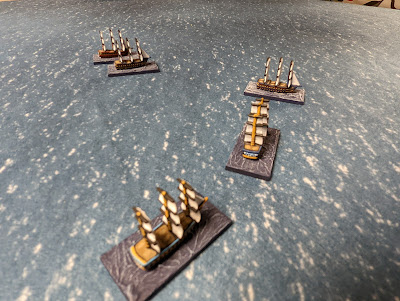
Sails Ahoy!  The British lookouts spy 3 masts closing fast!

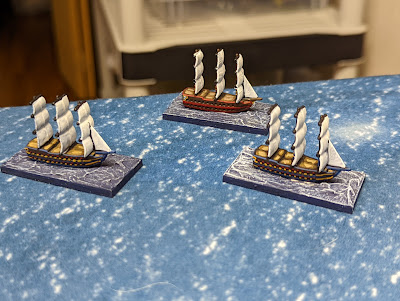
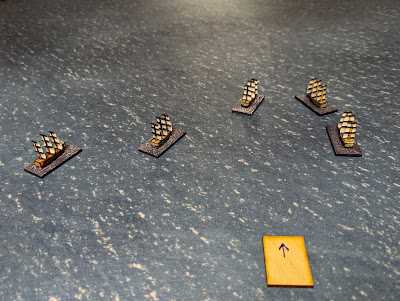
R to L: French Frigate Duquesne, Spanish Ship Coronado, and French Frigate Carillon - all French ships are 38-gunners, and the merchant ship Coronado is armed.

The objective of the French is to cross the table and exit off the far corner.  They must protect the Coronado at all hazards!  This mission has the attention of the Emperor himself, so whatever is on that Spanish ship, it must be important!  By the way, ships are RISK pieces and at $30 for 60 ships, an outstanding deal.

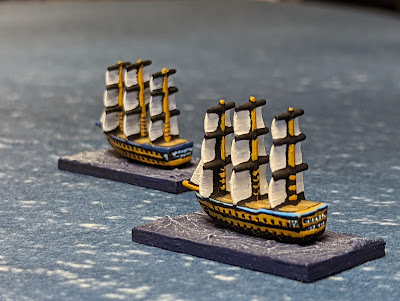
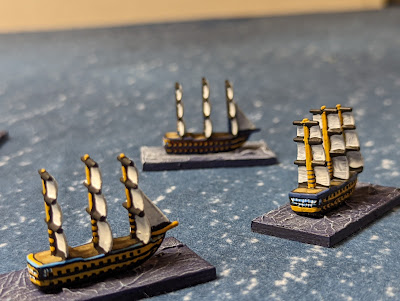
The Frigates HMS Ulysses and HMS Serapis, 40 gun frigates, attempt to close with the French and destroy them!

The first few turns are spent moving.  Given their mutual positions on the table, all ships are able to move their maximum distance relative to the wind.  IIWW has a handy gauge you can cut out that is placed over the ship model which tells you the movement distance allowed based on the ships position.  Our ships in this game are headed towards each other quickly!

Another aspect I like is that you roll for initiative at the beginning of both the movement phase, and the fire phase.  So it's not a given who will move first or fire first.  I like this aspect and it made for some tense rolls throughout the game.

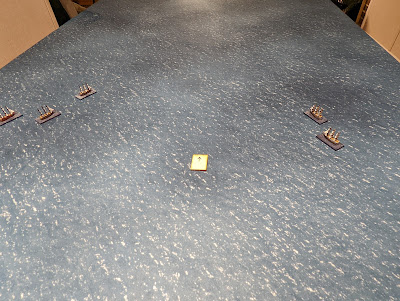
Turn 3 all ships are still moving quickly.  Note my cool "wind" marker :)  I forgot I had a marker set for the Osprey "Age of Sail" game which would have worked great for this engagement.

When your sailing positions are favorable, you can move up to your max distance, which for Frigates is 10".  Note here the Duquesne pulls away from the group while the Carillon provides cover for the Coronado.

The Royal Navy Frigates see what is up and maneuver to keep pace with the French who are racing to the northeast!


Once the 2 x sides begin to close into firing range (10" long range, 5" short range) they slow a bit in order to maximize their ability to get a shot in.


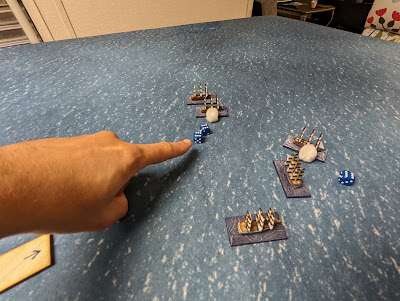
While you roll lower for movement initiative, you must roll higher for firing initiative.  The French win the initiative and the French guns open up!

Duquesne fires on HMS Ulysses and scores a hit!

In the return fire, HMS Serapis hits Carillon but at long range, only "6s" count.  British ships are allowed to re-roll a single miss, which I missed, until the second or third turn of shooting, so I didn't use that rule for this game.

Maneuvering priority now is to get the best shots off on the enemy, and for the French to continue to move the Coronado off the table.

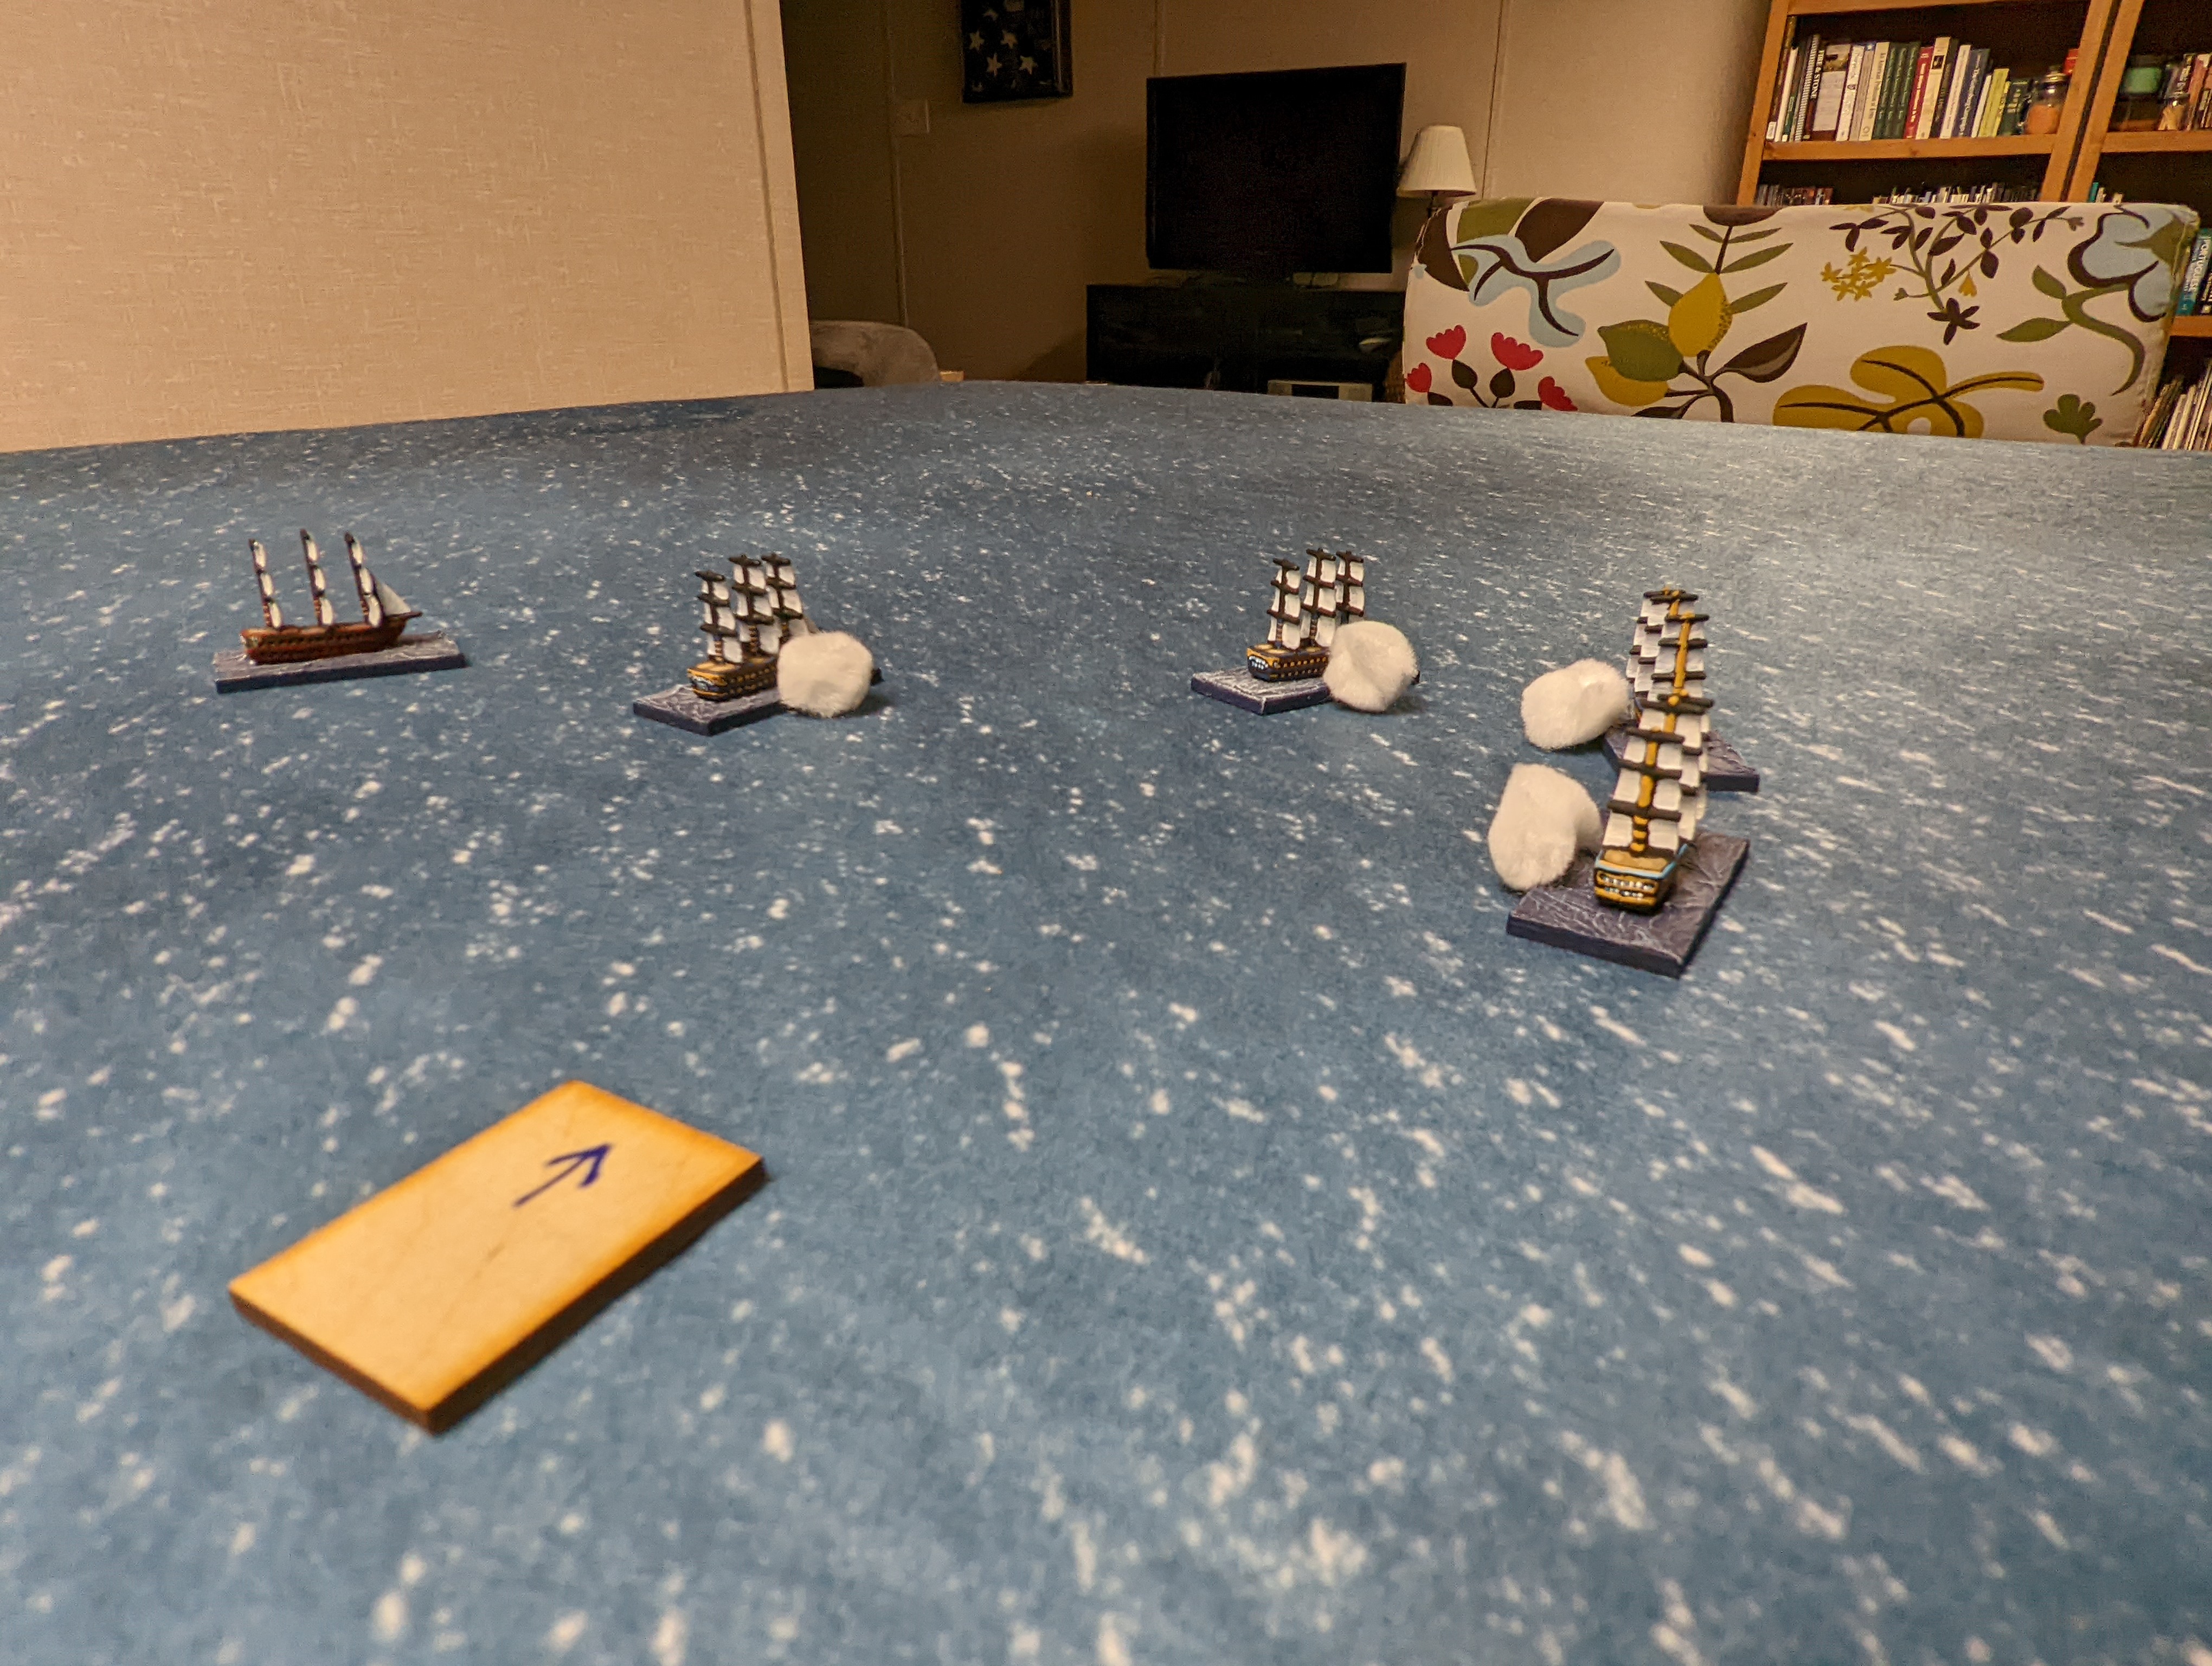
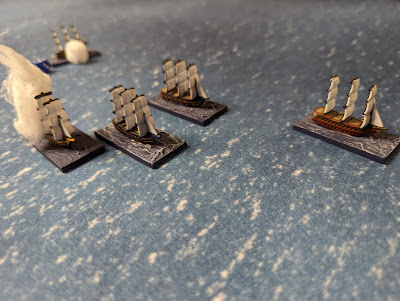
Ships maneuver into close range - Ulysses and Serapis on the right, and Duquesne, Carillon, and Coronado on the left

HMS Ulysses and Duquesne prepare to exchange broadsides!

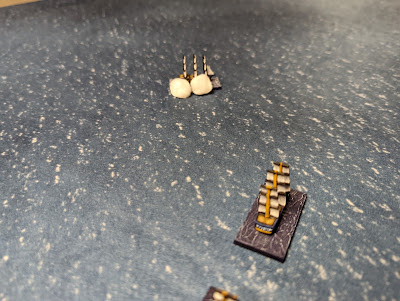
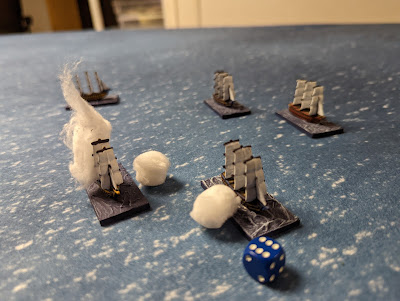
I used the cotton puffs to show who fired.

After a turn of inconclusive shooting, the ships continue to maneuver to get a raking fire shot off one another - the French hoping to cripple a British ship in order to maximize their chances for the Coronado to escape.

This is going to be ugly!  Duquesne prepares to rake Ulysses

In "It Is Warm Work", raking fire hits on a 4+, but I think you can only "rake" at close range.  I might have messed that up.


Duquesne scores a hit against Ulysses on the right, and Carillon scores 2 sixes against Serapis!

It Is Warm Work uses a system where it tracks hits which reduce your firepower score.  38 Gun Frigates have 3 boxes - a "2" "2" and "1" box.  When all boxes are checked you roll to see what happens to your ship.  The Royal Navy frigates are slightly upgraded (40 gun) and have 4 damage points "2" "2" "1" "1".  Both the Ulysses and Serapis are in trouble with both of their "2" boxes ticked off!

A confused, swirling fight!

The Ulysses turns to get a raking shot against Duquesne while the Serapis (far right) moves to fire a broadside into Duquesne.

The French have definitely gotten the upper hand in the engagement and the British ships are in big trouble with a box left each, and firing only 1 die.  Their movement is reduced to 1/2 movement regardless of position.  The Coronado is making good progress towards the table edge as well.  While the French ships are damaged, the Royal Navy ships are close to striking!

During the next turn, a broadside from Duquesne forces the Serapis to strike!  You roll on the table and I roll a "4" "ship strikes its colors."  In this instance, the French do not have time to board her.  They sail right past the striken Serapis, ending the chance for the ship to be captured yet again.


A final broadside into Serapis

With the removal of another ship from the fight, and licking their own wounds, the Ulysses attempts to get a raking shot off against Carillon to hopefully even the odds.

note the white puff in the background as Ulysses fires a raking shot against the Carillon!

Interestingly, stricken ships drift 2" with the wind.  The stricken Serapis drifts into Duquesne as it attempts to sail off!  You roll for fouling and I rolled a "1" which means they're fouled!  After reading the rules though, a ship which has struck its colors cannot foul with another ship.  So Duquesne is able to sail around the Serapis and escape.

So while the French forced Serapis to strike, they ignored her and sailed on.  The French won the engagement and the Coronado delivers its cargo back to Europe.


Thoughts
A great game!  I really enjoyed this little scrap, which took a just over an hour and fifteen minutes to play since I was reading the rules while playing.  I'll go over what I most enjoyed, what I did not enjoy, and what I missed.

What I Liked
As far as Age of Sail games go, it was very simple and extremely easy to learn and play.  I love the way ship strength, damage, and firepower are related, and I love the streamlined mechanics of moving and shooting.  (even though I didn't play one, boarding actions are probably some of the most elegant I've seen among the various rules, both simple and complex, out there.  I really liked the variable initiative for movement and for shooting.  This made for a much more tense and exciting game and a much more fluid situation.

My decisions were about maneuvering my ships to get the best possible shots off against the opponent.  Almost every question I had was answered by the rules.  Also the rules are not long and are for the most part very well-written.  There are neat extra rules for shore batteries and fortresses, and a system to build your own scenarios.

What I Disliked
As with all simple rules, there were some things missing.  IE with drift - do ships drift with the wind?  or relative to the wind as if they were sailing?  The rules say "downwind 2 inches" so I simply pushed Serapis 2" along the direction of the wind but I wasn't sure.  

What I Missed
Ships receive a saving throw from hits on a "6".  I completely missed this although after re reading it's obvious in the rules.

British may re roll a single miss.  I "missed" this until about halfway through the game.

Raking Fire - you only get the raking fire bonus at close range (5" or less) and I think it was applied in 2 x instances at longer range once against the French and once against the British.

Overall
These rules score an impressive 4.5 out of 5 ships-biscuits with me.  They are the rules I'll play, and will paint up more ships to put on a larger game for my gaming friends.  

After having read through numerous Age of Sail rules including Kiss Me Hardy, Fire As She Bears, Wooden Ships & Iron Men, Osprey's Fighting Sail, and Form On the Admiral's Wake, and also having played a few games of "Oak and Iron" with Ken, I will say that these rules, which seem to share much in common with the Junior General "Trafalgar" rules, are my favorite, and my new "go to" set of rules for naval battles set in the Age of Sail.  They're perfect for beginners, kids, land lubbers, and most importantly - big convention games with lots of ships on the table!


Friday, August 26, 2022

The Battle of Teugen-Hausen 1809!

 Ken and Dave were over last weekend (yes I know this post is dreadfully late) for an 1809 Napoleonic clash to fight one of my favorite battles of the Napoleonic Wars - Teugen-Hausen!  The French have 9 turns to capture Hausen and a road exit.  Anything else is an Austrian victory.  Is my scenario too restrictive?  Read on!

An epic "meeting engagement" of sorts, Teugen-Hausen features Davout's III Corps smashing into Hohenzollern's ArmeeKorps during the dramatic Spring "mobile" battles in late April 1809, and were part of the leadup to the Battle of Eckmuhl.  You can read about how the forces got to the battlefield, and why the battle was fought here.

With Dave playing the role of Marshall Davout, and Ken playing Hohenzollern, I acted as GM.  Black Powder were the rules of choice for this game, and I fully recognize this choice will throw some of you into uncontrollable fits of rage.  (if you click this link, please turn the volume down if the kids are within earshot - you've been warned!)

BP suited the amounts of units on the table rather nicely.  We played with units as "Regiments" and called the commands "Divisions" instead of "Brigades" which caused some confusion with my guests but we were able to work through it.  The action starts with Saint Hilaire's Division along with Davout deploying from the line of march to assault the ridge to their front.

French Legere in Assault columns- I labeled the units because it's classy...

Dave deploys wisely by shaking out the lead regiments into line, and opts to go to the left for a wide, flanking maneuver.  Ken has Vukassovich's Advanced Guard Division, the best Austrian Division on the table, deploy along the ridge with his artillery and light units.

Vukassovich's Troops deployed astride the road to Hausen

Peterwardeiner Grenzers!

Dave gets the command rolls and position Saint Hilaire's units to hold and exchange volleys with the Austrians to his front, while sending around some considerable combat power up the ridgeline in an attempt to flank the position.

French Regiments shake out into line trading fire with the Austrians on the ridge and in the woods

Ken moves up a trickle of reinforcements to the line.   Ken is going to position an Austrian infantry regiment on the reverse slope of the ridge to catch the French before they can wreak havoc in the Austrian rear area.  They are large Austrian infantry Regiments (6 x stands in this case) and take 4 hits for Shaken instead of 3, making them a bit more stubborn and with their poor command values, a bit more slow moving.  

slow moving Austrian Regiment moves up to counter the French flanking effort

The progress of Dave's deployment of St Hilaire's Division - keeping Vukassovich's units occupied and penned up.

In the center, Ken moves his skirmishers out to screen the forces on the ridge, buying time for his reinforcements to come up.   The more fighting he can do on the ridge and keep French forces attacking there, the more combat power he can accumulate on his side of the ridgeline.  Dave's lead regiments charge the skirmishers, pushing them back.  High drama on the slopes!

note the columns top left as Dave's forces move to flank the ridge!  This was one of my favorite pics of the battle!

the generals commanding!  View from the Austrian positions

Davout's hard-marching columns racing into the woods on the ridge!

musketry duels with the Austrians and French.  Eat your heart out BP EPIC!  These Old Glory 10mm Naps look the part!  Also note the mixed in RISK pieces in the Austrian Hussars.  Somehow they were intermingled (during the confused fighting no doubt) with Old Glory 10mm Hussars on the ridgeline!

Damn your eyes why aren't the men firing, Captain?  Because you and your staff are blocking the guns, sir.


Austrian Grenzers disordered (yellow die) with 1 hit

Dave claws his way onto the ridge as unit after unit of Ken's advanced guard (Vukassovich) are gobbled up or sent streaming down the opposite side of the ridge towards Hausen.  Meanwhile, Dave's flanking columns shake out into line in the forest and start trading volleys with the Austrians at the base of the hill.  The battle is entering a new phase!

Grenzers are pushed back in heavy fighting

Dave flanks Ken's Hussars who melt away from the heavy fire

French reinforcements are continuing to arrive

Just epic!  French forces storming the ridge and you can just make out the Austrians forming a new line to confront them in the upper left!  My second favorite pic - almost looks like a painting of a Napoleonic battle with French lines everywhere!


The Iron Marshall - please disregard the Staff Ratings on his stand - we were playing with BP 2nd Edition - no more Senior Officers!  The Commanding General is more of a morale marker.

More fighting atop the ridgeline

As massive Austrian columns slowly make their way towards the fighting.  We have started rolling for the Grenadier reinforcements now (Turn 5-almost Turn 9 where we'll start rolling to end the game)  Ken had to leave and left me in command of the Army!  BIg trouble!

Vukassovich's battered units refused to carry out any order after their retreat from the ridge.  They remained blockin the road for the remainder of the game.  I could have used them to slow down the French even more!  Meanwhile, French columns start pouring down the ridge and deploying into line...

The few Austrian units who managed to deploy shake out into line to meet the French, whose blood are up!

Hard fighting here next to the road as the French try hard for a breakthrough in the center!

Up and down the line the French charge the Austrians!

More heavy fighting!  2 x massive Austrian regiments attempt to hold off the flood of French who are desperately seeking a breakthrough on Turn 6.  They have 3 more turns to capture a road exit and Hausen!  Can they make it?

More and more French columns joining the fight and reaching the now-abandoned ridgeline


and even more behind them!


The French aren't breaking through as quickly as they'd like to - the stubborn Austrians are hanging on by their fingernails!


After multiple turns of failing an order, the Austrian reinforcements finally start moving.  In march col on the road, they were getting 1 free move per turn, but it is taking a long time to move the massive columns into position.  They were able to screen the road exit closest to the French, and arrived just as Dave was making his breakthrough.... finally.


Final french dispositions before Dave rolled a 6 and a thunderstorm ended the game on turn 9.  So while the French won ever engagement, this was technically an Austrian victory...

Final Thoughts

Sound Officers Call Final Thoughts


I really enjoyed putting this scenario together with the extremely competent and lethal French units, along with their stalwart Austrian enemies, this had all the makings of a good scenario.  So what happened?  Well besides being alot of fun, I'm not sure the conditions could have been met by the French (BTW looks to me like the result was fairly historical with the French holding the field by day's end)  Dave and Ken suggested for next time, lengthening the time before you roll for the thunderstorm to end the game.  Dave suggested Turn 13.  My suspicion is it's a bit before that but the maths (average commands given on 2D6) would have to drive those considerations.

While many scoff at Black Powder, it handled the large multitude of units on the table nicely, and the rules really came back to me.  They're still my favorite for large, sweeping battles like this and allow us to get lots of toys on the table for a significantly less commitment of time.  

On the whole, we missed some stuff in the rules, but everything worked, and fairly smoothly at that.  This game was much fun and I'm looking forward to playing more.  I already have some great ideas for future games.  For those interested, we halved all measurements just like in the "Epic" rules and it played very well.  My larger 10mm units - French at 5 x 30mm stands, and the Austrians at 6 x 30mm stands - really made the game look good and I know I've got some work to do on the terrain but this game was just what the Doctor ordered for my gaming funk of late.  While I'd like to say the Napoleonics bug has been "worked out" that's probably far from the case and I'm already scheming another battle or 2 to fight before I go back to WW2 battles.

Also of note, I've been reading up on a very nice and simple Age of Sail rules called "It Is Warm Work" which seem to me to be based off the Junior General "Trafalgar" rules in a way, and I like that alot (seriously what's not to love there - free rules, free ships, free scenarios).  I'd like to get a game of them on the table soon, as well as some WWII action after that.  Looking squarely at more FoW battles, and playing Steven Thomas' improved Armor rules for Crossfire.  Fall and winter we can hopefully get more gaming in so stay tuned - more great things to come!  

On the hobby/building/painting front, I'm going to be basing my 15mm Romans AGAIN (the poor fellows) for ADLG, and am painting up my El Cid Heavy Spanish Infantry for ADLG games against Ken's Muslim troops.  Im also painting the 3D printed "dead" El Cid figure Ken very kindly gave me (more to come on that) and we're going to party like it's 1099!


Sorry, Rodrigo, we have one more job for you before you rest!