Sunday, July 14, 2019

ANTIETAM with BattleCry!

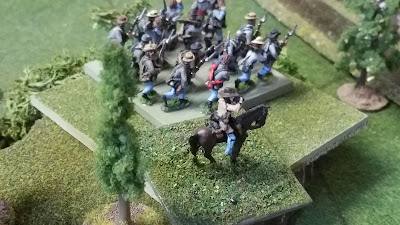
Yes that's right.  The whole battle on my humble table....with Battle Cry!  We played the simplest of all the Borg "Commands and Colors" series games last Sunday and enjoyed it so much we played 2 more games that afternoon.  Brian was there to offer tactical advice while Ken and Alex played the first game.

This is a challenging scenario where the Rebels have 6 command cards and the Yankees have 4 but great positioning on the field.  The Rebels are spread out and not concentrated.

Heights visible upper right and of course Burnside's Bridge!  The Cornfield is visible on the far center-left and the sunken lane in the center of the field near Dunker Church and the visitor's center....er wait.

Burnside's men poised to assault across Antietam Creek

AP Hill's Division moves forward
Guarding the sunken lane


AP Hill prepares to counter attack the bridge after Burnside seizes it!


Heavy fighting in and around the cornfield as the Union troops press on.


Rebs push the Union back to their start line at Burnside's Bridge.  Still the scene of brutal fighting
We played 3 games that day, actually, with most being done in under an hour (!) truth be told I cant remember the outcomes but I am pretty sure the Rebels won 2 out of 3 games. 

Battle Cry is probably one of the simplest of the Commands and Colors games with many elements lacking that are in the Napoleonic and later versions.  Brian brought over some extra rules he'd found adding some neat flavor (rules for taking ground, different movement and firing values, etc) and I would really like to try those soon.  All in all, a great and relaxing day of gaming.  Can't wait to do more!  This weekend's focus was on the basement re-organization and storing away most of my World War 3 Cold War 15mm stuff (don't worry I'll come back to it soon) in favor of 6mm 1/285 micro armor projects.  Also putting my British WWII forces in storage for the time while I'm finishing up the Americans.  Have been working down in the basement cleaning up for the better part of 2 days!

Saturday, July 6, 2019

Gaming Double-Header! SEVEN DAYS TO THE RIVER RHINE & COMMANDS AND COLORS ECW!

A truly epic day of gaming yesterday as Ken and I finished our Cold War battle with SEVEN DAYS TO THE RIVER RHINE featuring Ken's excellent 15mm Team Yankee Soviets against my 15mm West Germans.  Again, we played the "capture" scenario and a hard-fought Cold War nail biter ensued.  We closed up shop at 4:00pm and I prepared myself for some Commands and Colors ECW "Hammer and Tongs" action at Brian's house.

Pictures will tell the story for the most part here.

Marder in a hide position at the Aldi.
 Ken weighted his right with the motorized infantry in BTRs.  They came barreling down the road at top speed and were promptly dispatched by auto-cannon fire. from my Marder.  I also had West German infantry in the Aldi preparing the Carl G for close action!

Note the burning BTR to the left and the ton of yellow dice representing command tokens on the right!


 This time I'm trying to not give up my hidden positions until the last possible moment and Ken starts putting the pressure on right away with his reinforcements from turn 2.

Leo on the left in the village firing at the oncoming BTRs.  Ken would eventually switch tactics, seizing the hill in front of the village which protects his advancing infantry from fire.  It's a tactical mistake I will pay for dearly!
Firing against Ivan's oncoming vehicles.  I feel like I have this flank "locked down"

West Germans at the McDonald's

 After stalling out and losing a platoon's worth of transports and some infantry squads, Ken starts the advancing on the his left with his T-64s.  Trouble!


I take one out.  This Leopard I has been very busy!
 All apologies to Ken, I kept reading the stats from he T-64A instead of the "B" model.  Ken paid for the extra armor and performance from the B model.  We realized this around the end of turn 4.  Sorry Ken!  Speaking of turns, Ken tries out his attack helicopter.  Luckily I have an "air cover" card waiting to be played for just such an eventuality!  I roll lucky and down the Hind!


On they came!  T-64s bounding towards their objective.

Ken uses a tactics card that has Precision Guided Munitions (krasnopol?)  and targets a leo I with it!  Recce coming in handy!


cool pic.  cool model.

burning leo i on the road.

 Sensing that he's not going to get infantry up the right flank, Ken opts to send them up the middle with a covered route behind a large hill which I foolishly left unguarded...  It's a great call and Ken slips his infantry up to the treeline and takes out my Leopard I from close range!  Crap!

Another burning Leopard I.


The Leo's wingman comes up and fires on the infantry in the treeline!  RED 2 SCRATCH MY BACK!
Ken's advance on the farmhouse/mill here turns up a West German squad waiting in ambush.  There are more marders and Milan teams guarding the northern approach to the village.  Ken dismounts his infantry and advances on the farmhouse!


Endgame for me as I hit my breakpoint with the destruction of the Milan team in the enclosed farm!  What a great game!
We broke the action off when my Germans reached their breakpoint.  What a fun but exhausting game!  I really feel like 7 Days evokes the feeling of a good, tactical fight at the company level but I will say a company is about the limit that a player will want to control.  Anymore than that and I feel the game will start to overwhelm the controlling player, unless you do multi-player, which also comes with its share of difficulties.  All in all a great game, and Ken handled his Soviets well playing true to life tactics and seeing them pay off.  It speaks to the great strengths of the 7D system (and the Iron Cross system!).

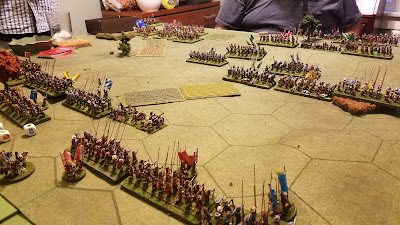
Later that evening I went to Brian's for some outstanding English Civil War action, but using a kit-bashed version of the Commands and Colors Ancients rules (and cards).  WOW is all I have to say.  This game rocked and really evoked the flavor of the period I felt.  Brian's changes and mods were perfect!

I was so engrossed in the game that I only took a few pictures but they are excellent pictures and show how awesome these CC games look with miniatures.  Naturally I played the Royalists...


My infantry in the center!
 I played against Rich and both of us came to grips rather quickly, opting for aggressive action.  The entire game took a little over 3 hours.
Cavalry on the flanks of course!  Rich wisely used infantry to cover the cavalry action and properly supported his troops, and also allowed room for them to retreat!  not me!

The battlefield looked good!

A swirling cavalry battle!


Fortune shined on me during the first half of the battle and I think at one point i was ahead 6 to 2 but Rich had a magnificent breakthrough with his cavalry on my left and also was properly using his infantry to shoot up my infantry opposing him.  Something I was not doing properly.  Rich played a great game and he caught up in a matter of about 2 or 3 card pulls!  I was busy setting my infantry up in the center for a crushing blow, all the while Rich was focusing on wearing down my units.  It was a good move and after a very good round of Cavalry combat, Rich ended up taking the game! 

All in all I'm thankful for a fun, relaxing day of gaming with friends and I cannot wait to play more 7 Days or Commands and Colors!  Sadly my "Stay-Cation" is coming to an end and it's back to reality on Monday!

Thursday, July 4, 2019

Franco-Prussian War Battle: Kepi and Pickelhaube

Alex was over last night to premier his outstanding "Kepi and Pickelhaube" rules which are his take on the Neil Thomas 19th Century Wargaming rules and he brought with him some outstanding borrowed 15mm Franco-Prussian figures to take the rules for a test-drive.  WOW is all I have to say!


We played with the equivalent of a Corps per side with all the toys - Cavalry, Artillery, and of course the Infantry - the Queen of Battle.  Admittedly this is the first time I've ever played the NT 19th Century rules, and also the first time I've ever played a FP War game - so I had almost no pre-conceived notions about this game or the period.  I can tell you, however, if you're like me and your thoughts about the FP War are: "Napoleonics with longer-ranges," you're mistaken!

2 companies of Bavarian skirmishers lead the way.  All of my troops are in column in order to move.  In these rules, you may not move in line unless you're a skirmisher unit.
 I will say it is always a great thing when you can walk away from a game and feel like you learned something.  I learned a ton from last night's battle.  To set the stage, both the French and Prussians are trying to control 3 of 4 objectives on the table.  3 villages and the hilltop in the center.

General Von Oberdorf
 My deployment sees my Cavalry weight my left flank, across from Alex's Cavalry.  I have 2 x strong, combined arms groupings (brigades or small divisions) with infantry, artillery and cavalry.  Your infantry are very potent and powerful, shooting with 2 x dice per stand!  But they are rather immobile once the shooting starts.  My plan is to actually avoid the center hill objective but demonstrate against it, and shoot for the villages, including the one in Alex's rear area. 


note the small village on top of the hill.  I send a detachment to capture it however as fate would have it, Alex captures it first and my troops must take the village by storm!
I get a rude awakening charging infantry with my Cavalry.  The more modern firearms make Cavalry charges against infantry a very risky proposition in this game.  Point taken, Mr Thomas!

Alex's French troops advance!
 on my right, I attempt to force the valley between the 2 hills to get into a position to flank the hill objective, all part of my demonstration.  Alex is able to slip his skirmishers into the town on the top of the hill and I send up a battalion of infantry to capture it!  Great excitement here!

Note the infantry column on the right headed towards the town.

In my center, I send troops towards the wooded area which will be my jumping off point to mount an assault against the rear village, in French control.
 Alex and I both identify the woods north of the hill as key terrain.  Luckily I'm able to grab them and my infantry can advance relatively unscathed for the time being.  Alex moves up Guard infantry to guard the exits of the woods and I'm starting to get nervous!

Moving the Prussians up through the road and into the woods!

Prussian Hussars!  (actually Napoleonic Austrians, but you get the idea!)


In the foreground, note the masses of cavalry galloping towards each other!  The small hill there would be the scene of a brutal back and forth action almost the entire evening.


Prussian cavalry assaulting the hill to be repulsed with extreme prejudice!  Note my infantry going up the slope on the far right as well.  Alex turned the hill into a fortress!

Prussians back in command in the village on the right.  The red bead means a stand lost.  "Hans, is this a pig sty?"  "Ja Herr Oberst"

Firefight!  Prussian infantry battalions fire against a French battalion arrayed against them in the valley. 

The situation in the valley. 
Note the Prussian columns advancing through the woods on the left.  They would double-time it to the edge and move directly to assault the French guards posted there, sending them back.  Unbelievable, Alex would only score 1 hit in the pre assault volley.


A swirling cavalry battle on the left.  

Cavalry.  My Prussians were gaining some ground but were eventually forces back.

Prussians go into the assault after emerging from the woods.

The fight against the hill is going Alex's way.  I need to keep enough of his forces pinned down for my lighting (blitzkrieg?) assault against the flanks!

The French Guards are treated roughly here but they'll have their revenge!  Note the "1" on the Prussians. 

The French retreat and Alex must reorganize a second defensive line here as I have 2 more infantry battalions coming up.  My Krupp guns and skirmishers are keeping Alex busy on the hill but truth be told, I needed them in this coming fight on my left.  Victory hangs in the balance!
I start to lose the Cavalry battle now but both sides' Cavalry are blown by now.  Note my infantry columns lower right emerge from the woods.  Alex is organizing his second defensive line in front of the town.  Plenty of firepower and he sends another infantry battalion from the hill in that direction!

Press the attack, boys!  Vorwarts!

Meanwhile i try to move my units on the right aggressively.  Alex moves a unit on the ropes into the woods protecting the flank of the hill.  They're easy pickings....or are they?  Amazingly they mount a desperate defense and my Prussians are sent retreating!?!?  

Lots of red beads on my Prussian cavalry, too.  The assault in the center must now go in or we will surely lose the day!
 Alex has also deployed the reinforcing infantry into line in front of the town.  I'm facing 2 battalions of fresh infantry, 2 batteries of fresh guns, and a big skirmisher detachment, which Alex moves into the town to garrison it.  If I can break him from shooting, I'm never going to take the town!


last picture of my Prussians going in to finish off the unit in the upper right in the woods on turn 7, only to be sent packing!  Lots of exciting things like this happened during the game.
I called the game around 1030pm when it became apparent I was not going to pry my way into the last town.  WOW what an exciting game and a very different an unfamiliar period for me.  So what did I learn?

First lesson - this is NOT Napoleonics, which I was maneuvering like it was.  Infantry units are lethal in the defense.  The rules don't even let you attack if you have the same amount of bases. 

Second lesson - I did not use my direct-fire artillery properly.  Ironic for a former artillery officer but the artillery does not need to keep pace with the advance.  They need to find a nice dominant spot to observe and fire at-range.  As Alex pointed out, the French rifles shoot 3" further than the Prussian rifles, and so can fire on you for an entire turn before you can turn your rifles on them.  Your artillery can be causing casualties all the while your troops are moving into position.

Third lesson - cavalry is much more vulnerable than it used to be especially to infantry fire. 

Many thanks to Alex for a great game and a real learning experience.  I am looking forward to playing these rules again and also hoping Alex gives the ACW and Napoleonics the same treatment!