Tuesday, November 29, 2016

Neil Thomas: Simplicity in Practice PART II Fighting Retreat at El Perez

The second installment over as many days in my "Fighting Retreat at El Perez" scenario played out using Neil Thomas' "Simplicity in Practice" rules which I enjoyed very much.

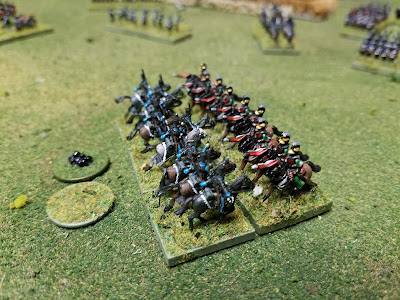
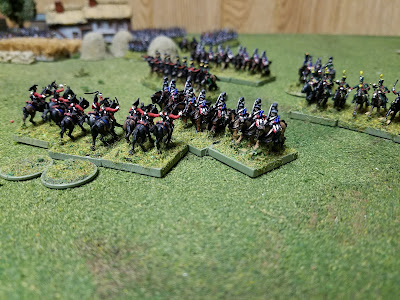
We left off yesterday with the Portuguese forming to assault the Petitos Garrison and the French columns massing to assault the British line.  The Cavalry battle on the British left was pretty much decided with the British Dragoons sent reeling in defeat.


The Portuguese assault on Petitos fails to gain a foothold and they are sent back across the river.


On the British right, the loss of the Cavalry battle forces one of the Portuguese battalions on the right to turn around and form a rearguard within a rearguard as they are assailed by French cavalry.

WOW that did NOT turn out the way the French intended.  The Dragoon Regiment is annihilated by the Portuguese Infantry!
 I have to say one thing, Cavalry is intended to go after weakened units in this game.  That much is obvious.  Charging headlong into fresh, formed infantry doesn't typically end well in any of my Neil Thomas games.
British deployed with the French deploying in battle line.  Lead French unit already has 2 DPs on it.

El Perez is "difficult terrain" and so the French only get 5cms moving through.  The wall affords a saving throw from fire but the French dont have time to trade shots!

Rifles!
The French deployment is still underway and slow but the lead battalions are taking a beating from the firing.  2 British Batteries are hammering the French as they emerge from the village.  At this point, a wasted opportunity as I should have the Cavalry to attack the British battle line.  Instead they indulged in a fool's errand by chasing down a British column and mixing it up with a fresh, solid Portuguese infantry battalion.

Portuguese Battalion starts backing off after winning that Melee.  At this point, the French light cavalry start taking pot-shots at them but it's ineffective.

Meanwhile the French deployment is riddled with problems.  Traffic management problems!

Battle lines so far.  The French chances on their right are now slim but the center infantry brigades have a better chance of taking down the right side of the British line.

 Almost forgot there's a French artillery brigade moving through El Perez also.  Too little, too late!  The French could not bring enough firepower to bear to inflict enough damage on the British line and Battalion after worn Battalion broke themselves against the "thin, red line."

Looks like the French are calling it quits!
Lovely little game and a great set of rules well worth the price (only $ 3.75 US).  My observations after "finishing" this game?  Well it's frustrating to try and attack but the French really didn't have an easy time coordinating their force to attack.  The British enjoyed interior lines with massed firepower pretty much guaranteeing 2 or 3 battalions were shooting at the lead French units when they crossed the stone wall.

The French "should" have swung that powerful cavalry brigade around and hit the British flank.  This game features NO modifiers which is also extremely appealing.  Instead you add dice to your original throw, adding 2D6 per advantage.  That's huge in some circumstances when you have supports, less DPs than your target (already +4 dice on your throw) and the fan produced variant allows +2 more D6 for having a general officer within 10cms of the combat!

I enjoyed this game very much.  "Simplicity in Practice" would be literally perfect for a refight of Borodino, Austerlitz, or Waterloo where you have huge forces on the table.  I believe it can handle the units and there isn't alot of "mental gymnastics" involved during play.  In fact just enough to make me happy.

I believe, far more than Neil's Intro 2 Wargaming or One Hour Wargames, THESE rules would be the best possible rules to introduce folks to the hobby. They are both challenging and easy to learn.
 Mission Accomplished!


Monday, November 28, 2016

Neil Thomas: Simplicity In Practice PART I Fighting Retreat at El Perez

Reading over various folks' blog posts about rules and in light of this past month's quest to find a "staple" set of horse & musket rules, I came across a "relatively" obscure set of rules that Mr Neil Thomas wrote for "Battlegames Magazine" in 2010.  I bought the back issue ($3.75 on Wargames Vault) and discovered a very interesting, challenging, and engaging set of Horse and Musket rules that seem to bridge his "Introduction to Wargaming" rules with his "One Hour Wargame" rules.  Given the name, I don't need to tell you how simple they are - but simplicity aside, they are a joy to play.

Basically, if you felt that OHW was too simple, or that his I2W were too involved, then these might be for you.

They hone a simple, universal sequence of play that will be familiar to any Horse & Musket enthusiast:  Move, Shoot, Melee.

Units shoot based strictly off their type.  So "Close Order Infantry" have a "To Hit" value they must achieve, as does Light Infantry, Artillery, and various types of Cavalry get to shoot too (not effectively mind you, but it's still fun to shoot with your units).

Scoring hits on a unit triggers another roll for "demoralization" points.  (score 3 hits on a unit, firer rolls 1D6 looking for a 3+ on a 1D6 to cause a single demoralization point.  If you only scored 1 hit on a unit, you'd roll a 5+ on a 1D6 to cause a demoralization point.)  Units are eliminated when they receive 4 DPs.  It's a very nice system that would seem at home playing SYW, AWI, ACW, and Napoleonics.

I played the "Fighting Retreat from El Perez" Peninsula scenario in Black Powder last night before bed with my 10mm troops.  Like many of Neil's rules, these seem to favor the defender, but in retrospect, I probably didn't make some good choices, either.

French Brigades massing for the assault through El Perez to get to the British covering force.  note the Cavalry Brigade in the lower right of the picture

Long British columns completing their passage of lines

French at the Petitos Garrison, Blocking the British/Portuguese force

British Columns

French Battalions move out
 It's important to note here there is absolutely no distinction between column or line.  I simply put the French troops in column to get them through the town.  On their first "normal" move after the difficult terrain, I placed them back in line at no cost to them.


Portuguese leading the way on the retreat back to Torres Vedras

Traffic Jam


Rifles forward deployed
 At this point, the British heavy dragoons launch a pre-emptive charge because they're impetuous Cavalry and that's what they do!  They are repulsed by French Heavy Cavalry in the first serious clash of the battle.  Losers of melee automatically retreat with 2 Demoralization Points.


KGL Cavalry in the lower-center swing into action to assist on the right flank.  The Thin Red Line awaits the French onslaught

The French Cavalry attack and harry the British unceasingly.
 One thing I'll note is you get additional dice as melee advantage.  NO MODIFIERS!!  That's a big plus for some of the guys I game with.  So you could, potentially roll 6 or 8 dice in your melee attack with the right supports and leadership involvement.  It also has the added benefit of making your battlefield "look" napoleonic.


British Dragoons are defeated and evaporate

Meanwhile the KGL Cavalry rides to the rescue in their inaugural game!


Pour it into em lads!  The Rifles earn their pay

The stalwart defenders of the Petitos Garrison.  Even now as I write this, they have not yet been dislodged.


Portuguese massing for an attack on Petitos!
That's where the action stopped last night.  After a crazy Sunday I just had to hit the hay.  But you can see what a proper game of Simplicity in Practice looks like.  Since this is a Black Powder scenario, I'm keen to play this again with Black Powder rules and see how they fare.

So some of the things I like about this game?  Well, it meets my Top 3 for sure.  Uncomplicated, Basing Agnostic, and it plays with a few or alot of units.  there are tons of units on the table right now.  So many so that I could technically have other folks play as well.

It plays fast!  No kidding.  You have a solid decision in your games and there isn't much ambiguity (except those things which Mr Thomas left out - like what is the "To Hit" score for Melees?  Which I just assumed were the same as the "To Hit" roll for shooting).

I like the fact that this game would be comfortable in virtually any era, and you could add the requisite period modifications to make it feel right.  These rules have just the right amount of detail, texture, D6 dice rolling, and fire and maneuver to make this middle aged grognard feel at home.

The cons?  Well they definitely seem to favor the defender that much is evident to me.  Most (all) of my Neil Thomas games where the French attack the British end with the French leaving the field, which may be correct in most aspects of Peninsular Warfare, but since there are absolutely no special rules or shooting advantages given to the Brits in these rules, I have to think that any defender would be at an advantage, especially in terrain.  (case in point look at the Petitos Garrison - the Portuguese have not been able to dislodge the French yet).

Okay I'm off to play a few turns tonight.  More to follow.  Check out the "AMW Group" on Yahoogroups for a fan-produced set of Simplicity in Practice variants, and buy the Wargames Vault supplement.  In the preceding issue, Neil Thomas writes about the virtues of simplicity in wargames design.

I still like Black Powder best as the most sensible compromise with what I'm looking for in a Horse, Musket, Rifle, and Sabre game, but I do like the possibilities these rules open up for some truly big battles!


Saturday, November 26, 2016

Hail of Fire: Screaming Eagles Attack ENDGAME

So for those of you hoping "the good guys win" you'd better skip this post!  I actually feel bad as many were looking forward to the second part of the battle but the "second part" of the battle didn't last long...
Move out men!  
 The Americans, true to form, kept their good dice rolling for orders and were able to swiftly move through the woods right up to the German objective.


 The Germans, true to form as well, busted their reserve roll each turn so the Tiger and other infantry platoon never materialized.  The Germans were forced to make due with what they had.  Their tenacity made up for lack of numbers!
German platoon moving towards the farm to counterattack!
 The Americans gambled on a lightning fast assault of the objective from the cover and concealment of the woods and their order dice enabled them to get into position without any trouble.


 Unfortunately for the Americans, their .30 cal fell behind and was not able to set up in time to throw some fire on the objective so this was, for all intents and purposes, a "hasty assault."

Also, this was one of the first games where I used the chit draw system.  As you can imagine, with all these platoons out there getting KO'd, there were quite a few chit draws on both sides.  The US player's break was calculated at 14 and the Germans at 18.  At the start of turn 3, the US player was already at 13 and the Germans still held the objective which meant another chit draw (the Germans if you must know were only at 11)....Now they may have drawn a "0" chit, but who knows.  I really wanted to carry out this assault if anything for the practice!

So the Paratroopers did what they definitely do best.  "Close with and destroy the enemy by fire and maneuver"  Well they did almost all of that.  The "close with" part they have down pat.  The "destroy the enemy" thing we'll need to work on.

US units move swiftly through the crops after emerging from the woods. 

There they are men!  Advance!  Attack!  Assault!  MOVE FORWARD!
 The US troopers dash through the terrain just as Gerry's rifles and LMGs open up and start tearing them up!  Too late!  Prime that grenade, grab your E-Tool and let's go!

I get into close combat with only 2 teams but there are others up there for support behind them.  Now call me crazy, but this latest version of HOF, I found more difficult to follow the Close Combat sequence from the last one.  Admittedly, I'm a bonehead so that might have something to  do with it, but for some reason this was more confusing for me this time, and last time I was on the Eastern Front with a shedload more teams in contact!

Over that hedge Soldier!  I can smell Gerry on the other side!
 The 2 sides tie their "hits" and we have to roll another round of Parry / Thrust.  The Ami's get the worst of round 2 and end up losing teams.  At this point, both sides in the combat sat down, pulled out their scorecards and tried to figure out who won.  "Fritz, throw your pencil over the hedge, bitte.  I lost mine in the melee!"

 The math says this round goes to the Germans and that's a wrap.  The remaining US teams withdraw to the edge of the woods.  The paratroopers fail their subsequent morale check and bug out.

Final dispositions

So that's it.  sorry to disappoint everyone I know this post series wasn't very long but the game had a combined total of 4 turns.  Granted, I only had a small number of understrength units on the table, but it still made for some good fighting on the table.

I like the things that Hail of Fire lets you do - the sense that you can gamble with momentum like in Crossfire is very appealing.  I know it will take me at least 3 turns to get to the treeline.  Do I risk getting stuck in the open?  Or go for broke?  Should I spend a turn trying to suppress that MG position before stepping off?  Is there an enemy unit in those woods?

These are all questions make you ask, and it's appreciated that it does.  The approach to turns and orders is novel and works out nicely.  I love how shooting is handled and frankly in that regard, HOF goes "Flames of War" one better in terms of simplicity and effectiveness.

The cons?  Well not too many of those.  I understand and am grateful for Brandon F's desire to keep the rules as short and concise as possible but I think I need to go through them with a fine toothed comb and extract some pertinent things for my own "cheat sheet" as I am finding there are too many details and things I'm overlooking during solo play.  This is not a shortfall of the system, just my own quirks.

I probably need to "practice" melee a few times to ensure I'm getting it right.  Same with the hidden unit placement rules.  They are a little confusing to me (the execution of revealing units, not the idea).
Also, inherent leadership casualties.  In this game, leadership was close to the action and inevitable got hit and killed.  What happens when the company commander is KO'd?  These are some questions I've got to troll through the rules to figure out.

All in all, an awesome game that I will continue to play more with more varied forces and bigger battles.  I think it scratches that itch for company sized battles and does give an appropriate feel of command at that level.  What more could you ask for?  Go to Wargames Vault and download the Beta version now and get playing!


Friday, November 25, 2016

Hail of Fire Game: Screaming Eagles Attack!

So I painted these lovely 101st Airborne Paratroopers from Normandy and even painted the 101st patch on them.  Then I used "manstein shade" on them and RUINED them so it looks like I just painted them in olive drab instead of my meticulously mixed M1942 jacket green.....

Company Command Stand


Right - to the action!  So this game was a small airborne company (-) with their company 60mm mortars, and 2 platoons of airborne riflemen squaring off against a reinforced "Kampfgruppe" of 2 small platoons of German infantry, an MG platoon, and an 81mm Mortar section!  As an added surprise, ze Germans have a Tiger I as a reinforcement.

Mortars!

Germans!


I played down the narrow side of the table to give the Germans some semblance of depth, but as it turns out, they may not need it...

Turn 1 a US platoon crosses the line of departure.  The US have 4 orders and 4 hero dice!  Impressive since the Germans only have 1 each...  As the US attempts to keep the movement going, the Germans use a hero dice and open up with the MG platoon - 2 x MG42s on tripods and 8 fire dice later with telling results.  The US platoon in the open is knocked out as they make their Received Fire Checks to try and get into cover.  Every team hit is knocked out.  The US platoon fails its morale check and its curtains for them....

The MG42s tear through the paratrooper ranks!


Unbelievable!  All the Received Fire Checks are KOs...

The company commander, in pure disbelief, is rallied and smacked by his RTO and he gets back into the ballgame.  The second platoon on the right opens fire at the German MG positions.  The Germans have only 1 order die and aren't keen on using it so the US player goes for broke!  After suppressing the woodline MGs, the US platoon rushes for the woods to their front, crossing a huge linear danger area and gambling away all of their orders to get to the safety of the wood copse.

The paratroopers' shooting is dead on and they give the MGs a rough time.  Time to go for broke and the paratroopers burst from the treeline!  Note the attempt to smoke and cover the advance - the mortars missed the target!


The paratroopers reach the woods and fan out using their last orders to reorient the platoon.


 Meanwhile, the US movement triggers a different German reaction - a hidden platoon is revealed on the US objective!  This is not going to be an easy slog!


That's part 1 of the battle so far.  I think I'm playing the hidden platoons stuff all wrong but I can see where it would be kind of cool - something akin to the Flames of War ambush rule.  It's a subtlety and I like it.  Too bad I forgot about it when the US player was moving on the German left.

Oh there's another interesting twist, too.  The US quality is "elite" since they are 101st Airborne and the Germans are "Regular" since they are garrison troops in Normandy.

So far the Germans have busted their reserve roll and it's on to turn 2!  Stay tuned!  Can the "screaming eagles" pull off this attack?