Sunday, January 30, 2022

Fighting the Battle of Hubbardton with Live Free or Die!

 Ken came by today and we played our first game of Live Free or Die using my Battle of Hubbardton wargame scenario put out this past week.  This battle was more of a playtest for me both with trying out  the rules and to see how my scenario played out.  Ken and I finished the game in 2 hours and that probably was a bit long for the small amount of units on the table.  So how did it go??  Let's get into the battle.

The entire 5 x 4 setup.

0630 Hours

Ken and I stumbled a bit through the first turn regarding the sequence and when to do things.  While it becomes obvious as you read your way through the sequence, it's not obviously apparent when you allocate your command points.  (you do so immediately)  It does become second nature though as you work your way through the turn sequence, turn after turn.  Anyways, you roll D6 per command "star" for the scenario, so the British roll 5D6 and the Americans roll 4D6.  Every 5+ gives your command an additional command point for the turn.  The British move Major Acland to the 24th Foot to assist in the upcoming combat. 

 (this is also not completely obvious from the rules - when do you move leaders who are NOT attaching to units? We moved them during the command actions phase).

Major Acland joins the 24th Foot to assist.

The British start immediately with a "British Bayonet Charge" order, costing Fraser 3 command points (!) to launch the charge, and 1 command point for the movement!  (Fraser only had 4 this turn - so the lights and Grenadiers are staying put on the road!)

The 24th slices through the skirmisher picket line opposite Sucker Brook.

Major Acland leads the 24th Foot across Sucker Brook in a bayonet charge.  Sucker Brook a bit out of scale and it caused some problems for the British in the scenario.  I'll explain later! Note the use of casualty markers as "DMZs" or "demoralization points"

The 24th Foot charges through the skirmishers (and the invalid camp) and pushes the skirmishers back.  A very nice introduction to the charge and melee rules and Ken's "hasty" skirmisher fire doesn't do much to stop the cold steel of the 24th Foot.  The skirmishers head back towards the wooded area on the hillside.  The 24th cannot proceed and are halted for the remainder of the turn since they only won by 1-3 successes (5+).The 

The skirmishers retreat back to the wooded area up the hill, below the crest of "Monument" Hill

0650-0710 Hours

The next 2 turns, the British push across Sucker Brook with the Lights and the Grenadiers move up.  All are still in column.  The Americans have moved to the stone wall now and are watching the British march up.  The 24th Foot wheels left and is facing the top of the hill now.  They'd march into musket range and begin a furious exchange of volleys with the 2nd New Hampshire.

Grenadiers pushing across Sucker Brook while the lights have already turned to start their advance.  I kept the Lights in "line" and not in "skirmish" formation to give them more punch.

Ken skillfully moves the infantry forward to the crest, exactly as happened historically so far!

Meanwhile I kick out the Loyalist Scouts to maintain contact with the American skirmishers.  Probably did more in the first 3 turns than they did in the entire actual battle but still wanted to include them in the game because they're alot of fun.

Pushing towards the Castleton Road exit.

0730-0750 Hours

Warner's Green Mountain Boys against the stone wall, watching the skirmishers evade across their front.

Colonel Francis prepares his men for combat

Warner's Continentals prepared for the assault
After 2 straight turns of continuous volleys from down the slope, the 24th Foot moves in against the 2nd New Hampshire at the stone wall!  MAJ Acland goes with them.  The 24th Foot, now only 3 stands, pushes the "CLass 3" 2nd New Hampshire back from the stone wall in brutal, close range combat!

THE 24th WILL CHARGE!!

Meanwhile, Fraser positions the lights to assault up the hill.  They're sorely needed at the top.

The lights can make out the sights and sounds of distant combat as the 24th's assault goes in.

Meanwhile up the hill, the 11th Massachusetts sees the lights in the woods and are preparing for combat themselves!


Brutal close combat ensues at the stone wall as the 24th and 2nd New Hampshire come to blows.
rut

The 2nd New Hampshire are pushed back!

The Situation at 810am as the 24th are at the top of the hill (but not on the objective) and the 2nd NH is pushed back.  The lights and grenadiers are not yet engaged.

meanwhile, a running fight breaks out between the loyalist skirmishers and the continental skirmishers!  The Selleck Cabin is in the distance!

8:10-8:30 Hours

The lights advance through the woods on the hill and it takes 2 turns to pick through the bramble, and felled trees.  The Grenadiers, who historically moved with swiftness to the Selleck Cabin, turn up the hill in column and form line, eager to challenge the Green Mountain Boys to their front.  True to history, the lights will face off against the 11th Massachusetts.  

Steady Grenadiers approach Warner's Continentals.  You can just make out the Light Bobs emerging from the treeline upper right.

Francis' men move back, ostensibly to the next fenceline (as they did historically).  This is what I thought was happening, anyway :)

Meanwhile the skirmish fight is still going on at the Selleck Cabin.

The Grenadiers turn up the hill and are facing the 11th Mass and the Green Mountain Boys.


By 8:50am, the lights emerge from the woods and assault the 11th Massachusetts at the stone wall!  The DMZs accumulated from marching 3 turns through the woods, however, and lack of a superior officer attached to help rally or assist in the combat see the odds of success significantly reduced, and the lights take a bad beating at the stone wall.  They'd retreat to the safety of the woods, down 2 stands!

This is going to hurt!

Ken, also full of surprises today, launches the Green Mountain Boys, Warner's Own Continentals, against the British Grenadiers (as they did, historically!).  The Grenadiers are locked in an inconclusive round of murderous, close range firefights (leading to another question - If you're "locked in combat" after an inconclusive round of melee, and you both lose a stand, do you both take a morale check?  If the rules are to be interpreted literally, I guess yes?


The GMB did maneuver against the British Grenadiers as happened today on my table.

The bloodied lights are licking their wounds after being ejected from the stone wall.  All of this is easily justified as it happened historically.  The lights made a few advances against the crest of the hill on the day of the battle. So far, I'm mostly pleased with how the scenario has played out, even if I'm less pleased at how my British are doing!

0910-Endgame

With the ejection of the Lights from the stone wall and the inconclusive nature of the Grenadier combat, we called the game, 2 turns OVER the turn limit.  

What Happened?

Well neither side achieved their major objectives.  (although I as the British player forgot to bring on he Hessians so technically there's that - I'm sure that would have made BG Fraser happy :)  )The British did not capture the Castleton Road exit, or the Monument Hill objective (that honor should have went to the Lights, who were pushed back and ran out of time).  The Americans did not retreat off the table, but did preserve two-thirds of their force, which was part of the tactical victory conditions, so this was an American victory.  

Looking at stand loss, the Americans lost 4 stands and the British lost 5 stands.  Stand Loss points cost for the scenario were Americans 1 point per stand lost to the British who were 1.5 points per stand lost to the Americans (the British could not as easily replenish their ranks).  So even if the Americans did not preserve 2/3 of their force, they'd have won by casualties alone (all of this is very historical, BTW).

One problem I did note with the scenario was the time it took for the British to get into position. 

Technically, if you were to move in column all the way from the Sucker Brook, along the Road, to the Selleck Cabin, that should take you 5 turns (45" give or take).  With the British bayonet charge on turn 1, and the Sucker Brook costing 1/2 movement for units crossing it, that held up the Grenadiers and Lights for a considerable amount of time, both of whom lost a turn with 1/2 movement, and zero movement on turn 1 due to the 24th's bayonet charge into the American pickets (the expensive nature of bayonet charges meant that I did not have the command points to move the lights or grenadiers on turn 1, so in effect I lost a turn).  Turning the Grenadiers up the hill instead of moving towards the Selleck Cabin also cost me a turn since the Grenadiers had to change from column into line.

This is kind of a neat problem to have I think, being forced to make a decision to charge or move other units, but my fear is that is simply takes too long for the British to get into position to pull out a major victory due to making the Sucker Brook too restrictive.  I'll have to play it again to see.

If you try my scenario (and of course you should!!!) My advice is to try the game by STILL paying 1 DMZ to cross Sucker Brook, but not losing 1/2 move for it.  It's a stream, not a river or creek.  

I suppose I could have volleyed with the 24th Foot on turn 1 instead of charging, however even with 10 dice (!) [4 stands x 2D6 each when volleying plus 2D6 for Major Acland] the skirmishers likely would have stayed put.  Meaning I dont think I could have shot them out of their position but you're free to give that a try.  Additionally, the Hessians never showed up, and they were sorely missed.  A fresh unit arriving on the American flank where the 2nd New Hampshire were forced back could have turned the tide.

So as far as the scenario goes, I will likely adjust the penalty for the Sucker Brook, otherwise this was a very good scenario, I think.  Lots of fun and no shortage of excitement.

I really enjoyed the "Live Free or Die" rules.  There are alot of unexpected turns of events in "Live Free or Die" with the morale rolls, officer casualty rolls, and even the uncertainty of the melees.  Ken seemed to enjoy the rules and the scenario and I'm hoping we will play again.  I have enough 15mm stands to play some of the bigger engagements of the war and would love to try, although there is also something fun about these smaller battles as well (thinking Wetzel's Mill, Edge Hill, and some of the "smaller" battles of the war with about 1000 - 2000 troops on a side) and this game took a little over 2 hours to play.  Perfect for a Sunday afternoon of gaming.  Mission accomplished!


Thursday, January 27, 2022

A Hubbardton Scenario for Live Free or Die - Ready for Your Testing!

*UPDATE*  I made a few corrections to the scenario already so please be sure to check it out or download it again.  Terrain notes have been updated, along with the OOB!  1/28/22 

Well it's finally ready!  My totally unofficial "Live Free or Die" scenario for the Battle of Hubbardton, July 7, 1777 is ready for download and playtesting.  If you've been following the series of posts on scenario development, you know how much fun I've been having creating it.  Please take a look and if you happen to play it, I would love to hear how it went for you?  I plan on playing my first game of LFoD this weekend and am very much looking forward to it.  The download link is below and to the right on this blog.

I think this scenario would translate very easily to other rules sets so if you happen to play it with a different set of rules, let me know how it worked out for you?  My goal in creating this was to make circumstances for the commanders as similar as possible to the tactical challenges they faced on the day of battle.  

The real challenge for me were the victory conditions, since both sides could technically claim they met theirs.  The British ended up in control of the field at the end of the morning, but at great price.  The American retreat, far from an orderly "withdrawal" must have looked more like a jailbreak after Colonel Francis was killed.  Still, some of the men from these units would meet again at Bennington or Saratoga in a few months.  

The Battle of Hubbardton is one of my favorite AWI battles, and the research that has gone into it has been an informal hobby activity of mine, and was certainly not "painstaking" but more of a fun diversion. I'm sure there are mistakes and circumstances that happened in the battle that are not easily covered in a set of rules or in a humble wargame scenario like this. 

If you find any issues, let me know so I can fix it them!  Please feel free to tweak and develop your own parameters if you don't like mine.  Most of all though, I hope you learn something about this battle if you didn't already know of it, and I hope that you find the material of some use.  If you fight the battle with my scenario, I sincerely hope you have fun doing so.

Download the Hubbardton Scenario for Live Free or Die!

Tuesday, January 25, 2022

Developing a Hubbardton Scenario for "Live Free or Die" - The Map


Those with younger children will get this...

 A map.  "A diagrammatic representation of an area of land or sea showing physical features, cities, roads, etc."  I'm a sucker for maps.  I have the 1:100,000 map of when I was a platoon leader in Iraq framed and on my wall in my gaming bunker.  I have numerous expensive books of maps that show combat at Regimental level at Gettysburg, Antietam, and on the Iberian Peninsula during the Napoleonic Wars.  Yes, I'm a map aficionado.  I love a good, beautiful map, hand drawn by staff engineers and painstakingly scaled with regiments, detachments and cannon on it.  Supposedly, Von Paulus' hobby was to recreate hand-drawn maps of battles from the Napoleonic Wars.  I can relate.

That could be why this last phase of scenario development for the Hubbardton Scenario is proving so difficult.  I'm wanting to produce something good but don't have the skills or the software.  Anyways, let's get to it.

Here we see the topographical map of the Hubbardton Battlefield, with modern roads and buildings.  There are alot of squiggly lines and let me tell you, they are just as painful to walk up as they would be to try and count with your eyes.

Source: Arc-GIS
So, what are we looking at?  North is up.  The "Y" junction in the center of the map at the base of the big hill shows where the "Road to Ti" would have met the Castleton Road (which is the main road going north to south on the map).  In fact part of that old road still exists, albeit in paved form today.  Sargent Hill is the large landmass in the upper left of the map and the old military road came down it, crossing Sucker Brook and almost colliding with what is now called "Monument Hill".  It was there, at Sucker Brook, where the battle began in earnest.  I have added British and Continental positions - the starting positions for the battle - below.

From top (N) to bottom (S) you can see the Blue continental units arrayed along the Castleton Road.  2nd New Hampshire, 11th Massachusetts, and Warner's GMB below them by the Selleck Cabin.  The skirmishers are deployed to meet the British 24th foot (facing each other) across Sucker Brook in a swampy area, and behind them coming down off Sargent Hill are the lights and grenadiers in column.  This is the area we will focus on for our game.

From the map above, you can see where the old military road would have intersected with the present day road. (along the Gridline and the word "East Hubbardton Cemetery").  The gridline below that almost moves straight into the modern road and this is the part that follows the old military road.

  In fact, the Cemetery on the map is probably where the 24th and Lights commenced their first push against the hill mass, with the long lines of Continental blue on the map pushing west, up to the crest to meet them during the battle.

So, with all this great info I have, what's my problem?  Well, for starters, I don't have good software to make cool maps like you see in wargaming books.  A quick turn to Google solved the problem.  

I used a map creation template from the "Jay's Wargaming Madness" Blog (used without permission) which turned out to be a very nice tool, indeed.   While the contour lines aren't great, you get the general idea and I'm pleased enough with this to offer it as the scenario map, suitable for a 5 x 4 table.  The units are slightly out of scale - please forgive!  I was not using a mouse when drawing them but rather my finger tips on the track pad.  Not the most effective way but it got the job done.  When laying out your scenario, use the stand width and stand count as your guide and not my goofy unit drawings.

Starting Positions.  East is up.  North is to the left.  The Continental units start in column along the Castleton road, arranged north to south.  The British Grenadiers start immediately behind the lights, off map.  When you read my scenario download, the letters on the map will make sense!


On the map I have plopped the Selleck Cabin about where it should be (small black box) and a tiny wheatfield next to it.  The contour lines will be difficult to recreate if you dont have large hillmasses and I'm thinking of using towels placed under my wargaming mat.  Zion Hill will be forbidden to climb except for the small woods at the bottom of the hill. 

So there you have it!  We are almost ready to fight Hubbardton with Live Free or Die.  The only thing needed now is to put the scenario download together.  We have to put it all together in a nice, attractive package that is fun to read.  Expect that (hopefully) over the next day or so.  Enjoy!


Monday, January 24, 2022

Blood Red Skies: Sink the Carrier!

 It was Ken's turn to host this past week and he'd been wanting to put on a bigger game of Warlord's "Blood Red Skies" aerial combat game as our games have mostly consisted of smaller air to air "skirmishes" with a handful of planes.


Our game took place in the Pacific around the time of the Battle of Midway and saw an attack consisting of Japanese torpedo and dive bomber planes coming after a stricken American carrier to try and sink her.  Naturally they had plenty of speedy Zero fighters for cover!  My force consisted of 6 F4F Wildcats with only 2 on combat air patrol and the rest coming in as reinforcements from "high cover".  The Japanese team got to pick their entry point...

the matt is from cigar box battle - all of the models are Ken's

 Take a look at the wave of bandits coming at me!

Upper right are the "Val" D3 Dive Bombers, Center are the "Kate" B5N Torpedo Planes, and on the left, a whole gaggle of A6Nspeedy zeros!  

When playing Blood Red Skies I always try to be aggressive to the point of being foolhardy for a number of reasons.  First - the enemy isn't expecting that...  Second - I'm not as comfortable with the nuances of the rules yet so I'm bad at pushing the rules and planes to the limit of what they can do ("outmaneuvering" as a pilot action is an example of this, then shooting with a wingman).

My plan now is for the left F4 to charge straight at the Kates, while the right F4 goes after the Vals.  I'll zoom by them, turn tight, and get on their tails, hoping that the wave of friendlies will block their zero escorts from shooting at me.  In other words, I want to use their tight formation to my advantage.  As you'll see, it doesn't quite work out that way.

Ken's nicely painted aircraft.  I have a squadron of Messerschmitt's and Spitfires waiting for their paint scheme!

I'm also hoping the zeros cant make that turn and still stay "neutral" or "advantaged" - I was wrong and this is probably an underestimation of the rules...

Not only can the Zeros turn in on me, Dave gets one right on my "disadvantaged" tail and ...you guessed it.  He shoots my F4 down!

But not before 1/2 of my cunning plan occurred.  I charged the Kate head-on and disadvantaged it.  Then I got on its tail.  I couldnt shoot it down, though.  This will have telling consequences later in the battle!

Really love Ken's paint schemes and decals on these 1/200 planes.

Turn 2 Butch O'Hare (skill 4 pilot) and 3 other F4s show up from another carrier.  They are starting at least 4 turns away and will arrive right as the Kates and Vals bear down on the US Carrier!

My lone F4 is shot down and the Vals head straight for the US carrier - which I later found out already had 2 hull damage points!

Reinforcements get stuck in (left) but it's too late!  The Kates and Vals secure enough hits that one more will destroy the carrier.  That lone Kate I wasn't able to shoot down might make the difference!


Despite the flak and shooting down a Kate, we weren't able to get any more.

This was a tough battle but the points helped out alot.  Since the Japanese didn't destroy the carrier completely, the battle turned out to be a tie score!  But since the Japanese downed 2 x F4s, and scored some hits on my carrier, I have to say they were certainly more successful.  Next time!

All in all, a perfect Sunday afternoon game and one which I'm keen to play again (as well as get my own planes painted up.)  Blood Red Skies delivers a tense, and challenging game that keeps you engaged and abstracts the action while still keeping the major dogfighting decisions at the controls.  While not calculating speed or individually micro-managing every aspect of what a plane is doing, you're definitely managing the battle and managing "advantage" which is crucial.  The game forces you to think like a dogfighter, trying to stay one step ahead of the enemy and line up a perfect shot.  Success goes to the pilots who are willing to take calculated risks and think about 2 to 3 turns ahead of your opponent.  I also love how the authors have woven some of the more fun technical aspects of the plane's strengths into the game (max speed is the tie breaker when 2 skill ratings are the same) and there is a fun use of cards that add flavor to the game but don't over power it (I played numerous "robust" cards due to the F4's armor that reduced the Japanese dice.)  Anyways, all of this to say I had a blast and can't wait to play again.  I've always had a soft spot for the Flying Tigers and I plan on ordering a squadron of venerable P40 Warhawks next!

Okay - back to work on the Hubbardton Map and Scenario - coming up soon.  Stay tuned!


Saturday, January 22, 2022

Developing a Hubbardton Scenario for "Live Free or Die" - Scenario Coordinating Instructions

Another week, another installment of my "Live Free or Die" project with probably some of the more interesting aspects of scenario design - the coordinating instructions for the Battle of Hubbardton scenario.  Last week, we covered the Order of Battle and some nice online research references for Hubbardton and this week we dive into the real meat of developing the scenario, now that we know who the key players are in the battle and how they should look in terms of the game we'll be playing.


 So what do I mean by "coordinating instructions?" Well, to be honest, "Coordinating Instructions" are a term I borrowed from the  US Army 5 paragraph Operations Order (OPORD) that fit nicely with our topic (developing a LFoD scenario - stay with me here!). Wikipedia (which heavily quotes the US Army's Field Manual 5-0 The Operations Process) shows the Coordinating Instructions for the upcoming operation as being correctly placed in Paragraph 3 (Execution), section h.

 Operations Order Coordinating Instructions consist of the following:

h. Coordinating Instructions.
(1) Time or condition when the plan or order becomes effective.
(2) CCIR (Commander's Critical Information Requirements)
(3) EEFI (Essential Elements of Friendly Information)
(4) Risk Reduction Control Measures.
(5) Rules of Engagement.
(6) Environmental Considerations.
(7) Force Protection.

While not all of the above categories are good for our purposes, certainly the time frame, EEFI, rules of engagement, and environmental considerations are key ingredients for writing a wargame scenario.  (note I did not say write a "good" wargaming scenario).  For me, the scenario considerations for the Hubbardton Scenario need to cover the following aspects of the battle:

  • Turn Length
  • Victory Conditions
  • Reinforcements
  • Starting Positions
Some of these are clearly easier than others for reasons I'll explain.  Let's get into it.

Game Turn Length.  
The turns in LFoD represent "20-30 minutes of real time."  Easy enough.  The battle itself started around 0630 hours and lasted until 0930 hours.  That's 3 hours of engagement time which is 6 to 9 turns.  I'm inclined to say 9 turns because 6 just doesn't sound long enough.  So 9 turns representing 3 hours.  Check.  (That was easy.).  Scenario turn length is 9 turns.

Victory Conditions  
The British.  This is not so easy.  There are numerous historical records that aren't kind to BG Fraser, especially because he did not wait for Von Riedesel as the two had mutually planned the evening before.  What was Fraser thinking?  The loyalist scouts, and prisoners taken, identified that there were solid units of the Continentals on the road ahead waiting for the British, so what was Fraser wanting to accomplish by attacking with haste?  Von Riedesel did not speak highly of Fraser in writing about the battle, and blamed the German casualties on his [Fraser's] fool-hardiness and haste to get into battle "for glory."  

At Fraser's own death on the Saratoga battlefield a few months later, he lamented his own ambition.

This is all speculation, of course.  Fraser had some of the best of the British Army in North America with him at the time.  The these were highly motivated, spirited, and disciplined troops as well as picked officers.  Morale was still running high.  Since Fraser commanded an advanced guard whose job it was to maintain contact with the enemy's retreating forces, we can probably safely assume that Fraser needed to breakthrough the road to Castleton and maintain contact with St Clair's main force (this was his job from General Burgoyne).  Fraser saw the campfires himself and the lead elements that made contact understood there to be Americans on the ridge to their east (present day Monument Hill) so he needed to deal with them to keep the road open.  "Dealing with them" assumes he would need to break the American force.  

That's a long way of saying the British objectives are:

1. Seal the road to Castleton (Capture the area around the Selleck Cabin where the road leads off-table)
2. Capture the hill (where the Warner's rear-guard is mostly encamped).
3. Break the American force.

It's an even tougher job to assign objectives to the American force.  Warner, remember, is tasked with buying time for St Clair's forces to put distance between them and the British, hence saving "the Northern Department" of the Continental Army.  His job is not to defeat the British, necessarily.  Just to force them to deploy and fight, for a bit.  Seems kind of wonky (but not impossible) for assigning a wargame scenario objective.  Like any American force fighting an AWI battle, your other directive is simply to survive to fight another day.  And so force preservation is important.

That's a long way of saying the American objectives are:

1. Hold the road exit to Castleton preventing the British from access to St Clair's force 6 miles away.
2. Preserve the force.  Pretty broad?  Okay end the day with 2 of 3 fighting regiments intact and not routed.

These objectives leave the player with maximum flexibility to manage the battle as the commander sees fit, just like Fraser and Warner, who were operating with much autonomy on the day.  With those objectives, maybe we can explore why certain actions occurred as they did.

So in translating this to a scenario, I'm going to attempt victory conditions for both sides, taking the historical objectives into account:

British Glorious Victory:
Secure all objectives under 9 turns, without use of any Hessians. (Fraser expressly requested British reinforcements from Burgoyne, and it was widely assumed (and Ketchum writes) that he did not care for working with his German allies).  This will prove tough, but would give you just the glory needed for that next promotion.

British Tactical Victory:
Secure 2 of 3 objectives above.

Anything else and your "losses were in vain!" as Von Riedesel complained to his wife after the battle.

Major American Victory:
Hold the road to Castleton open for 8 turns and escape with all 3 regiments intact is a big feather in Warner's cap.

American Tactical Victory:
Escape with all 3 Regiments on turn 9 either up the Pittsford Ridge exit or down the Castleton Road is a tactical victory

If both sides both achieve their major or tactical objectives for victory, use stand losses to determine a winner.  American stands are worth 1 point to the British.  British stands are worth 1.5 points (General Burgoyne is going to need those men in a few months at Saratoga!).

Reinforcements
Pretty easy.  The lead elements of Fraser's column, the 24th Foot with the lights behind them, engaged the pickets of the 2nd New Hampshire at Sucker Brook after coming off the saddle of Sargent Hill.  The advanced pickets further up the road were driven back by the Loyalist and Indian Scouts, but to keep the table manageable, we'll start the action at Sucker Brook. This occurs at 0630 hours, the start of the game.  Behind the 24th Foot, the Lights and Grenadiers are in March Column already on the table.  The biggest question for this scenario to me is when should the Hessians arrive on the field?

The Vermont Historical Society paper referenced in our first post on the subject puts the Hessians arriving at 0845 hours.  That would be turn 7 arriving along the military road to Fort Ticonderoga passing over the saddle atop Sargent Hill.  If units are only moving 6" per turn or even 9" per turn Im not sure that's enough time for them to cross the distance, scale the draw next to Monument Hill and flank the 11th Massachusetts as happened historically.  So while I'm content to put it at Turn 7 for now, that could be subject change!  Hessians arrive on the military road in column on Turn 7.

Starting Positions
We've covered the British starting positions including their order of march in "reinforcements" above with the British elements mostly in column except for the loyalist scouts and 24th Foot who engaged the 2nd New Hampshire pickets at 0630 hours.  Those units will start deployed.  The 11th Mass, main body of the 2nd New Hampshire, and Warner's "Continentals" or "Green Mountain Boys" depending on your perspective, all start in march column along the Castleton road east of the open area atop "Monument Hill" with the 2nd New Hampshire the furthest unit north, immediately to the South on the road are the 11th Massachussets troops, then Warners Regiment, who were all making preparations to march south to Castleton when the British struck.  Most troops are in column formation along the major roads depicted except the pickets who are engaging on turn 1.


I have to admit, this part of the scenario design has been fun and allowed me to flex a little bit of creativity.  Next post will be centered around developing the map and play area for Hubbardton!  After that, I'll post a final "product" that you'll be able to download to play the battle for yourself if you feel so inclined.  If you do, be sure to give me feedback as I'd love to hear how it went for you!  Perhaps I can convince Ken to put the battle on with his 28mm AWI troopers (even though I have custom units painted up just for this battle in 15mm.  No reason we couldn't play it twice!).

So what else have we been working on?  Well, for starters painting up more 15mm AWI troops to prep for when it's my turn to host a game with our group.  I've also been playing around with some Seven Years War rules sets and even a slightly "home brewed" set on hexes that I've been testing.  

Lots of excitement going on at the Sound Officers Call Tavern, so put on that tricorne, grab your musket, powder and ball and let's head out!


Sunday, January 16, 2022

Developing a Hubbardton Scenario for "Live Free or Die" - The [fudged] Order of Battle

 It's not always easy to get your hands on good orders of battle, which is why I suspect wargaming reference books will always have a place in this world.  Luckily for anyone who is developing an Order of Battle for Hubbardton, 1777, the battle took place in an era when men wrote things down.  The British Army of the period already have a halfway decent staff system in the mid to late 18th Century.  The Continental Army was doing whatever it could to model itself after the British Army, and so we have officers who documented the returns from the fighting.

My first place when researching OOBs is always the George Nafziger collection, housed at the US Army's Command & General Staff College at Fort Leavenworth, Kansas, and available free to the world.  (my link at right is broken since apparently the site moved.)  Unfortunately for this lazy gamer, the collection only lists returns from a few weeks after the battle of Hubbardton, and even then only lists Brigade strength - not the individual Regiments of the Brigade.  The British force list has no numbers until September, 1777.  So this time the Nafziger Collection can't help!
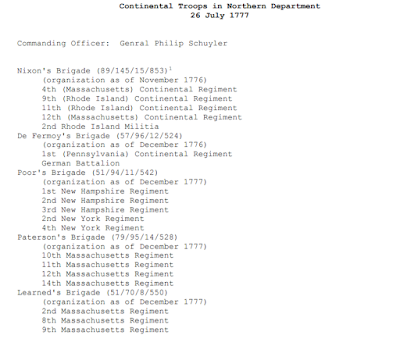
Numbers listed are Officers / NCOs / Staff / Rank & File

The staff ride resource I posted yesterday has an awesome Table of Organization (TOE) for a British, Continental, and "German" Infantry Regiment and shows the authorized company strengths.  This is super helpful to know if we can't get good battlefield returns.  Here is an example of a Continental Infantry Regiment TOE from the Staff Ride Read Ahead:

Knowing the per-stand strength in "Live Free or Die" to be 1 Stand = 50-75 men, we're on a good course.  The paper from the Vermont Historical Society lists the British overall strength of Fraser's advance guard to consist of "22 companies (approximately 850 men) under his detachment."  The Continentals also have a good approximation of their rear-guard force strength.  As everyone knows, things aren't always as they seem and all of this data is subject to interpretations, so there will be fudging.  

Upon arrival at Hubbardton, Francis was to place himself under the command of Warner. Once united, this rear-guard, drawn from the best units St. Clair had available, would constitute a force of somewhere between 1,000 and 1,200 men under Warner and Francis, two experienced, and highly regarded officers.

The foot notes clarify the strengths even better and quote the book "The Battle of Hubbardton - The American Rebels Stem the Tide" by Bruce Venter.  The Vermont Historical Society paper then gives the overall Continental strength as:  Hale 126 men present, and fit for duty, Francis 206, and Warner 99, for a total of 431; 110 were present, and sick, and 332 “on command” for a total of 883. Seven men were sick absent, and three on furlough. The rear-guard that departed Mt. Independence was about 450 strong; adding Hale’s, and Warner’s, 225 men plus some 300 stragglers, sick etc we arrive at a number of around 1,000 men at Hubbardton.

So I have the overall forces for the Continentals by-unit.  Sort of.  The numbers of the "Regiments" by their Colonels don't add up to 1,000 but addition of a generic "rear guard" of 450 comes close.  The British were tougher to get specific strengths online, so I turned to the Osprey Book "Saratoga, 1777" and of course my old friend Ketchum, whose "Saratoga" is quite possibly one of the finest books I've ever read, period.  More on that at another time.  Ketchum puts the British strength at 2 x companies of the 24th Foot (assuming full strength that's 2 x 67 =134 troops), 10 companies of lights (10 x 67 = 670 troops), and 10 companies of Grenadiers (20 x 69 = 690 troops.  The eagle-eyed among you will note the addition of "2" to the Grenadier Company.  The extra 2 troops are fifers.  I wonder if Grenadier fifers caught alot of flak from their messmates in a Grenadier company.  Anyways, I'm not sure there were 10 full companies of Grenadiers or Lights because other accounts only list 4-5 company's worth of Grenadiers. So I'm digging into Osprey, but at least we have our max ceiling for both companies.

Anyways, our picture of the battlefield strengths is coalescing now:

Continental Troops (1000 roughly, all ranks)

  • Rear Guard detachment 450 troops + (Since I dont have specifics I'll amalgamate these into the line units below, 150 each, this will make sense when we start assigning stands to units)
  • 2nd New Hampshire (Hale) 126 + 150
  • 11th Massachusetts (Francis) 206 + 150
  • Green Mountain Boys (Warner) 99 + 150

British + Hessian Troops (900 troops roughly, all ranks)

  • Combined Grenadier Battalion (Acland) Companies from 9th, 29th, 34th, and 62nd Regts (Osprey) 276
  • Combined Light Battalion (Earl of Balcarres) Companies from 9th, 29th, 24th, 53rd, and 62nd Regts (Osprey) 335
  • 24th Foot 140
  • Loyalist Scout Detachment 100 (?)
  • "Hessian" Forces under Freiherr Von Riedesel (Jagers, Grenadiers, Chasseurs) 1100 however in the interest of speed, (and according to Ketchum) Riedesel left the majority of them behind to keep up with the American rear guard along the military road from Ticonderoga the previous day.  Giving us a Hessian force of roughly 100 Grenadiers and Jaegers.  They'd arrive as the battle was coming to a close the following day.  I think.  We'll find out.

Stand and Unit Composition in "Live Free or Die"

The "Live Free or Die" Rules (LFoD) call for a stand strength of "50-75 men" per stand, along with overall commanders who are assigned "command points" and "stars" which enable them to assist units during the turn.  I could probably fudge the stand values a bit (+ or - 5 or 10) and I dont think that would dramatically impact the game.  I'd like to have units that were at least 3 stands as 2 wouldn't look quite as good but I dont want to mess too much with the mechanics of the game.  Clearly the leadership values will be subjective so I'll  have to assign them myself and I'm sure that could make many folks' heads explode on TMP...Perhaps I should issue a warning atop this post?

The unit quality is pretty well established from historical accounts and from the troop types present.  LFoD gives us unit classes for each:

  • 1st Class: Grenadiers, Light Infantry
  • 2nd Class: Regulars, Continentals, Rangers, Jägers
  • 3rd Class: Raw Regulars, Veteran Militia, Loyalists
  • 4th Class: Militia, Indians & other Irregulars

Since by all accounts, St Clair (overall Continental Army Commander) assembled some of his best troops to serve as rear guard (see quote above) and based on the good accounting the units gave of themselves, we have to assume that as far as Continentals go, the American forces "aren't too bad".  The 11th Mass and 2nd New Hampshire were both good units in their own right.  That said, the men were completely exhausted.  Warner made a controversial decision to bed down where he did instead of completing the additional 6-10 miles he probably should have gone.  This allowed the British advanced guard to catch up with him the following day.  Also about 1/4 to 1/3 of the force are sick and stragglers from the main body's retreat to Castleton.  The men were hungry, tired, and nursing some of the slow moving stragglers.  So I'm not inclined to be too generous when assigning the Continental unit classes...  Anyways here goes.

Here is my fudged, totally unofficial OOB for The Battle of Hubbardton for the Live Free or Die rules:

Combined British Force

  • Combined Grenadier Battalion (Acland) 1st Class, 5 Stands (remainder 25 troops)
  • Combined Light Battalion (Earl of Balcarres) 1st Class, skirmish optional, 6 Stands (remainder 35 troops)
  • 24th Foot 2nd Class, 4 stands (140 men from the unit and the 60 from the remainder pool above)
  • Loyalist Scout Detachment  (?) 3rd Class, 2 stands
  • Hessian Forces Detachment (Baron Von Riedesel) 2nd Class, 3 stands (totally fudged this for unit composition)
  • Hessian Reinforcements 2nd Class 8 stands
  • BG Simon Fraser 4 Command Points, 3 Stars
  • Major John D. Acland, 2 Stars
American Force
  • Skirmish Line from Rear Guard, 2nd Class, 3 stands (skirmishers)
  • 2nd New Hampshire (Hale) 3rd Class, 5 stands (26 remainder)
  • 11th Massachusetts (Francis) 2nd Class, 7 stands
  • Green Mountain Boys & Warner's Continentals (Warner) 3rd Class, 5 Stands
  • Colonel Seth Warner, 3 Command Points, 2 Stars
  • Colonel Ebenezer Francis, 2 Stars
There were a host of other colorful leaders present (Earl of Balcarres, John Stark of the French and Indian War , Bunker Hill, and Bennington fame, and Baron Von Riedesel who outranked Fraser and was younger than him by at least 10 years) in this scenario and while I'd love to include all of them, this is not technically a skirmish set of rules so I wont.  Since Francis died at the battle (and is buried on the battlefield) I'm including him on the field.

Now that we have a playable OOB for the battle, there are 2 other major ingredients we will need next.  The first are the scenario's "coordinating instructions" IE what are the victory conditions, when do the reinforcements show up?  What are the starting positions?  How many turns should the battle last?  Once we've answered those questions, the third question, the battlefield, should be an obvious next task to finish.  After we get those things done, I dare say we will have ourselves a proper battle!

For those of you who stuck with me to the end of this post here is a sneak peek at the scenario "product" I'll be putting together.  This is the "officially unofficial OOB" for my Hubbardton LFoD scenario (and my apologies to Colonel Ebenezer Stevens, whose painting I used to represent the likeness of Colonel Francis).  The rest are all accurate likeness of BG Fraser, MAJ Acland, and COL Warner.  Google told me so!


Now in the "scenario coordinating instructions" component, we'll need to figure out just where and how all of these various units were used.  That means that the positively huge Hessian "main body" may not actually make it into the fighting, same with the Loyalist Scouts!  We'll also need to get clever as to how we assign victory conditions here.  Clearly the British have an edge (as they almost always do in the AWI) but Warner's job is to slow them down, not stop them! 

Lots more fun coming up in the next installment of Developing a Hubbardton Scenario for "Live Free or Die" - Scenario Coordinating Instructions.  I hope you're having as much fun reading this as I'm having putting it all together.  

Stay tuned!