This year's "Christmas Offensive" was the Battle of Princeton, another of my favorite AWI battles, and full of all of the drama and excitement you'd expect of "the ten crucial days" of the American Revolution. For the Christmas Offensive in past years, we've played the Battle of the Bulge, Germantown, Aspern Essling, the Arab Israeli Wars, the and the Eastern Front but this year we'd go back to the AWI! I was able to game this battle while ago and have just been able to finally blog about it so here we go! It's apt that the first blog post of the year covers a battle actually fought in January! Rules in use were the LittleWars TV "Live Free or Die" AWI rules (my favorite so far for AWI fighting).
 |
| We all love a good snow battle! Parts of LTC Mawhood's BDE at one of the British exit points and the bridge over the Stony Creek, astride the Trenton/Princeton Road |
Ken commanded the British as LTC Mawhood and Alex commanded the Americans as General Washington with me commanding the left wing as General Mercer. Despite my best efforts to get General Mercer killed as in the real battle, he stymied every attempt!
 |
| Cadwalader's BDE - the Philadelphia Associators, Philadelphia and Delaware Militia emerging from the woodline along a logging trail |
 |
| His Excellency - General Washington! |
 |
| Arguably one of the best American units on the table- the Marylanders with General Mercer deployed to challenge the British in front of the Clark Farm and Quaker Meeting House - I feel cold just looking at this table! |
The game was played and finished over 2 consecutive sessions and that was with much chatting and snacking, as well as a toast to General Washington (with Madeira naturally).
 |
| Alex sends me an artillery battery - our first question for the game - we are assuming Brigades are color coded by-label and must remain together. Or put another way, can you use an order with units from different brigades - IE they have different-colored labels. Since Alex, overall American commander "assigned" the artillery to my side, we allowed this and the artillery remained with me for the battle. |
 |
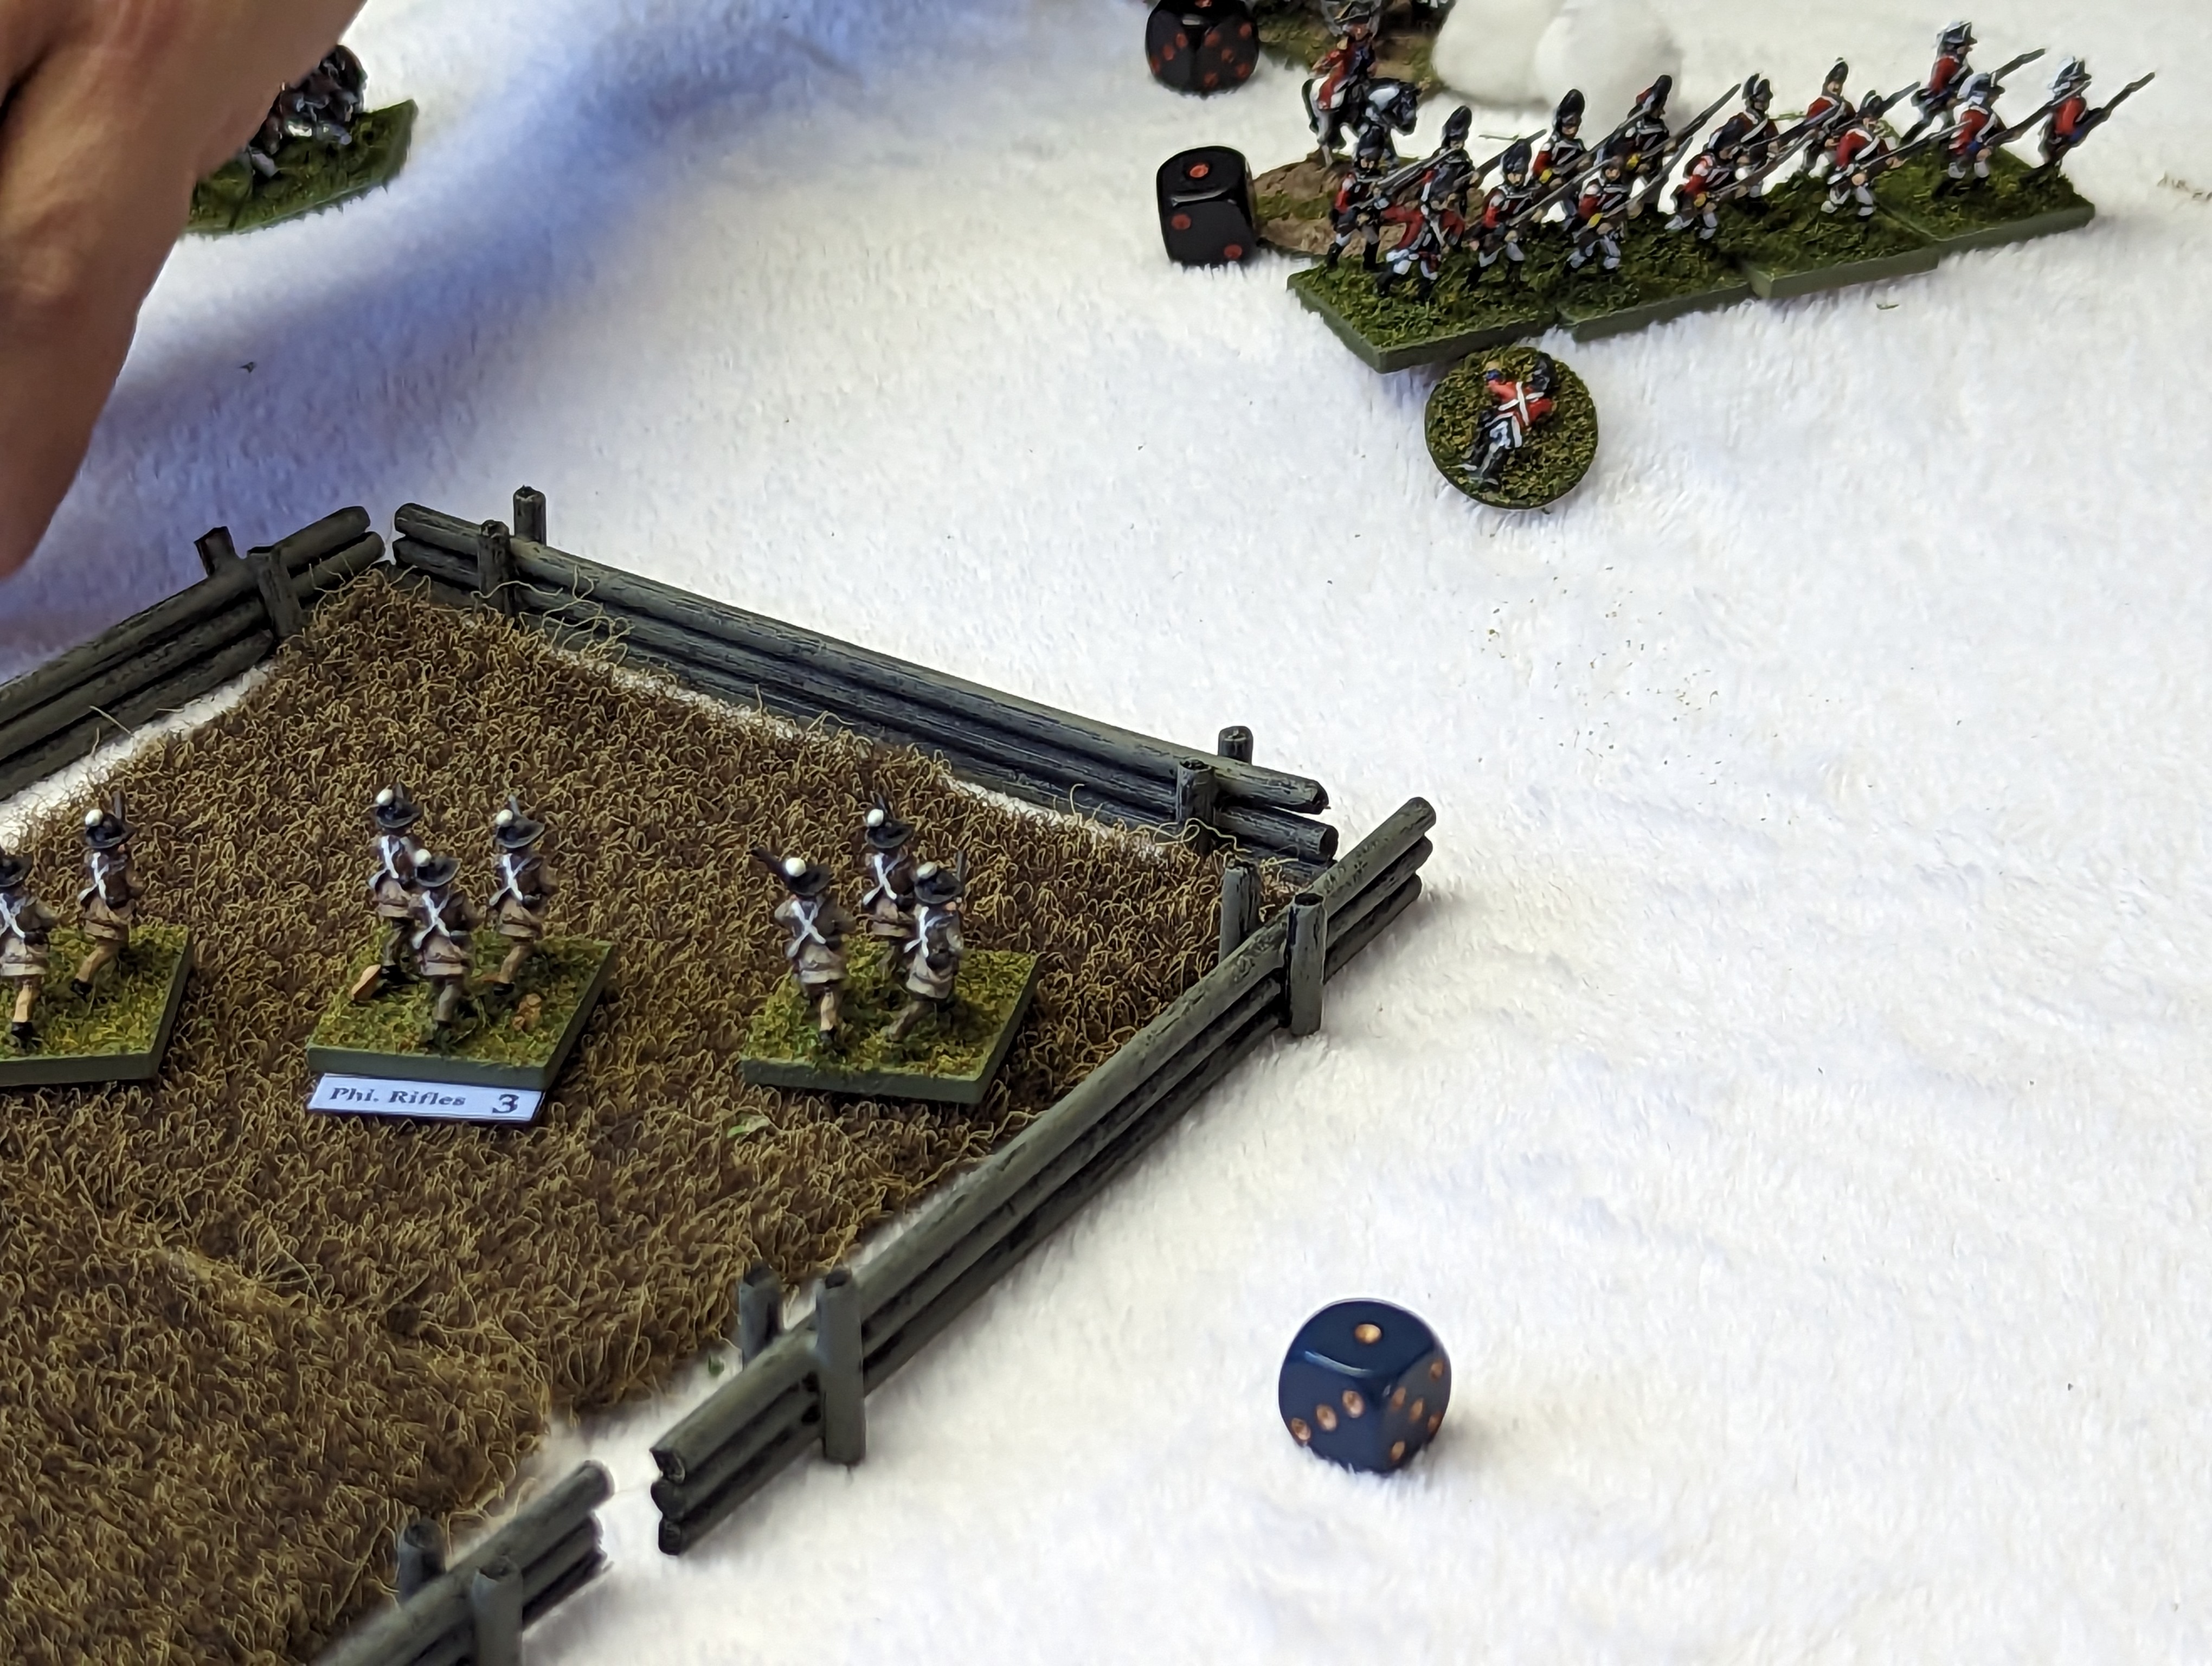
| Philadelphia Brigade creeps closer to the British hill. Note the rifle-armed skirmishers in the center at the Clark Farm, skirmishing with the British line. |
 |
| Combined Grenadiers and Lights. |
 |
| Ken decided to push these upstart riflemen out of the farm, only to roll a snake-eyes for his charge movement! (they'd only move 2") The fence stopped the men cold and they suffered as a result! Mawhood pulls them back. |
 |
| Mawhood directing the Grenadiers and Lights with the Royal Artillery behind him |
The generals are feeling out the rules and have had, so far, generally conservative movements. The scenario is not kind to the British, who must score more casualties than they receive, and maintain a road exit. Ken early-on abandons the road to Princeton, instead favoring the stronger position on the road to Trenton near Stony Creek.
 |
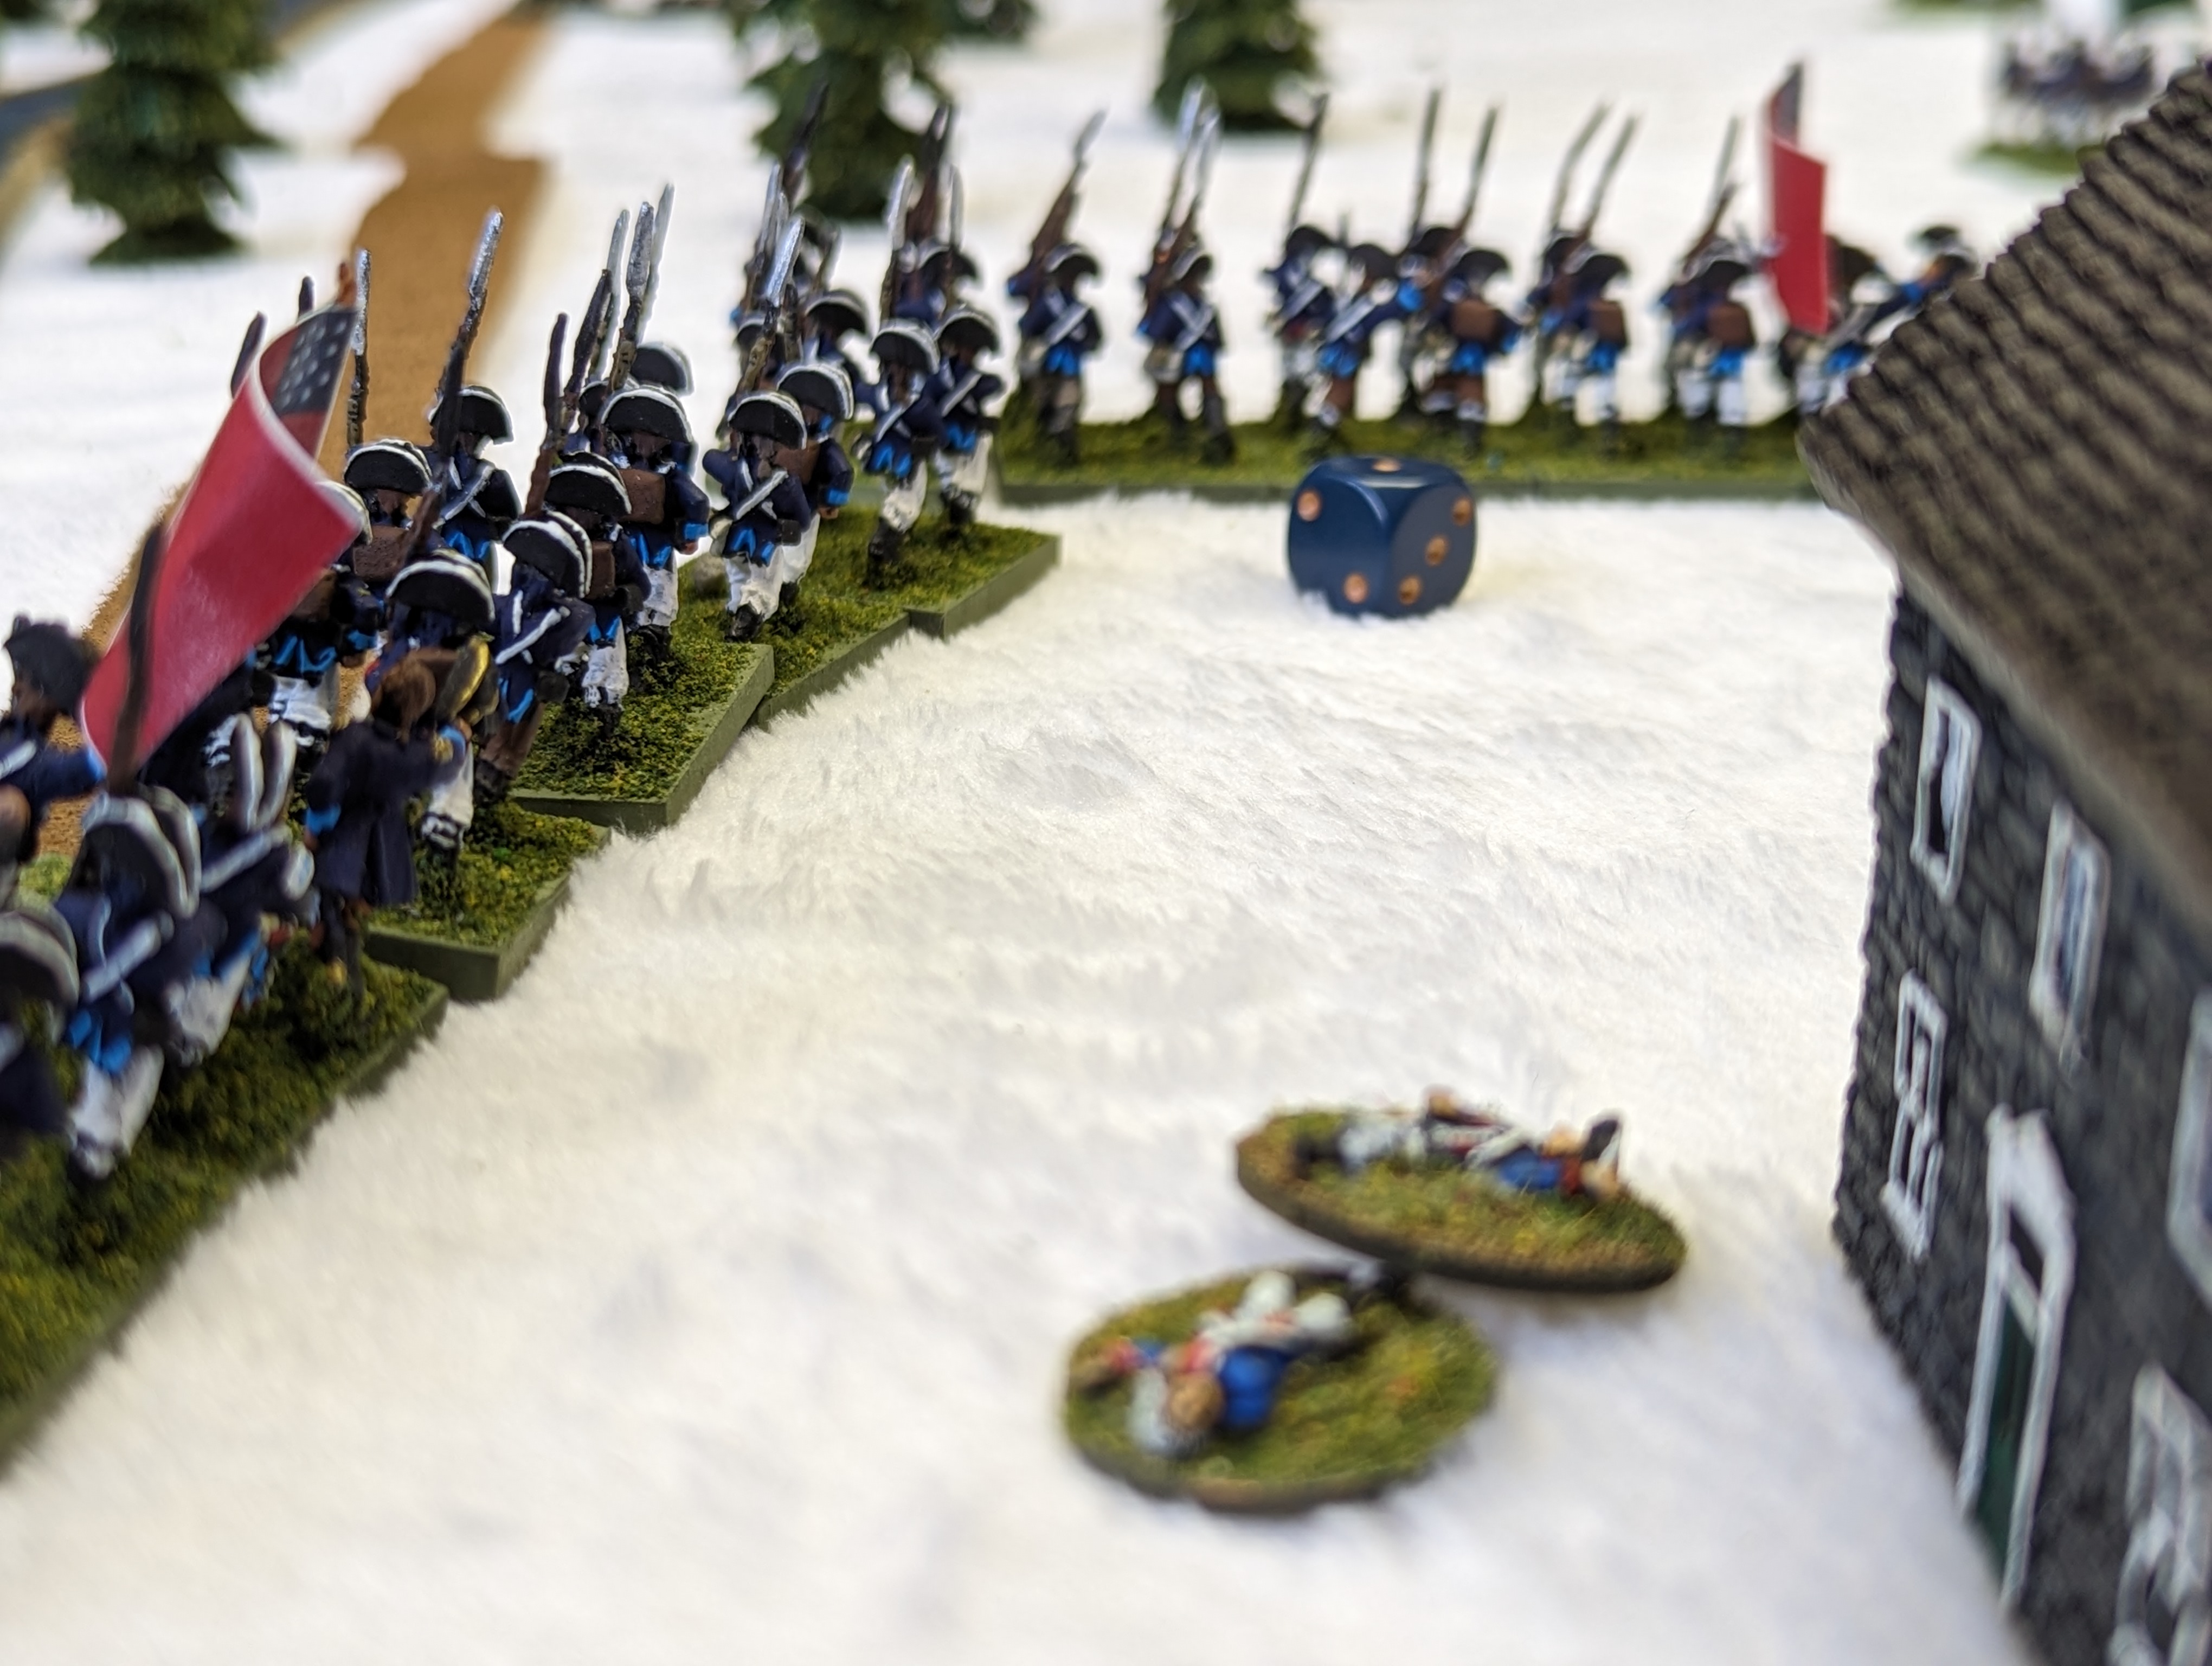
| Turn 5 sees the arrival of more troops, this time Pennsylvanians disguised as Virginian Continentals from 1779! These are the Pennsylvania "Dutch" (that's for you, Grenzer John) and more Pennsylvania Continentals |
 |
| Mercer advances with the Marylanders to contest the left! |
I made a bad decision on the left and instead of practical movement with the Pennsylvanians who have just arrived, I opt for speed and send the PA men forward in column, instead of changing to line (and as a result losing an entire turn of movement). It's a fool's errand because Ken/Mawhood has cavalry nearby and the British Dragoons charge the troops in Column! Another question we had - is there a melee penalty for troops being charged when they are in column?
 |
| Meanwhile a firefight breaks out in the center. One cotton ball is indicative of hasty fire, and these troops can then move. 2 would mean "volley" fire and thus no movement. The casualties are Demoralization Markers. |
 |
| Ken charges along the road against the Pennsylvanians into what will go down in history as one of the most infamous wargaming charges ever to occur on the wargaming table.... |
 |
| The Rifles and the Marylanders maneuver to force more casualties on the British |
 |
| And it seems to be working! |
 |
| the Dragoons plow into the front of the column! Since there was no guidance on melee'ing a column that I could find, we used the skirmisher -3D6 penalty. That seemed fair. The Pennsylvania "Dutch" are left with 1D6 for their troubles...The British will fight with 9D6. |
 |
| General Washington moving the Philadelphia Brigade up to block the Princeton exit and secure the hill! |
 |
| The Dragoons suffer a single DMZ from the closing hasty fire but that's not the most exciting part of this story... |
 |
| Ken rolled 9 dice and did not hit the Pennsylvanians in column! No hits! The PA Germans rolled a dice on their single hit and won the melee! They win some DMZs for their trouble but stood their ground in column! "Eh Amos, Vat iz daht gerausch up zere?" |
 |
| The Dragoons fall back 12" and the column suffers its DMZs. |
This was really a turning point in the battle. The British began to fall back slowly to consolidate their line as the Philadelphia Brigade tightens the noose around the hill. Ken and Alex are facing off line for line now, which is risky for the Americans. A unit General Washington is attached to takes a hit, but the General is Ok!
 |
| Mercer's Brigade advances across the line to push the British back slowly. Combined firing will take a toll on the 17th Foot, who they've been challenging all morning so far. Mawhood has been charmed throughout this battle. |
 |
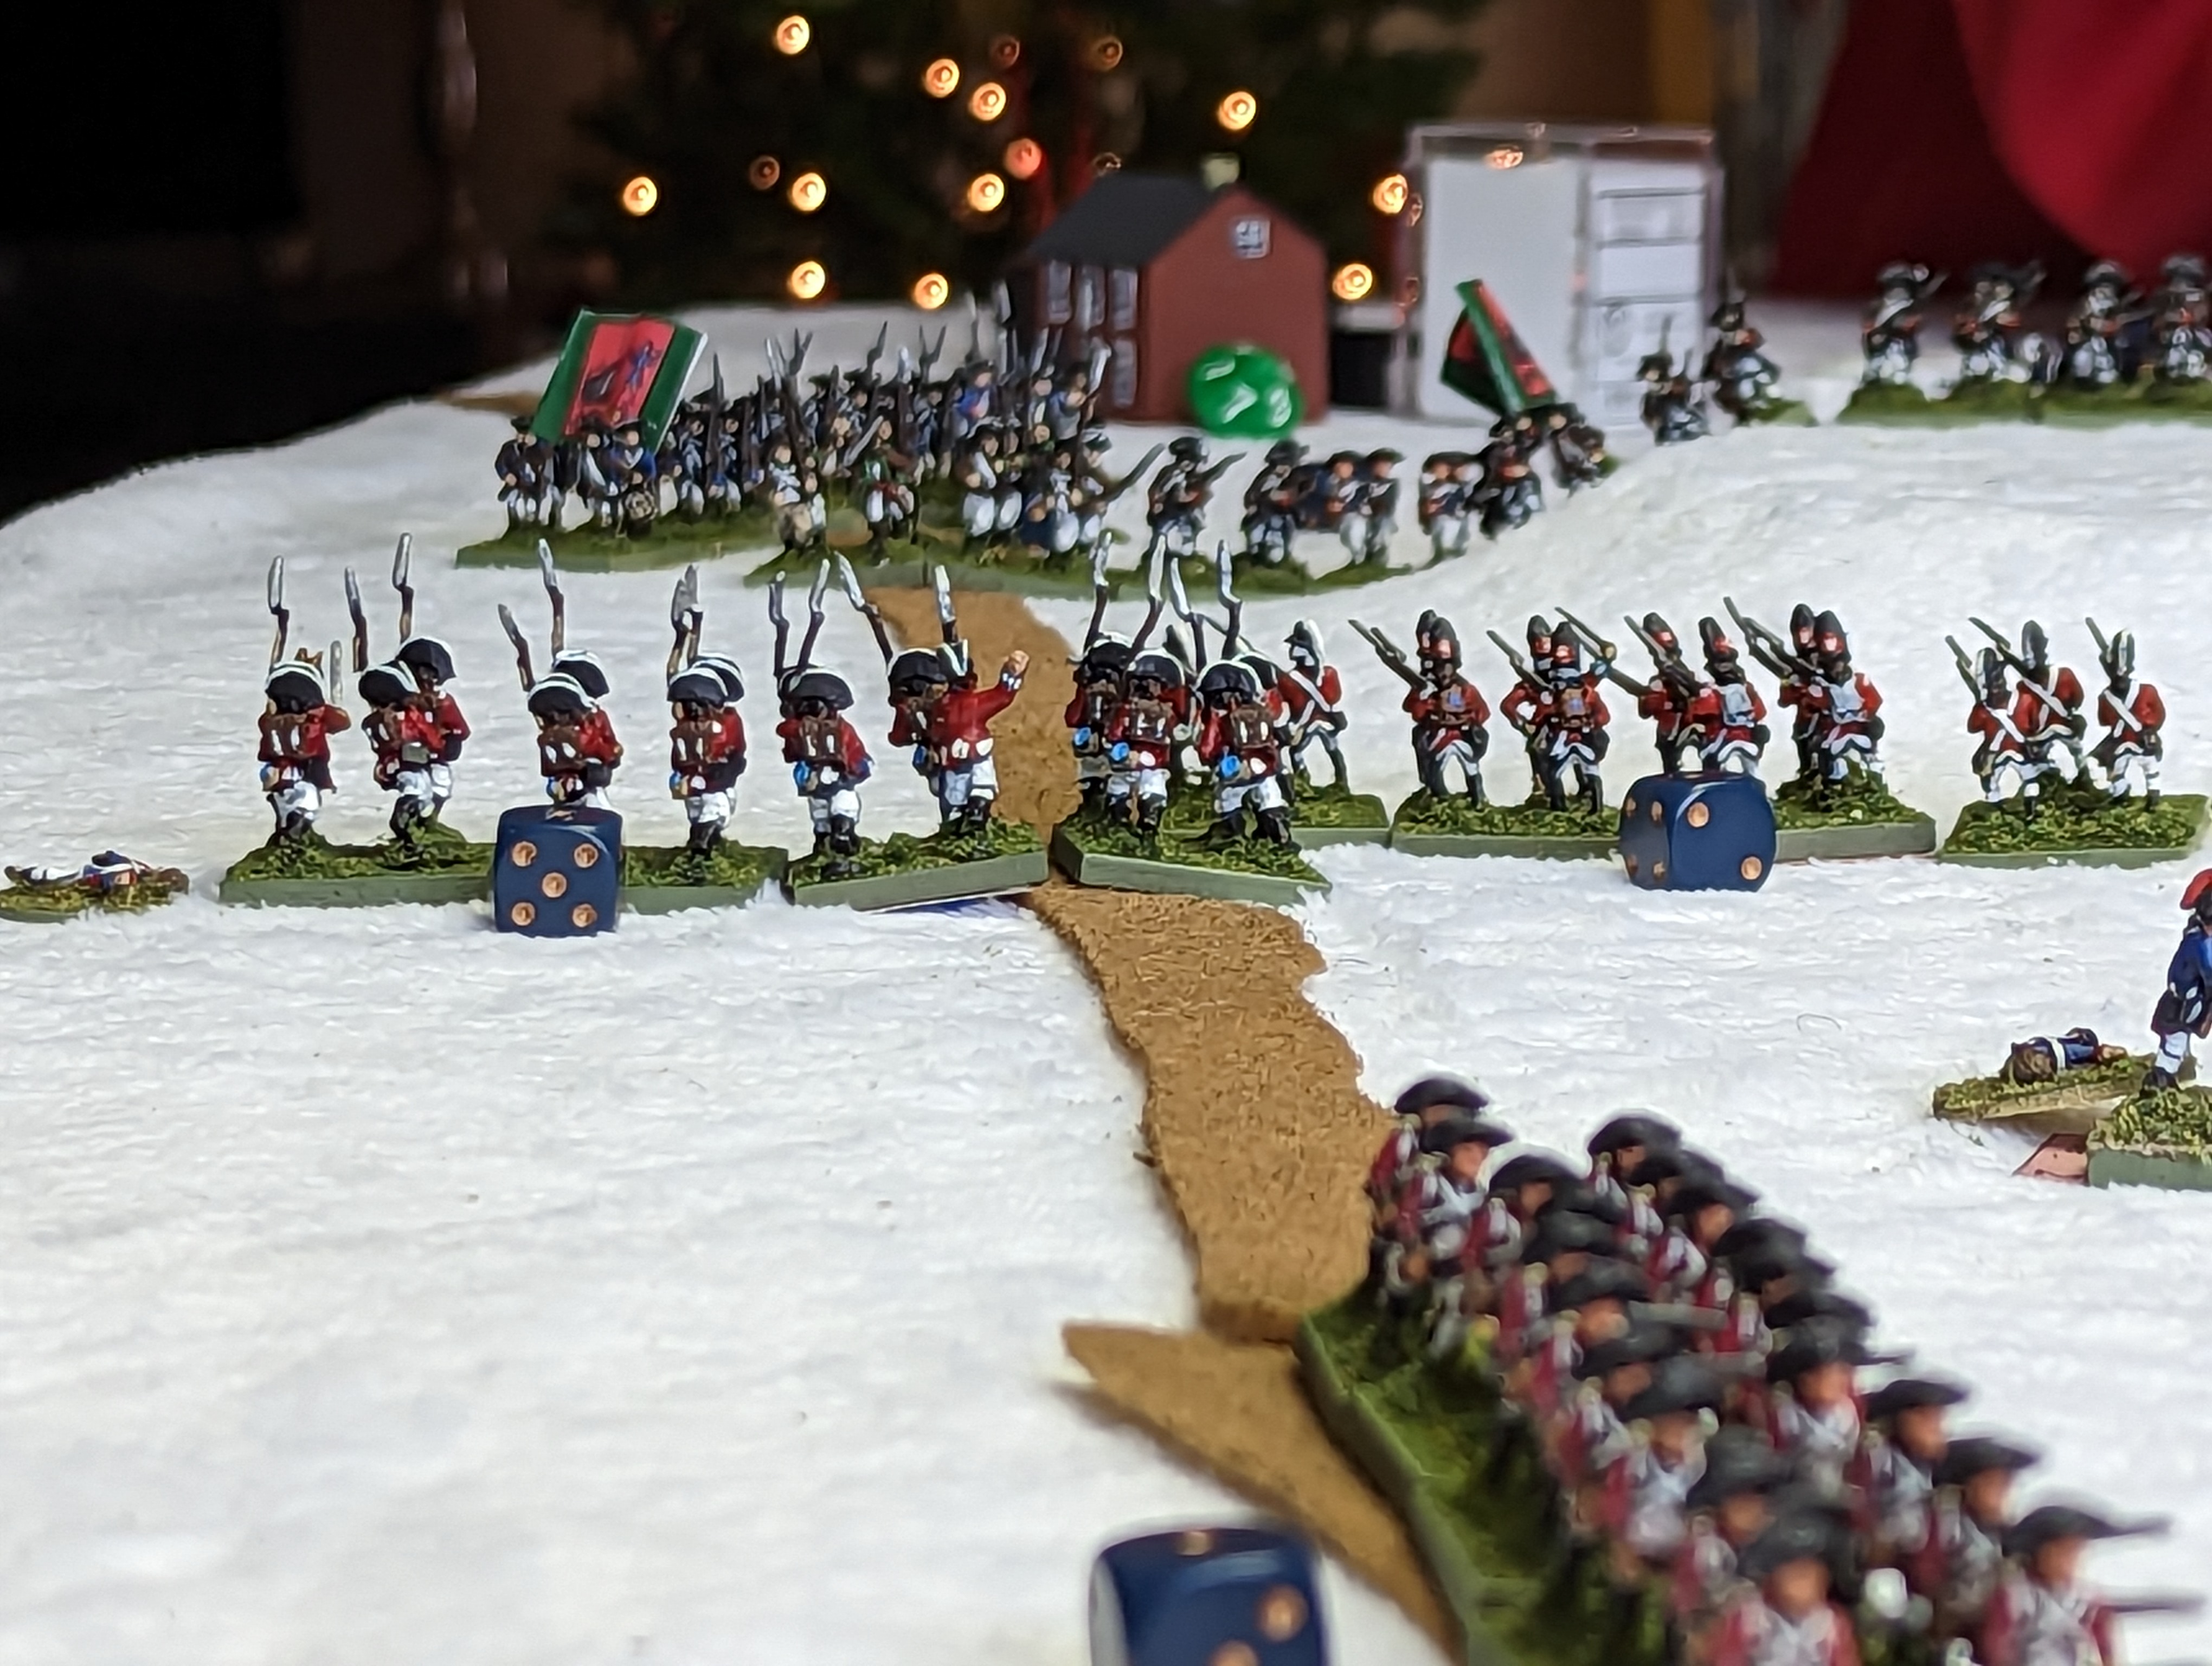
| Alex has moved all of his flanking troops and the Philadelphians up to the hill to contest, along with the New England Continentals. A nasty, stand up fight will develop here. |
 |
| note the Christmas Tree in the background! |
During the firefight on the British right flank, Mawhood is hit! Luckily for him, he rolls a light wound and loses 1 single star on or about Turn 8.
Final ThoughtsAt the end of Turn 10, we counted casualties and the Americans won the battle 5 to 4 stands. The British held the Trenton Road exit and were only 1 stand behind. One more and they would have tied up the game. I broke out a bottle of Madeira and we toasted to a year of great gaming, the Continental Army, and General Washington! I've never finished a wargame with a toast but that was fun! So what did we learn?
The sequence of play in LFOD is tidy and the game play is smooth as well. You're constantly focused on where you need to make key decisions. Assaults are bloody, and costly both in terms of leader attention and also stands. Expect to take casualties even if you win in a melee.
Princeton gives a unique challenge. As the British player, you have a small cadre of tough units. As the Americans, you have a big, motley assortment of some shoeless units with varying degrees of quality ranging from 2 (regulars) to 4 (rabble in arms - militia). The victory conditions for the British are tough - you must inflict better than you get. I feel as if the British need to create a hornet's nest for the Americans and strike at the weakest units as they close in. That's much easier said than done, of course but your quality is such that you'll likely push units back in melee (unless you roll 9D6 and dont score any hits) The Americans need to be aggressive, but not so aggressive that they rush in and take horrendous casualties from messing with the wrong regiment!
So all in all, LFOD scores high with this gamer and I'll play it again. In fact they're probably now my favorite AWI rules and I will happily play them again. Having already played my Hubbardton Scenario and now having run through Princeton once or twice, I'm ready for a bigger challenge like 1st Saratoga or even Germantown. In fact the only complaint from the team were they'd perhaps change their approach after understanding the rules a bit better but on the whole I think Ken and Alex enjoyed the game and that was my primary objective here! So that's a big mission accomplished in my book.


Wonderful looking and closely fought game. I like the idea of toasts at a game’s end.
ReplyDeleteThank you, Peter! I don't know why we've never thought about it or done it before but for special occasions, IE a holiday themed game it was a nice touch.
DeleteThat is a great looking game and a close one too, which is always good to see. LFOD are a good set of rules, but the only downside from my perspective is the sheer number of bases required for units, which is rather off putting to be honest. However I'm sure some fudging could overcome this issue. Then of course the scenarios are worth the prices of the rules alone.
ReplyDeleteThanks Steve yes it was close. Our commanding generals really got "dangerous" with the rules about half way through the game so things got much more lively on or about turn 5.
DeleteThat's a great point, it took me many years just to amass the requisite number of bases for Princeton, which is their "introductory" scenario!
You could, technically, use individually based figures for this and do it really cheap I suppose, but don't know if it's worth the trouble. I've seen guys buy 1/72 figs, spray paint them and base them on small squares for this game but again, is it worth the trouble?
Great looking game Steve. Happy new year
ReplyDeleteThanks Ski!
DeleteWooHoo - fantastic game Steve.
ReplyDeleteI could really sense the tension in your writeup.
A good set of rules, most certainly.
Also - can you give me Ken's address, and I will send him some new d6?
Alternatively, when the dice let me down, I line them up in front of all the other dice outside, and use the dice hammer on the offenders - just to teach them a lesson...it hasn't worked yet, but always makes me feel better.
Thanks, Darren. Yes it was a fun game esp towards the finale. How about Mawhood that tough SOB...
DeleteI have 2 sets of cursed dice that are NOTORIOUSLY bad. The "gaudy" French dice I used to use for Naps, and a set of black dice with red pips that I thought "looked cool". If I didn't think I'd somehow run into them again one day at a convention, I'd give them away but im going to find a out of molten steel to throw them in.
well said Darren - I always think that if they break permanently you were going to have to replace them anyway...
DeleteSteve, lovely looking game, thanks for all of the photos and commentary. I think the way you handled the charge v march column is the best way to go within the rules - though surprising that they don’t have a formation rule that discourages march column when in the vicinity of enemy troops. The advanced rules have a morale check for charging and I suppose if you used that, you could say that morale checks are not taken when charging march column. Anyway, another successful Christmas ‘big game’.
ReplyDeleteThank you Norm. We figured it made sense to severely penalize those troops in column being charged by the dragoons. I think it's one of those classic cases of trying to keep overhead down and relying on us gamers to just know.
DeleteIf I could get a chance to say something, I'd let the authors know 1 extra page (total 5 pages of rules) would still be an impressive feat :)
I think that is true of every set of ‘fast play’ rules that I have come across.
ReplyDeleteAbsolutely. The best of intentions but it leaves us hanging!
DeleteSuper cool Steve! The troops and table looked fantastic, and what an entertaining fight! Like you, I try to get all my officers killed in games, but for different reasons ;) Pretty wild to have the Pennsylvanians see off the British dragoons, but that's why we roll the dice! Those crazy, anomalous results are actually what make the games so memorable. And loved the British Colonel pointing at the dice, 'just a flesh wound' ;)
ReplyDeleteV/R,
Jack
Jack! Good to hear from you! (LoL about the officer comment "yep ..they got 2 lieutenants and a captain")
DeleteYeah that was a really fun game we'll be playing more.
Also dust off your Cold War gear! Once I get this convention game in the rear view mirror we'll kick off the Fulda / V Corps firestorm campaign!
A great a great looking and reading game but as you say, the abject failure on the part of the Donkey Wallopers was the critical point, if they had won that melee, they potentially could have taken out two American units, reversing the final total of units destroyed!
ReplyDeleteThank you sir yes it was a dramatic turn of events we all expected the dragoons to knife through the column!
DeleteKen and I both felt this was an exciting scenario design - on the one hand, the British need to keep an exit open; on the other hand, they need to inflict more losses than they receive. They could try to just knock off a couple stands or trash one unit, but once they pull back and the Americans get stronger they may get even since they shoot the same and have larger units. While the Americans have a much larger force, the battle's flow will be determined by the British, making for an interesting challenge. To Washington, the US Army, and to many games in 2023! Alex
ReplyDeleteThanks for dropping by, Alex. That was a very fun and memorable game and I'm looking forward to many more in 2023!
DeleteGreat looking game and a fine narrative, Steve!
ReplyDelete